For most bird photographers starting out today, the best camera setup is a modern mirrorless body with subject-detection autofocus, a 150-600mm or 100-500mm zoom, and three core settings locked in: continuous AF (AF-C or AI Servo), shutter speed at 1/2000s or faster, and Auto ISO capped around 6400. That combination will get you sharp, well-exposed bird shots in most conditions before you even start tweaking anything else.
Best Camera Setup for Bird Photography: Field Guide

Marcus Chen
17 May 2026
I spent a long time overthinking gear before I realized the camera type matters less than the AF system and focal length reach. The good news is that in 2026, even mid-range mirrorless bodies from Canon, Nikon, and Sony have bird-detection AF that genuinely works. Here's how to build your setup, dial it in, and actually use it in the field.
Pick the right camera type for birds
The three realistic options are DSLR, mirrorless, and superzoom/bridge cameras. Each suits a different budget and commitment level, and picking wrong wastes money fast.
| Camera Type | Pros for Birds | Cons for Birds | Best For |
|---|---|---|---|
| Mirrorless (APS-C or full-frame) | Best subject-detection AF, fast burst rates, excellent tracking, compact with adapter support | Higher cost, shorter battery life than DSLR | Serious beginners and intermediate shooters who want the best results |
| DSLR | Proven AF, long battery life, wide lens ecosystem, lower cost used | Older tracking tech, optical viewfinder lag, phased out by manufacturers | Budget-conscious buyers who already own compatible lenses |
| Superzoom / Bridge | All-in-one, affordable, built-in long reach (up to 1200mm equivalent), lightweight | Smaller sensor means more noise, slower AF, less subject-detection sophistication | Casual observers who want reach without buying separate lenses |
Mirrorless is the clear choice for 2026. Canon's EOS R-series, Nikon's Z-series, Sony's Alpha bodies, and even Micro Four Thirds cameras like the Olympus OM-D E-M1 Mark III all have bird-optimized AF systems that were simply not available on DSLRs. The OM-D E-M1 Mark III is worth a special mention for backyard and perched-bird shooting because its in-body stabilization is rated at 7 EV (CIPA), which means you can handhold at slower shutter speeds without blur from camera shake. For birds in flight, the Canon EOS R5 Mark II and Nikon Z9 are the gold standard, but you do not need to spend flagship money to get great results.
If you are photographing birds around your home or in your backyard, where subjects are often small songbirds at moderate distances, an APS-C mirrorless body with a crop factor of 1.5x or 1.6x gives you an effective reach boost for free. A 400mm lens on an APS-C body behaves like a 600mm on full-frame, which helps a lot when a sparrow is 20 feet away and not coming closer.
Choose the best bird photography lens setup
Focal length is the single biggest limiting factor for beginners. You need reach. A lot of it. For most bird photography situations, 400mm is the practical minimum, and 500-600mm is where results really improve.
The top zoom ranges to consider
- 100-500mm / 100-400mm: Versatile, fast to focus, good for birds that are moderately close. Canon's RF 100-500mm and Nikon's 100-400mm Z both perform excellently.
- 150-600mm / 180-600mm: The go-to range for serious bird work. The Nikon NIKKOR Z 180-600mm f/5.6-6.3 VR has built-in stabilization and focuses as close as 1.3m at 180mm, which is genuinely useful for perched small birds. At 600mm the minimum focus distance is about 2.4m.
- 200-800mm: Canon's RF 200-800mm F6.3-9 IS USM pushes reach to 800mm and focuses as close as 0.8m at 200mm (3.3m at 800mm). The variable maximum aperture of f/9 at the long end means you will need higher ISO in dim light, but the reach is impressive.
- Sigma 150-600mm f/5-6.3 DG DN OS Sports: A strong third-party option for Sony and Leica L mounts, built for wildlife and action with solid weather sealing and fast AF.
- Prime lenses (400mm f/2.8, 500mm f/4, 600mm f/4): Superb quality but very expensive and heavy. Probably not your starting point unless you are already committed.
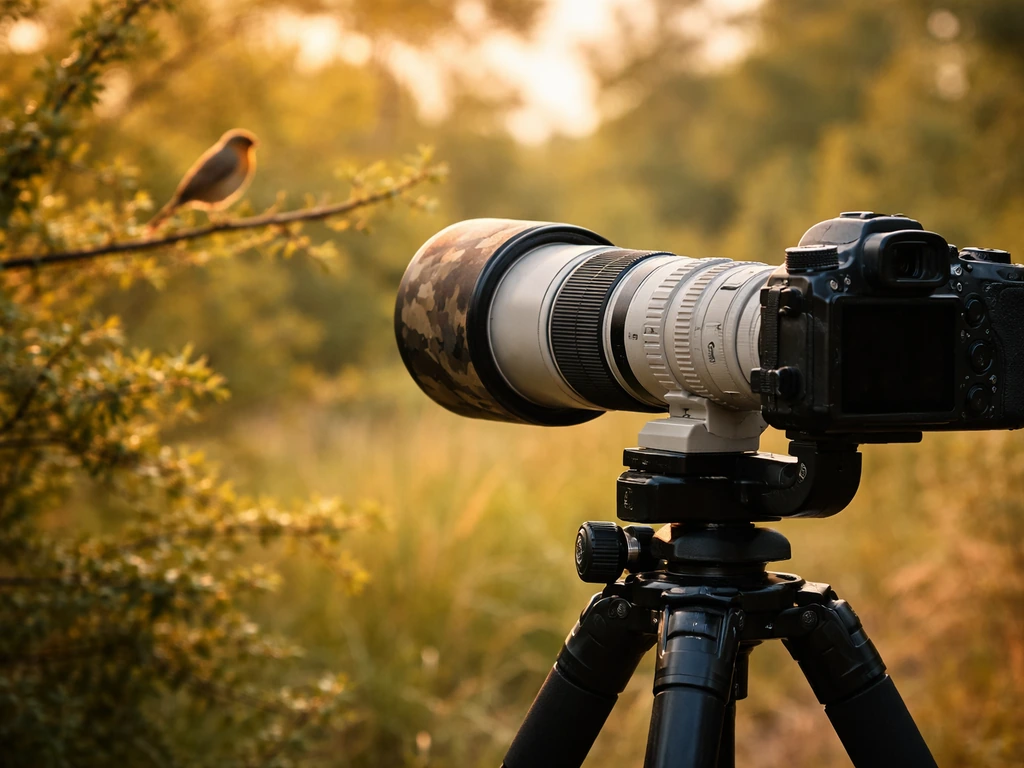
For most backyard and park bird photographers, a 150-600mm zoom hits the sweet spot of reach, close-focus capability, and portability. The wider zoom range also means you do not have to swap lenses when a bird lands closer than expected. One practical note: at the long end of these zooms, you are dealing with a maximum aperture of f/6.3 or slower, so you will be leaning on Auto ISO more often than you might expect.
Stabilization inside the lens matters a lot when you are handholding a 600mm zoom. Look for lenses with built-in optical stabilization (IS, OS, or VR depending on the brand) and combine it with your camera's in-body stabilization (IBIS) when available. The Canon RF 100-300mm f/2.8L IS USM, for instance, carries a 5.5-stop CIPA stabilization rating, which is excellent for handheld work on perched birds.
Core camera settings that keep birds sharp
This is the area where most beginners lose the most keepers. Camera menus are overwhelming, but bird photography really only demands that you get five settings right consistently.
Exposure mode
Use Manual mode with Auto ISO, or use Shutter Priority (Tv/S mode) with Auto ISO. Both approaches let you lock in a minimum shutter speed while letting the camera adapt to changing light. Manual with Auto ISO is more flexible because you also control aperture, but Shutter Priority works fine for beginners. Avoid fully automatic modes, they will choose a slow shutter speed in dim light and you will get nothing but blur.
Shutter speed
For perched birds: 1/500s to 1/1000s is usually enough to freeze the body, though faster is better for fidgety species. If you also hunt birds, the “what size shot for bird hunting” question comes down to matching shot size to the bird and distance to help you stay effective. For birds in flight: 1/1000s is the floor, 1/2000s is reliable for medium-sized birds, and 1/2500s or faster gives you a real buffer on fast wingbeats. Nikon NPS recommends 1/3200s for birds in flight as a starting point, and that holds up in practice. For small, fast birds like hummingbirds or swallows, do not be afraid of 1/3200s or even 1/4000s.
Aperture
Use your lens's widest available aperture as a default to let in maximum light and keep shutter speeds fast. If you are shooting a perched bird at close range and want to isolate it from a busy background, open up (lower f-number) as much as possible. If depth of field is an issue with a group of birds or a bird in a complex pose, stop down one stop. Do not overthink aperture, for most birding situations, wide open or one stop down is the right answer.
ISO and Auto ISO limits
Enable Auto ISO and set a maximum sensitivity cap. For most modern mirrorless bodies, ISO 6400 is a reasonable cap for daylight and overcast conditions. Nikon NPS recommends a maximum sensitivity of ISO 2000 for birds in flight in good light, that is conservative, but it produces the cleanest images. In dawn, dusk, or shade, bump the cap to ISO 6400 or even 12800 on bodies you know handle high ISO well. A sharp, slightly noisy image beats a clean, blurry one every time. Shoot RAW or RAW+JPEG so you can recover detail in post, Nikon NPS explicitly recommends RAW for birds in flight for this reason.
Drive mode and metering
Use your fastest burst mode for flight and active birds, most modern mirrorless cameras shoot 20-30 frames per second electronically. For perched birds, 8-12fps is plenty. For metering, evaluative or matrix metering handles most situations well. Switch to spot metering only when you are dealing with a very bright or very dark background that is fooling the camera, a white egret against dark water or a dark bird against bright sky are classic examples.
Autofocus, tracking, and focus-area setup
This is where modern mirrorless cameras genuinely changed bird photography. Subject-detection AF is not a gimmick, it works, and setting it up correctly is the single biggest performance upgrade you can make without buying new gear.
Single AF vs continuous AF
Use continuous AF (called AF-C on Nikon/Sony or AI Servo on Canon) for essentially all bird photography. Single AF (AF-S or One Shot) locks focus and stops, it is fine for still subjects but the moment a bird shifts, moves its head, or takes flight, you miss the shot. Continuous AF keeps recalculating focus as long as you hold the AF button. Get comfortable with back-button AF focus, where focus is controlled by a button on the back of the camera rather than the shutter half-press. It gives you more deliberate control and is how most bird photographers operate.
Subject detection: bird/animal mode
Turn on bird or animal subject detection on your camera. On the Canon EOS R5 Mark II, set Subject to Detect to Animals and enable Whole Area Tracking Servo AF. The camera will find the bird in the frame, prioritize the eye or face, and track it. On the Nikon Z9, Birds is available as a dedicated AF subject detection option, when a bird is detected, the focus point appears over the bird's face automatically. Sony's Eye AF for animals works similarly, though Sony's own documentation notes that not all birds or species will have reliable eye detection, so expect occasional fallback to body tracking.
Focus area selection
Wide or whole-area AF zones work best when subject detection is active, let the camera's AI find the bird. If you are struggling with focus locking onto the wrong subject (a branch in front of a perched bird, for example), Canon explicitly recommends disabling whole-area tracking and switching to 1-point AF as a fallback. In that mode, you place the focus point directly on the bird yourself. It is slower but more deliberate and works well for patient perched-bird photography.
Tracking behavior for birds in flight
For flight shooting on Canon bodies, use AI Servo with a tracking case setting that prioritizes continuing to track a subject even when obstacles cross the frame. Case 2 (continue tracking, ignore obstacles) is a popular starting point because birds often fly behind branches or other objects briefly. On Nikon, Birds detection combined with 3D tracking handles this well. The key principle across all systems is to keep the subject in the AF zone, keep the button held, and trust the tracking, do not release and reacquire mid-flight if you can avoid it.
Stabilization, support, and field accessories
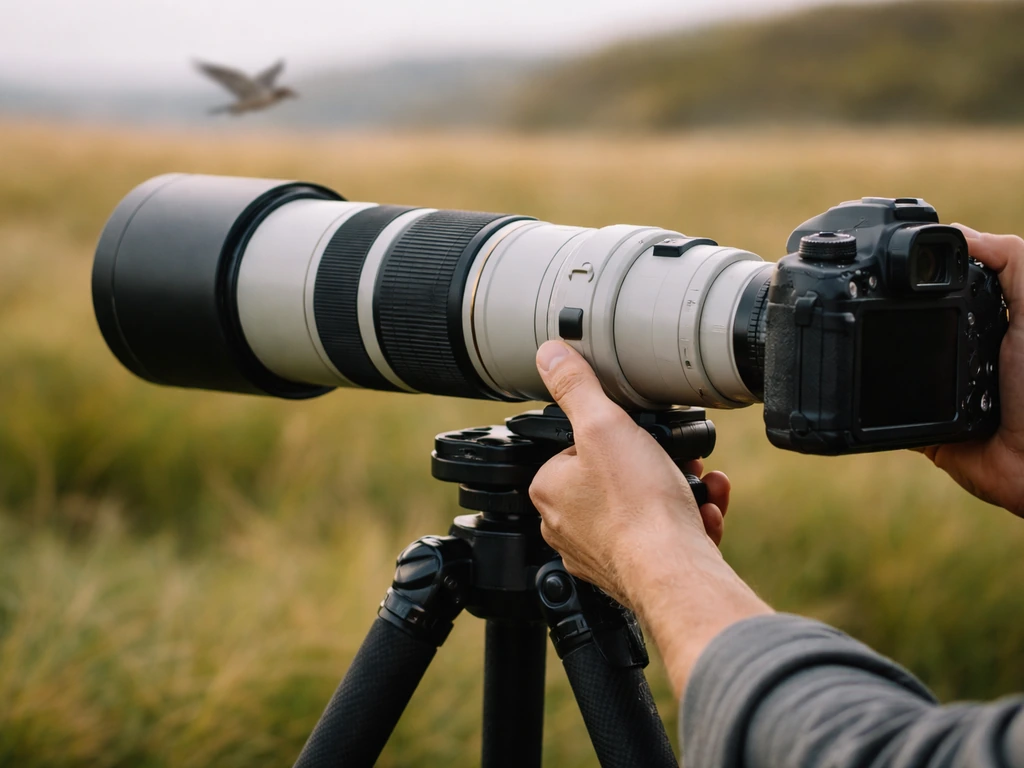
The classic debate for bird photographers is monopod vs tripod, and the honest answer is that it depends on how you shoot. For flight photography and active tracking, a gimbal head on a tripod or a gimbal alone is the most effective support system you can use.
Gimbal heads
A gimbal head balances your lens and camera so they feel nearly weightless during panning. Digital Camera World also describes gimbal heads as balancing the lens or camera so it stays effectively blank" rel="noopener noreferrer">“weightless” during panning, a setup commonly used by bird photographers. You can swing smoothly to track a bird in flight without fighting the weight of a 500mm or 600mm lens. This is a major advantage over a standard ball head, which tends to drift or resist panning. If you are shooting from a fixed position, a hide, a backyard blind, a deck, a gimbal head on a sturdy tripod is the best setup for long-lens bird work. A good best bird pole setup can also help you stay steady for longer lenses when you are panning.
Monopods and tripods
Monopods offer a good middle ground when you need to move around. They reduce arm fatigue significantly when handholding a heavy 600mm zoom for extended periods and add just enough stability to lower your minimum shutter speed by a stop or two. Tripods are slower to reposition but offer more stability for static setups. For backyard bird photography where you are set up in one spot, a tripod with a gimbal head wins. For hiking trails or field work, a monopod or freehand with good IBIS is more practical. The monopod vs tripod decision is worth thinking through based on where you photograph most.
Memory, batteries, and other field essentials
- Carry at least two fully charged batteries. Mirrorless cameras burn through batteries faster than DSLRs, especially in cold weather or with EVF use.
- Use fast memory cards rated for your camera's burst buffer — UHS-II SD cards or CFexpress where required. Cheap slow cards cause write-buffer lockup mid-burst.
- A lens-to-shoulder harness or peak design strap lets you carry a heavy telephoto comfortably while hiking to shooting spots.
- A lens hood reduces flare in backlit situations and protects the front element — always keep it on.
- A bean bag can substitute for a tripod when shooting from a car window, which is a surprisingly effective bird blind.
- Bring a rain sleeve or weather cover for the lens. Weather sealing on camera and lens only goes so far in heavy rain.
Ready-to-use starter presets for common bird scenarios
Most mirrorless cameras let you save custom shooting banks or C1/C2/C3 mode settings. Set these up before you go out and you can flip between scenarios instantly without digging through menus.
Preset 1: Perched birds (general)
| Setting | Value |
|---|---|
| AF Mode | Continuous AF (AF-C / AI Servo) |
| Subject Detection | Birds / Animals, whole-area tracking |
| Shutter Speed | 1/800s (minimum) |
| Aperture | Wide open (f/5.6 to f/6.3 typical) |
| ISO | Auto, max 3200 in daylight |
| Drive Mode | Single shot or low-speed burst (8fps) |
| Metering | Evaluative / Matrix |
| File Format | RAW or RAW+JPEG |
Preset 2: Birds in flight
| Setting | Value |
|---|---|
| AF Mode | Continuous AF (AF-C / AI Servo) with obstacle-ignoring tracking |
| Subject Detection | Birds / Animals, wide or whole-area zone |
| Shutter Speed | 1/2500s to 1/3200s |
| Aperture | Wide open |
| ISO | Auto, max 6400 |
| Drive Mode | High-speed burst (15-30fps) |
| Metering | Evaluative / Matrix (spot if sky is very bright) |
| File Format | RAW |
Adapting these presets to trickier conditions
- Small, fast birds (warblers, hummingbirds, swallows): Increase shutter speed to 1/3200s-1/4000s. These birds move their wings faster and their bodies shift unpredictably.
- Backlit birds or dark backgrounds: Switch metering to spot and meter off the bird's body. Otherwise the camera exposes for the bright background and the bird goes dark.
- Dawn and dusk: Raise your Auto ISO cap to 6400 or 12800 depending on your body's high-ISO performance. Keep shutter speed at 1/1000s minimum even in low light.
- Birds in dense foliage: Disable whole-area tracking, switch to 1-point AF, and place the focus point on the bird's head manually. The camera cannot reliably distinguish bird from leaves in cluttered scenes.
- Perched birds at very close range: Back off your shutter speed slightly (1/500s is fine for a still bird) and use the exposure headroom to lower ISO and get cleaner files.
Troubleshooting blur, focus misses, and poor exposure
Everyone walks away from a session with blurry or out-of-focus shots sometimes. But if it is happening consistently, one of a handful of things is almost always the culprit.
Blurry wings or body motion blur
This is a shutter speed problem, not an autofocus problem. If the bird's body is sharp but wings are blurred, your shutter speed is borderline, push it to 1/2500s or higher. If the whole bird is blurred as a single smear, your shutter speed is way too slow for the movement. Check that you have not accidentally left the camera in Aperture Priority with a slow shutter speed selected by the camera.
Focus on the background instead of the bird
This usually happens when subject detection loses the bird and defaults to whatever is in the AF zone. Make sure Subject Detection is enabled for birds or animals. If it keeps happening, especially with birds in trees or bushes, switch to 1-point AF and manually position the focus point on the bird. The camera will hold focus more reliably when you are telling it exactly where to look.
Noisy, grainy images
This is your ISO being too high, usually because shutter speed is also too high for the available light. The fix is either to accept more noise (totally valid, a sharp, noisy shot beats a blurry clean one), shoot in better light, use a wider aperture, or lower your minimum shutter speed slightly for the conditions. Shooting RAW lets you apply noise reduction in software much more effectively than in-camera JPEG processing.
Wrong exposure (too bright or too dark)
Dark bird against a bright sky, or light-colored bird against dark foliage, will fool evaluative metering. Use exposure compensation (+1 to +2 stops for a dark bird in bright sky; -1 to -2 for a white bird in shade) or switch to spot metering aimed at the bird. In extreme backlit situations, consider repositioning so the light source is behind you.
Can't keep the bird in the frame during flight
This is a technique issue, not a settings issue. Use your full zoom range, zooming out slightly gives you more frame to work with when a bird is moving erratically. Practice panning by following the bird before you press the shutter. Start the burst early and keep it going longer than you think necessary. Most keepers come from the middle of a burst, not the first frame.
Photographing birds around your home: distance, ethics, and backyard setup
If you are photographing birds at your backyard feeders or around your garden, a few practical principles make the experience better for you and for the birds. If you are trying to attract water birds for photo opportunities, using a well-chosen top water bird fishing lure can improve your chances. Maintain enough distance that birds are not flushed by your presence, generally 5-10 meters minimum for small songbirds at a feeder, more for ground-foraging birds or nesting pairs. A telephoto zoom in the 150-600mm range handles these distances well from inside a window or a simple blind.
Shooting from inside through a window is surprisingly effective and causes zero disturbance. Position a tripod or a beanbag on a windowsill, pre-focus on where birds land, and use a remote shutter or timer to minimize vibration. Natural window light from the side gives better modeling than direct flat-front light. Avoid using flash on wild birds, it startles them, can disorient them, and almost never looks natural in photos.
The same curiosity that makes someone want to photograph backyard birds is what drives the best pet bird owners, a genuine interest in how birds move, behave, and interact with their environment. Whether you are watching a pet bird inside or a wild one at your feeder, a camera with a good lens teaches you to observe in a way nothing else quite does. Start with whatever setup you can assemble today, go outside, and refine from there.
FAQ
What should I do if bird eye detection keeps losing the bird (branches, reeds, or cluttered backgrounds)?
If your camera has no bird-eye detection (or it frequently hunts), use continuous AF with a smaller zone. A practical fallback is 1-point AF or a limited-area AF box placed on the head and eye area, while keeping the tracking button held so the camera does not repeatedly reacquire in the background.
Can I use slower shutter speeds for perched birds without getting blurred shots?
Yes, for many backyard situations. Use 1/1000s or faster for perched birds, Auto ISO, and rely on wide aperture at the long end if needed. For perched birds that are mostly still, you can often drop below 1/2000s and keep sharpness, as long as the head and eye are staying crisp.
How do I choose a reliable Auto ISO maximum cap for both backyard and in-flight birds?
Turn on RAW or RAW+JPEG, and set Auto ISO so the camera adjusts sensitivity rather than shutter speed. Then review a test series at your most common distance, and set your ISO max to what your camera can handle (for many setups, ISO 6400 daytime is workable, flight often benefits from a lower cap if you have enough light).
Why am I missing focus even when my shutter speed is fast, especially during flight?
Use a short exposure buffer with continuous shooting (burst) and do not rely on the last frame. Start the burst before the action, then keep tracking for a moment after the bird passes your focus point. If you get lots of misses, consider slowing your panning speed slightly and keeping the AF zone from leaving the head area.
Should I use back-button focus for bird photography, or is half-press better?
Do two things: set an AF behavior that prioritizes continued tracking, and keep your AF button setup consistent. Back-button AF helps most people because you can hold focus while you reframe, avoiding the common mistake of releasing and reacquiring mid-flight.
Is higher FPS always better for birds in flight?
In many cases, faster burst rates are less important than enough tracking duration. If your camera allows it, use the highest-performance AF option with a reasonable burst mode, and make sure your shutter type is not forcing slower readout. If you shoot mostly mirrorless electronic modes, watch for rolling shutter artifacts, especially with wingbeats.
How do I handle exposure when metering gets fooled by bird color and background?
Turn on exposure compensation when the bird colors confuse the meter, and then verify with histogram or blown highlights review. For example, dark birds against bright water often need +1 to +2, while white birds in shade typically need negative compensation (about -1 to -2) to protect highlights and keep exposure consistent across bursts.
What do I do when my long-end lens forces ISO too high (slow aperture on 150-600mm)?
If your lens is f/6.3 at the long end, you may hit ISO limits quickly in overcast or shade. The fix is usually one of these: accept slower shutter within your tolerance only for still birds, open up if you can by stepping to a shorter focal length, move closer or reposition for better light, or upgrade to a lens with a wider maximum aperture if it is a frequent problem.
How should I use lens IS and IBIS when panning for birds in flight?
Use optical stabilization for handholding if your lens offers it, and avoid double-stabilization confusion by following your lens and camera guidance. For panning, lens IS modes that are designed for panning are often best, because they stabilize less in the axis you want to move.
When is a monopod the wrong tool for my bird setup?
A monopod is more flexible for changing viewpoints, but the biggest practical advantage is faster repositioning than a tripod. Choose tripod plus gimbal when you will stay in one spot (hide, feeder, shoreline) for long stretches, because it is easier to maintain framing and reduce fatigue while tracking.
What settings should I store in C1/C2/C3 mode for bird photography?
Use your custom modes to match your real shooting scenarios, for example, C1 for perched birds (slower shutter target, smaller AF zone), C2 for in-flight (highest shutter target, subject detection on), and C3 for low-light (higher ISO cap). The key is to include both AF behavior and exposure settings, so the camera does not “almost” match your intent.
My bird bodies are sharp but wings are blurred, what is the first change to make?
If you get sharp bodies but smeared wings, it is almost always shutter speed, not focus. Raise shutter speed toward 1/2500s or faster, and for very fast wingbeats like swallows or hummingbirds, consider pushing to 1/3200s to 1/4000s if your light allows.
What causes a “single smear” blur where the entire bird is unsharp?
If the whole bird is a blur, it usually indicates motion that exceeds your shutter speed or you are not actually maintaining the lens on the subject. Check for accidental mode changes (like Aperture Priority), then tighten your technique by following the bird through the frame and starting the burst early.
What is a good step-by-step fix when focus locks onto the wrong thing in AF area tracking?
If the AF keeps jumping to backgrounds, disable the widest whole-area tracking and switch to a smaller zone as a temporary rescue. Place the point on the head or eye area of the bird, then re-enable subject detection once you are sure the bird is clear of branches.
How can I reduce vibration and missed frames when shooting from a window or blind?
Use a remote shutter or short timer when possible, especially if you are on a tripod and long focal lengths. Also pre-focus on likely landing areas at feeders, so your first frame after the bird appears is not wasted searching for focus.
Is flash ever acceptable for bird photography, especially in the backyard?
Yes, but do it ethically. Use distance first to avoid flushing, and prioritize natural light rather than forcing exposure with flash. If flash is necessary for a controlled pet-bird setup, keep it subtle and focus on consistent exposure, because wild birds can get disoriented and stop behaving normally.