For most first-time bird breeders, the Brinsea Mini Advance or a similar small forced-air incubator with automatic turning is the best place to start. It handles the hardest parts automatically, keeps temperature steady within 0.1°C, and costs under $200. If you're working with a larger clutch or a tighter budget, a mid-range digital cabinet incubator like the GQF 1588 Genesis is the other serious option. The honest answer, though, is that the incubator is only one piece of the puzzle. Bird farming generally focuses on raising and breeding birds, which often includes managing nests, feeding, and egg incubation. Fertility, egg handling, humidity calibration, and species-specific settings matter just as much as the brand name on the lid.
Best Bird Incubator: How to Choose and Use One Right

Marcus Chen
11 May 2026
What 'best bird incubator' actually means for hatching eggs
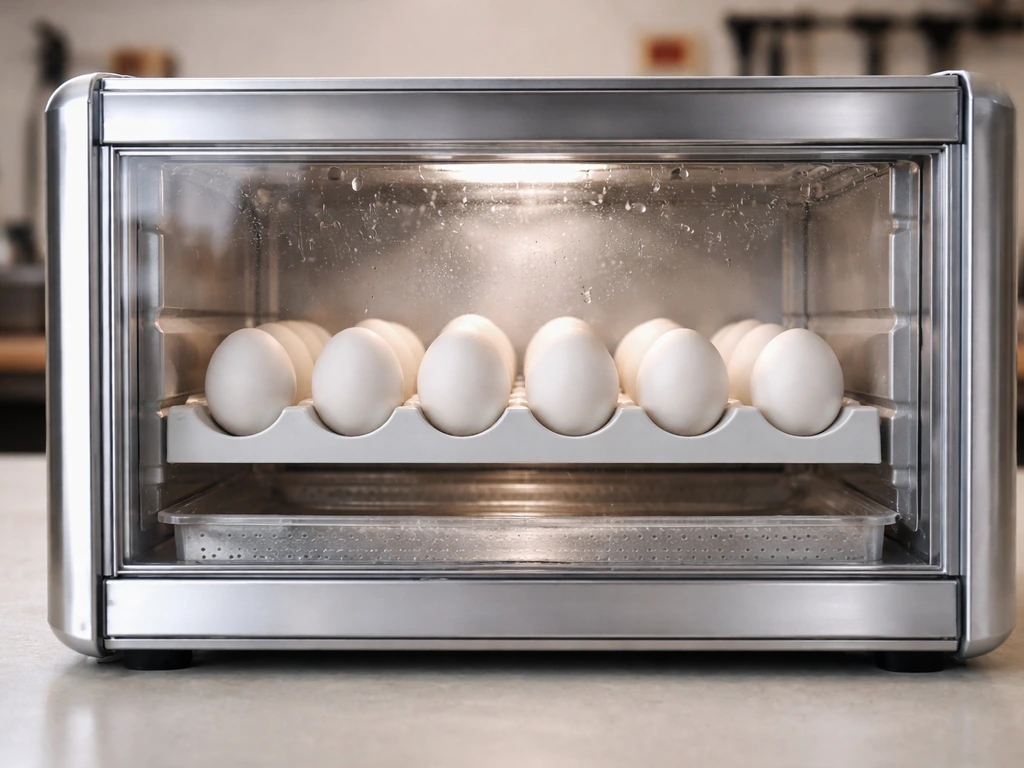
A bird egg incubator is a climate-controlled chamber that replaces what a brooding parent does naturally: holds the egg at a precise temperature, maintains the right moisture level, and rocks or rotates the egg so the embryo develops properly. What makes an incubator 'best' depends heavily on your specific situation. A single parrotlet breeder has completely different needs from someone hatching 50 quail eggs at a time. The same machine that's perfect for chicken eggs may run too hot for delicate finch eggs if the thermostat isn't accurate enough.
It's also worth separating bird egg incubators from reptile incubators. Reptile incubators are designed to run at lower temperatures (often 80-90°F) without egg turning, because reptile eggs are stationary in the nest. Bird eggs need turning and typically incubate in the 99-102°F range depending on species. If you pick up a reptile incubator by mistake, it won't serve you well. Make sure whatever you're buying is explicitly designed or confirmed to work for bird eggs.
Key features that actually separate a good incubator from a frustrating one
Temperature control
This is the non-negotiable. A swing of even 1-2°F from the target can reduce hatch rates dramatically, and a sustained spike above 104°F for more than a few minutes can kill an entire clutch. Look for a digital thermostat, not a dial with vague markings, and check what the manufacturer claims for accuracy and stability. The best units hold temperature within ±0.1°C. Cheaper units may swing ±0.5°C or more, which adds up over a 21-day chicken hatch or a 28-day parrot hatch.
Humidity management
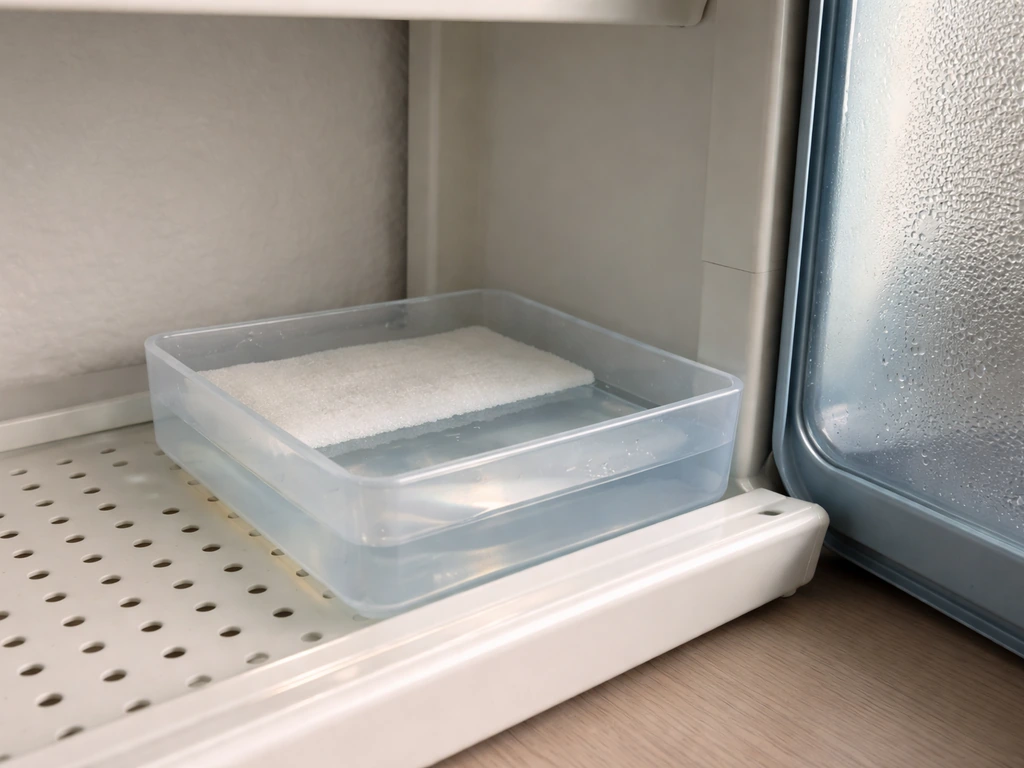
Humidity is where most beginners lose eggs they otherwise would have hatched. The University of Maryland Extension recommends keeping relative humidity around 55-60% through most of the incubation period, then raising it to around 65-70% for the final two to three days (the 'lockdown' period). You control humidity by adjusting the surface area of water inside the incubator, not by adding more water volume. A shallow tray with more surface area raises humidity more effectively than a deep cup with less. Some incubators include built-in humidity sensors and even automatic humidity control, which removes a lot of guesswork.
Egg turning
Eggs need to be turned at least three times a day, and more often is generally better up to around every hour. Manual turning works, but it requires you to be consistent every single day including weekends, and forgetting a session matters. Brinsea also notes that if you do not have automatic turning, you should manually turn chicken eggs about every hour at roughly an 80-degree rotation for proper embryo development Manual turning works, but it requires you to be consistent every single day including weekends, and forgetting a session matters.. Automatic turners rotate eggs on a set schedule and are worth the extra cost for anyone who doesn't want to set phone reminders for the next three weeks. Turning should stop for the final two to three days before the hatch date.
Ventilation
Developing embryos consume oxygen and release carbon dioxide. Without adequate air exchange, CO2 builds up and hatch rates drop. Most quality incubators have adjustable ventilation holes. During incubation, you want some air exchange happening continuously. During lockdown when you're raising humidity, you'll partially close vents, but don't seal them completely. Mississippi State University Extension specifically calls out ventilation as one of the four dominant factors controlling hatch outcomes, alongside temperature, humidity, and turning.
Capacity and egg size compatibility
Capacity is measured in standard chicken-egg equivalents, but smaller bird eggs take up proportionally less space and larger eggs (like duck or goose) may not fit the turning rack at all without an adapter. Check that the turning mechanism or egg tray accommodates your specific egg size. A 12-egg incubator for chicken eggs might hold 30 quail eggs or only 6 duck eggs. Many manufacturers sell species-specific egg trays as accessories, which is worth knowing before you buy.
Alarms and monitoring
Temperature and humidity alarms are a real comfort, especially overnight. Some higher-end units connect to an app so you can monitor conditions from your phone. For a first-time breeder, having an alarm that wakes you up if the temperature drifts is genuinely useful. Even if you trust the incubator, I'd still recommend keeping a separate calibrated hygrometer/thermometer inside the unit to verify what the built-in sensor is reading, because factory calibration isn't always perfect.
Still-air vs forced-air, and manual vs automatic turning
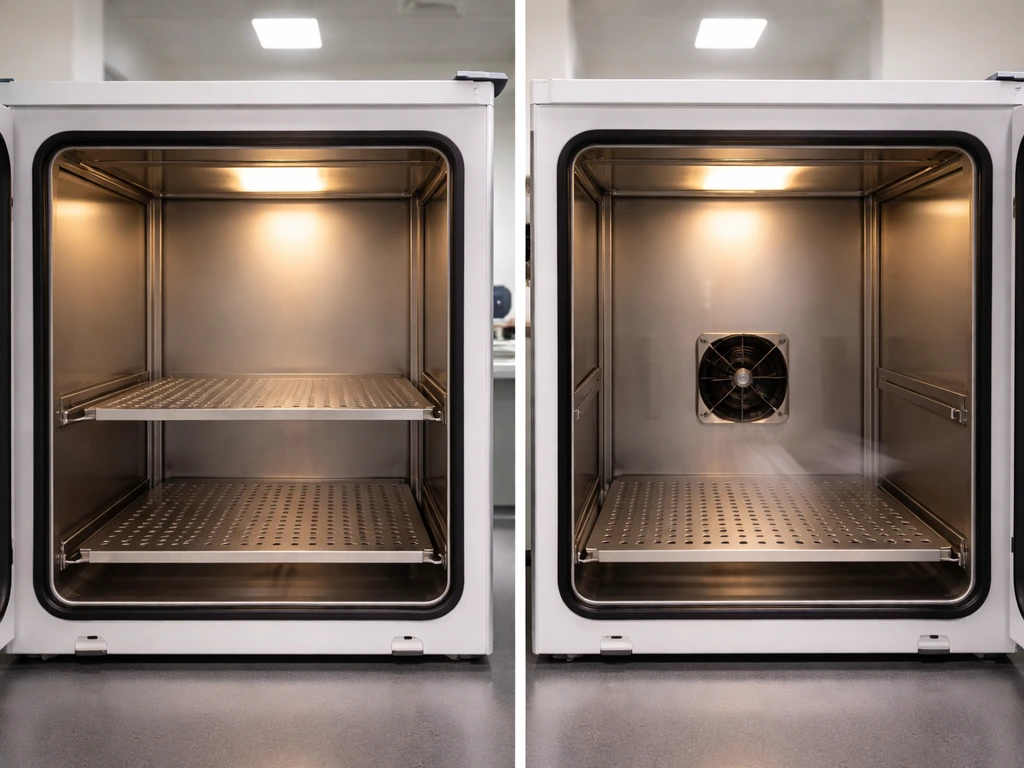
These are the two main choices you'll need to make, and they're worth understanding before you spend any money.
Still-air incubators
Still-air incubators have no fan. Heat rises and stratifies, so the temperature at the top of the incubator is higher than at egg level. Brinsea's own technical guidance points out that this temperature gradient also creates a humidity gradient across the incubator. You generally run still-air units about 1-2°F higher at the recommended measurement point (top of the egg) to compensate. Still-air incubators are cheaper, quieter, and simpler. They work fine for small batches when you understand how to manage the gradient, but they're less forgiving for beginners who are still learning.
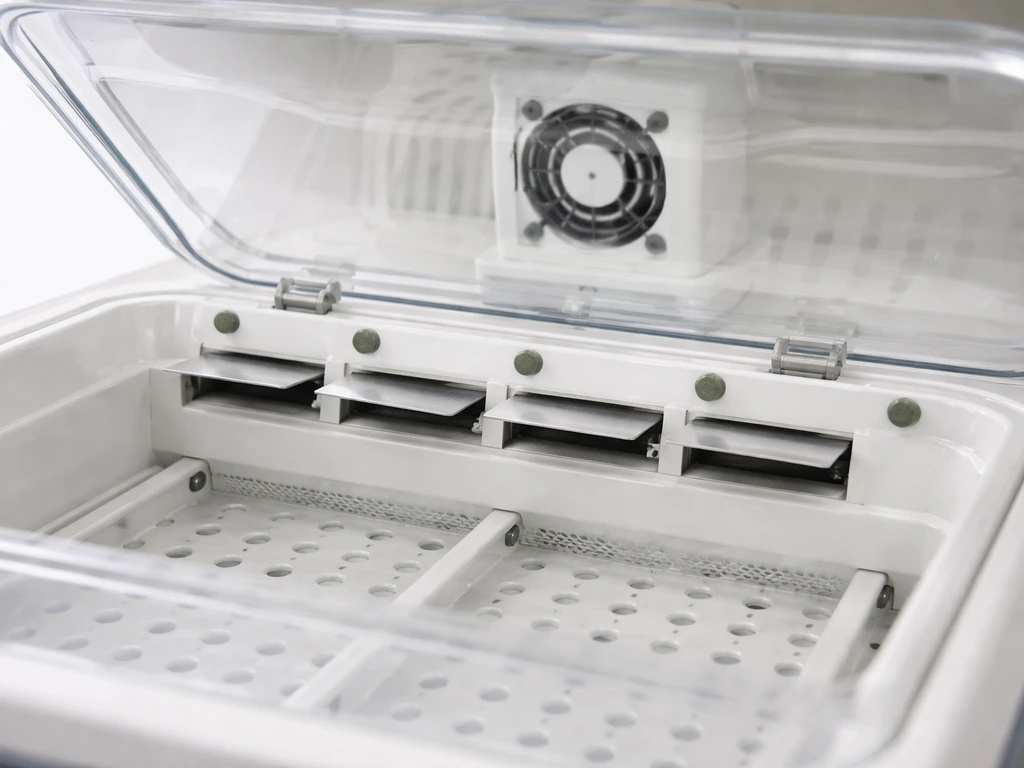
Forced-air incubators
Forced-air incubators use a small fan to circulate air and distribute heat evenly throughout the chamber. Temperature is consistent from top to bottom and corner to corner, which makes reading the thermostat straightforward and hatch rates more predictable. For beginners, forced-air is the better default. The fan also improves air exchange, which helps with CO2 levels. The tradeoff is a small amount of noise and, occasionally, slightly faster humidity loss because moving air is drier. That's easy to manage by keeping water trays full.
Manual vs automatic turning
Manual turning is exactly what it sounds like: you open the incubator and rotate each egg by hand at least three times a day. It works, people hatch eggs this way all the time, and it costs nothing extra. The problem is consistency. Miss a day or space your turns unevenly and you'll see it in lower hatch rates. Automatic turning does this for you on a fixed schedule, typically rotating eggs 45 degrees every hour or few hours. For anyone who has a regular job or doesn't want incubation to rule their schedule for three-plus weeks, automatic turning is worth every extra dollar. If your species requires very frequent turning or very specific turning schedules, make sure the unit's turning mechanism matches that.
| Feature | Still-Air | Forced-Air |
|---|---|---|
| Temperature uniformity | Uneven (gradient from top to bottom) | Even throughout chamber |
| Price | Lower | Moderate to higher |
| Forgiveness for beginners | Less forgiving | More forgiving |
| Humidity management | Trickier due to gradient | More predictable |
| Noise | Silent | Slight fan noise |
| Best for | Experienced keepers, small low-stakes batches | Beginners and anyone wanting consistency |
How to set up and run an incubation cycle, step by step
- Choose the right location. The BC 4-H Poultry Manual recommends placing your incubator in a room where ambient temperature doesn't fluctuate more than about 5-10°F. Avoid spots near windows, exterior walls, air conditioning vents, or heating registers. A spare bedroom or interior room is ideal.
- Run the incubator empty for at least 24-48 hours before adding eggs. This lets you verify that temperature and humidity are stable at your target levels and gives you time to make adjustments without risking eggs.
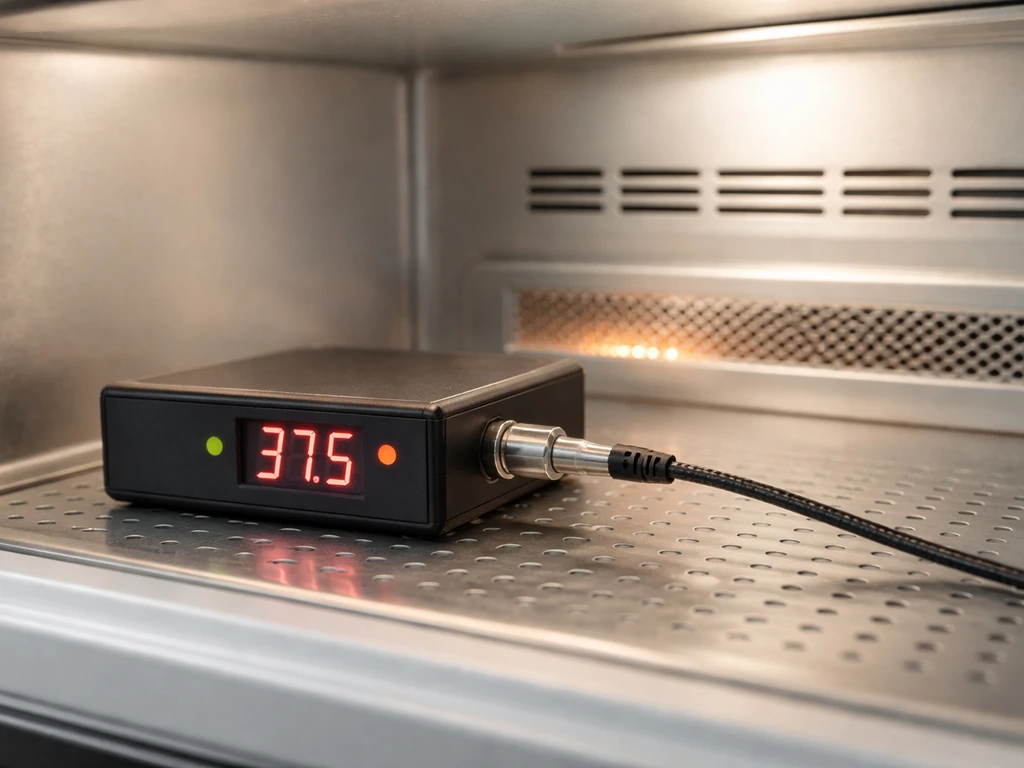
- Calibrate your sensors. Place a trusted external thermometer/hygrometer inside and compare it to the incubator's built-in readings. If there's a consistent gap, note it and adjust accordingly. Don't assume the factory settings are perfectly accurate.
- Set your target temperature. For most pet bird species (budgies, cockatiels, lovebirds, parrots), the target is 99.5°F (37.5°C) for forced-air. For still-air, measure at the top of the egg and target around 101-102°F. Verify with your species-specific chart.
- Set humidity to 55-60% relative humidity for the main incubation period. Use a shallow water tray with enough surface area to hit that target. Add a sponge to increase surface area if needed.
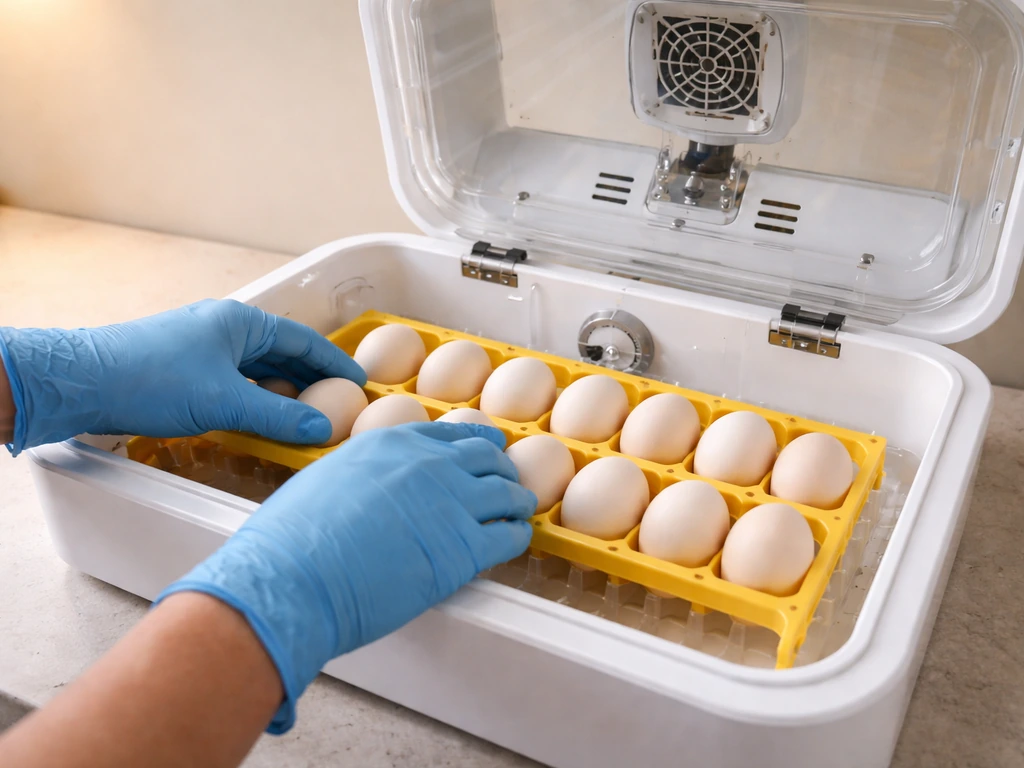
- Add your eggs. Set them pointy end down or on their side depending on your turner type. Mark one side of each egg with a pencil (not pen) if you're turning manually, so you can track rotation.
- If turning manually, turn eggs an odd number of times per day (3, 5, or 7) so the egg spends alternate nights on opposite sides. Space turns as evenly across the day as possible.
- Candle eggs at day 7-10 to check for fertility and development. Infertile or early-dead eggs should be removed to prevent them from contaminating the incubator if they go bad.
- Three days before the expected hatch date, stop turning eggs, raise humidity to 65-70%, and partially close ventilation to maintain moisture. This is called 'lockdown.'
- Do not open the incubator during lockdown unless absolutely necessary. Each opening causes humidity to crash, which can cause chicks to get stuck in the shell ('shrink-wrapping').
- After hatching, let chicks dry fully in the incubator before moving them to a brooder. Wet chicks transferred too early get chilled easily.
Species-specific incubation basics and what actually drives success
Different bird species have different incubation periods, temperature tolerances, and humidity requirements. A good incubator with wrong settings for your species is still going to fail. Here's a quick reference for common pet bird and backyard bird species:
| Species | Incubation Period | Temp (forced-air) | Humidity (main period) | Notes |
|---|---|---|---|---|
| Chicken | 21 days | 99.5°F (37.5°C) | 55-60% | Most widely supported by incubator manufacturers |
| Cockatiel | 18-21 days | 99.5°F (37.5°C) | 50-55% | Eggs are small; use appropriate egg tray |
| Budgerigar (Budgie) | 18 days | 99.5°F (37.5°C) | 50-55% | Very small eggs, fertility issues are common |
| Lovebird | 22-25 days | 99.5°F (37.5°C) | 55-60% | Similar setup to budgies but slightly longer |
| Parrot (larger species) | 24-30 days | 99-99.5°F | 55-60% | Vary widely by species; research your specific bird |
| Quail | 17-18 days | 99.5°F (37.5°C) | 45-55% | Lower humidity than chickens; needs small-egg tray |
| Duck | 28 days | 99.5°F (37.5°C) | 55-65% | Spray eggs lightly with water from day 7 onward |
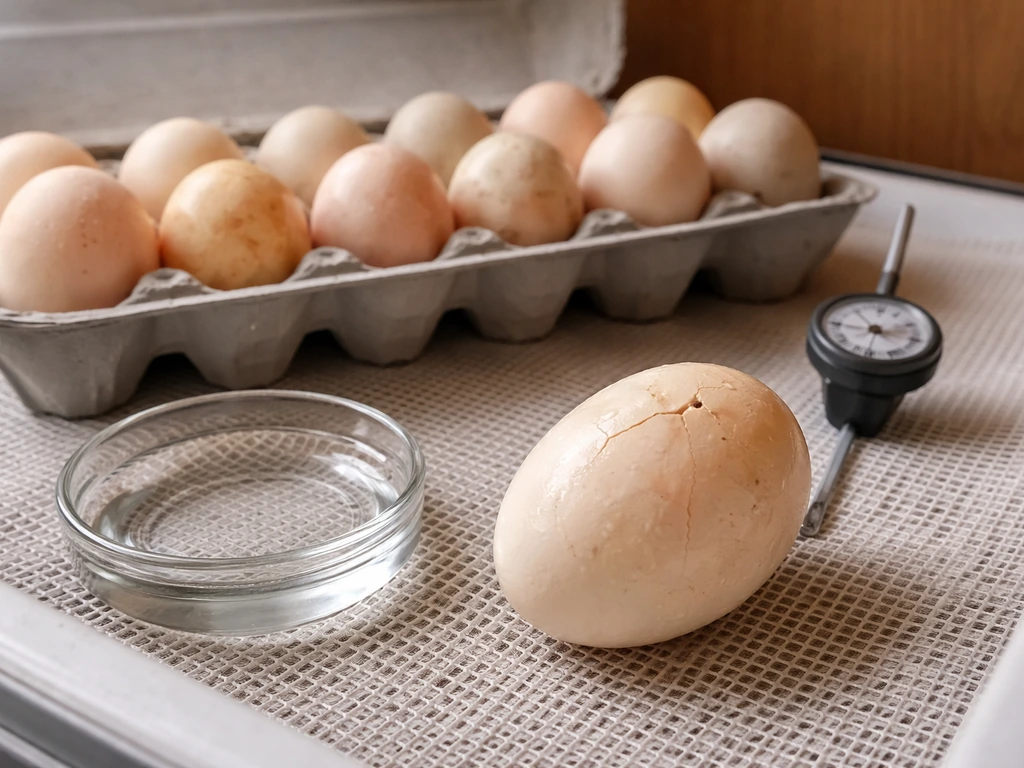
Beyond the incubator settings, the single biggest variable is egg fertility and quality. An incubator cannot fix an infertile egg or one that was stored incorrectly before setting. Brinsea notes that eggs should be stored in the ideal temperature range of 53, 59°F before incubation, and that proper storage humidity is important because low humidity can cause eggs to dry out before incubation Brinsea notes that eggs should be stored in the ideal temperature range of 53–59°F before incubation. Eggs should be stored at around 55-65°F, set within 7-10 days of laying, and never placed in the refrigerator. Pointy end down in storage is best. The older the egg at setting time, the lower the expected hatch rate, even in a perfect incubator.
Sanitation matters more than most beginners realize. A dirty incubator introduces bacteria and mold that can infect pipped eggs and kill chicks just before or during hatching. Wipe down the interior with a dilute bleach solution or incubator-specific disinfectant between hatches. Don't use harsh cleaning agents that leave residue, and let everything dry completely before adding new eggs.
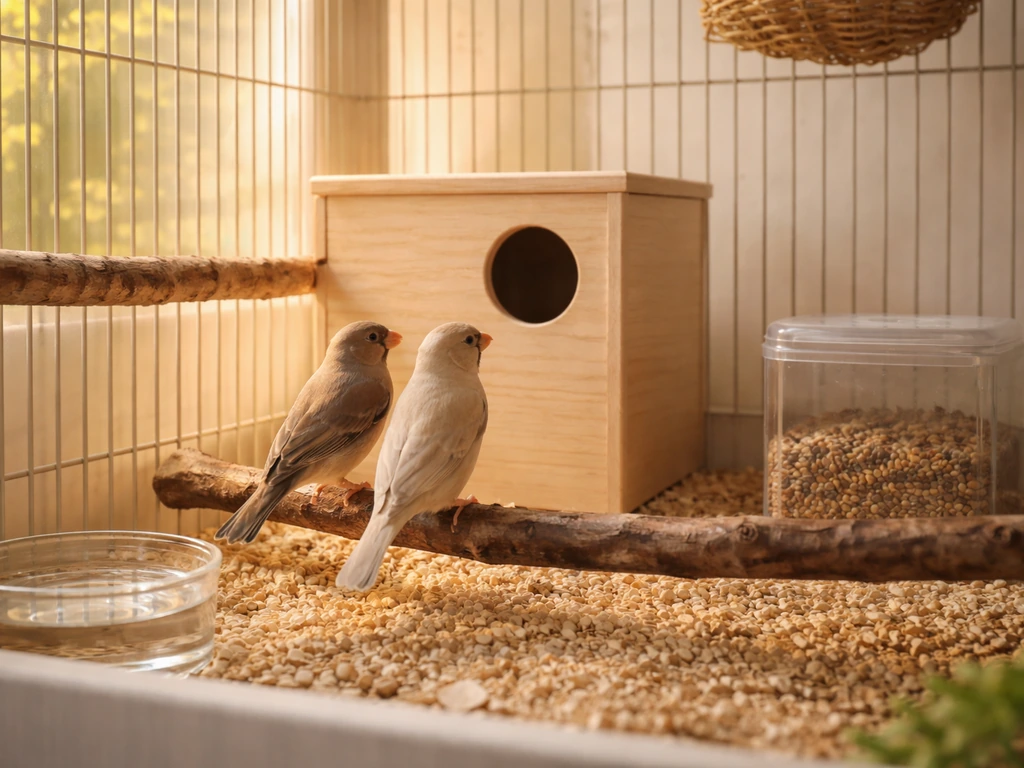
If you're interested in hatching as part of a broader breeding setup, the species you're working with matters a lot for the whole process beyond just incubation. If you're building a bird breeding setup, start by matching the incubator features to your species and the rest of your breeding plan broader breeding setup. Bird farming is called keeping and raising birds, often as a structured breeding or production activity. For a love bird breeding setup, dial in species-specific incubation settings and keep the rest of the breeding plan consistent, since incubation alone cannot fix poor pairing or egg handling. Species suitability for breeding, pairing, and nest setup are all interconnected pieces of a successful breeding program that the incubator alone can't replace.
When things go wrong: troubleshooting incubator problems and hatch timing
Temperature is fluctuating
If you're seeing temperature swings, the most common cause is room temperature fluctuation, not a faulty incubator. Check whether the room has drafts, afternoon sun exposure, or HVAC cycling nearby. Move the incubator if needed. If the room environment is stable and you're still seeing swings, the thermostat may need recalibration or the heating element may be failing.
Humidity won't stay stable
Humidity instability is almost always a surface area problem. If humidity is too low, add more water surface area (a wider tray or a sponge). If it's too high, reduce the water surface or add a small container of desiccant. Remember that humidity rises naturally as chick development progresses and the air cells grow, so you may need to reduce water surface area slightly in the second half of incubation.
Eggs aren't hatching on schedule
If eggs are running late, temperature probably ran slightly low during incubation. If they're hatching early, temperature ran high. A difference of 1°F sustained over the incubation period can shift hatch timing by a day or more. This is why calibrating your thermometer before adding eggs matters so much. If you're at day 25 on a 21-day chicken hatch and nothing is happening, candle the eggs first before giving up. Late pippers sometimes need another 24-48 hours.
Chicks are pipping but dying in the shell
This is one of the most heartbreaking outcomes and it usually points to low humidity during lockdown. When humidity drops below about 60-65% at hatch time, the membrane dries out and the chick can't rotate inside the egg to zip (work its way around the shell). The fix is keeping lockdown humidity high and not opening the incubator unnecessarily. If you have a chick that has pipped but hasn't made progress in 24+ hours, you can very carefully assist, but only if you're confident the membrane is drying out, not just slow. When in doubt, wait.
High infertility or early quitters
If candling at day 7-10 reveals mostly clear (infertile) eggs or blood rings (early death), the problem is almost always upstream of the incubator. Check your source for eggs, the age and condition of the breeding pair, and how eggs were stored and transported before they reached you. No incubator can create embryos that weren't there to begin with.
Which incubator to actually buy: honest recommendations by situation
There are a lot of incubators on the market and most of the cheapest ones will frustrate you. Here are the categories that make sense for different situations:
Best for beginners hatching a small clutch (under 12 eggs)
The Brinsea Mini Advance is the most consistently recommended small incubator for serious beginners. It holds 7 chicken eggs (or proportionally more small eggs), has digital temperature control accurate to 0.1°C, built-in automatic turning, and an alarm system. It costs around $150-$180. The Brinsea Ovation 28 Advance EX adds humidity control automation and holds 28 eggs, stepping up to around $300-$350. If Brinsea's price point is out of reach, the Nurture Right 360 (around $70-$90) is a fair mid-tier option with a 360-degree turner and a digital display, though temperature consistency isn't quite as tight.
Best for medium batches (12-50 eggs)
The GQF 1588 Genesis Hova-Bator is a forced-air cabinet incubator that holds 42 chicken eggs and has a solid reputation for consistent temperature. It costs around $100-$120 and is a good middle-ground option if you want a larger capacity without jumping to a full cabinet incubator. Add an automatic egg turner (sold separately for around $30-$40) and you have a reliable setup for under $160 total.
Best for larger operations or serious hobbyists
If you're moving into regular hatching, a digital cabinet incubator like the Rcom King Suro or a full-size unit from Brinsea's Ova-Easy range gives you precise control, large capacity, and app connectivity. If you are raising birds for meat instead of hatching eggs, the best meat bird to raise depends on your climate, space, and timeline. These run $400-$800+. At this level you're also looking at separate dedicated hatchers, which keep your main incubator clean and stable while eggs are in lockdown.
How to choose: a simple decision framework
- Hatching 1-12 small bird eggs occasionally: Brinsea Mini Advance or Nurture Right 360
- Hatching 12-50 eggs with moderate frequency: GQF 1588 Genesis with an add-on turner
- Hatching frequently or in larger volumes: Brinsea Ova-Easy or comparable digital cabinet incubator
- Tight budget and willing to learn: Nurture Right 360 with a separate calibrated hygrometer inside
- Want hands-off automation: Brinsea Ovation series with integrated humidity control
- Paranoid about temperature accuracy (reasonable for parrots): Brinsea with built-in calibration, plus an external probe thermometer to verify
One last thing to set realistic expectations: even with a great incubator and correct settings, hatch rates for inexperienced breeders with first-time breeding pairs often run 50-70%. To improve your odds, also focus on choosing the best bird for breeding by matching temperament, health, and egg-laying consistency to your goals first-time breeding pairs. That's normal. It doesn't mean your incubator is broken. As you gain experience with egg handling, source quality, and fine-tuning humidity for your specific setup, rates improve. The incubator is the most controllable variable in the chain, which is why it gets so much attention, but it's not the only one that matters. For more context on the full workflow beyond incubation, see bird breeding for beginners, since hatch success depends on factors like breeding setup and egg handling too.
FAQ
Is a forced-air incubator always better than a still-air one for the best bird incubator choice?
For most beginners, yes, because the fan reduces temperature gradients and makes the thermostat reading more representative at egg level. Still-air can work well in small batches, but you must be more disciplined about where you measure temperature and how you compensate for the top-to-egg gradient (often running the setting slightly higher).
What temperature sensor placement should I check before I trust the incubator?
Verify the incubator’s recommended measurement point, then add your own calibrated thermometer probe at egg level (or where the eggs sit) rather than only where the built-in sensor is located. This helps catch cases where sensor drift or airflow pattern makes the display look fine while the eggs run cooler or hotter.
Do I need a separate hygrometer/thermometer even if the incubator has built-in sensors?
Yes, especially for first runs. Built-in humidity sensors can be off because of calibration differences and where the probe sits relative to vents and trays. Use a second unit inside for verification during the first incubation cycle, then you can decide whether to adjust tray settings or rely on the built-in readings later.
How do I troubleshoot humidity that keeps dropping or overshoots during lockdown?
First treat it as a surface area issue. If humidity trends low, increase water surface area (wider tray or additional shallow tray), not just more total water. If it overshoots, reduce tray surface area and consider small desiccant near airflow paths. Also avoid opening the incubator repeatedly, because lockdown humidity is what prevents membrane drying.
Can I use a reptile incubator for bird eggs if I can set the temperature manually?
Generally no. Bird eggs need turning and typically operate closer to the 99-102°F range (species dependent), and reptile incubators are often built without egg-turning racks and with different ventilation and airflow design. Even if you adjust temperature, the turning and climate pattern can still make results poor.
How do I know if the turning schedule of an automatic incubator matches my bird species?
Check both the interval and the movement type. Some incubators rotate at fixed hourly cycles but may stop turning too early, or the rack geometry may not support the angle and spacing required for your egg size. For species that demand more frequent turning, confirm the mechanism can meet that schedule without gaps.
Is manual turning practical if I work weekdays?
It’s often a bad fit unless you can be extremely consistent, because you need at least three turns daily and more frequent is better up to around every hour. A common failure pattern is missing one weekend or turning unevenly, which can lower hatch rates even when temperature and humidity were correct.
What does “capacity in chicken-egg equivalents” mean for my actual bird eggs?
It means the manufacturer assumes a specific egg size and tray layout. Your real capacity can be much lower with larger eggs (duck, goose) if the turning rack or adapter does not fit, or much higher with small eggs only if there are properly sized inserts. Always confirm that the turning mechanism accommodates your egg dimensions and weight.
Do I need a separate hatcher, or is it fine to keep everything in one incubator?
For occasional hobby hatching, one incubator can work if you carefully manage lockdown settings and sanitation. For frequent or larger batches, a dedicated hatcher helps you keep the main unit stable and reduces contamination risk because you can leave the incubation stage undisturbed while eggs enter lockdown elsewhere.
When should I stop turning for best hatch results?
Stop turning for the final two to three days before the expected hatch date (species dependent). Turning during the last window can disturb the embryo’s positioning, while stopping too early can affect orientation. If your incubator has an automatic stop setting, confirm it aligns with your species timeline.
What should I do if eggs are pipping but not making progress after a day?
First reassess humidity and resist frequent opening. If a chick pipped but stalls for 24+ hours, low lockdown humidity is a common cause, so focus on restoring target humidity before considering assistance. If you assist, do it only when you are confident the membrane is drying out, otherwise you can harm a chick that is still transitioning.
Why are many eggs infertile or show early “blood ring” signs even with the best bird incubator?
Those outcomes usually point upstream, not to incubation control. Common causes include poor breeder fertility, eggs stored too long, storage temperatures outside the recommended range, or rough transport and handling before setting. Candling at day 7-10 is useful, but it often changes the diagnosis toward egg source quality rather than incubator settings.
If my incubator shows temperature stability but hatch timing is off, what’s the first thing to check?
Calibrate your thermometer and confirm the real temperature at egg level, then verify room conditions. A consistent offset of about 1°F sustained can shift hatch timing by a day or more. Room drafts, afternoon sun, and HVAC cycling can also produce “stable but wrong” readings if the sensor placement is misleading.
What cleaning routine reduces the chance of bacterial contamination without harming eggs?
Clean between hatches using an incubator-safe disinfectant (dilute bleach solution is commonly used), then dry completely before restarting. Avoid harsh residues or chemical smells that can linger in the chamber, and remove any debris from vents and trays since buildup can affect airflow and humidity behavior.
Next Articles
Best Bird for Breeding: Beginner Options and Steps
Top beginner bird species for breeding and step-by-step setup, diet, health checks, and chick care with safety tips.
Garden Bird Checklist: Wild Species, IDs, and Tracking Tips
Ready-to-use wild garden bird checklist with IDs, field marks, tracking tips, and a bird station setup for beginners.
Printable Backyard Bird Guide for Beginners and First IDs
Printable backyard bird guide for beginners: simple ID key, look-alikes, and a ready-to-fill checklist for backyard sigh