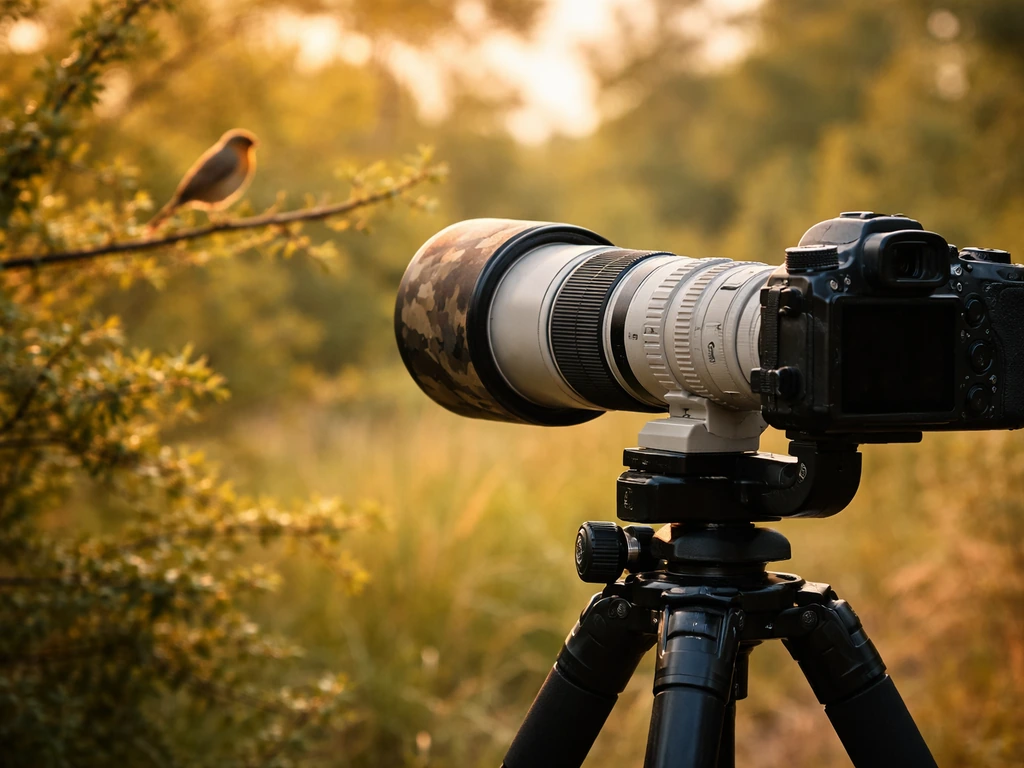
For most bird photographers, a tripod with a gimbal head is the better long-term choice, but a monopod is what you should probably buy first. That sounds contradictory, so let me explain. A monopod gets you into the field fast, reduces arm fatigue with long lenses, and works well for moving birds and unpredictable situations. A tripod gives you the rock-solid stability you actually need for maximum sharpness, low-light shooting, and those long sessions waiting at a nest or hide. The right answer depends almost entirely on how you bird: whether you're chasing birds through scrub or sitting quietly at a wetland at dawn.
Monopod vs Tripod for Bird Photography: Which to Choose

Marcus Chen
23 May 2026
Monopod vs tripod basics for bird photography
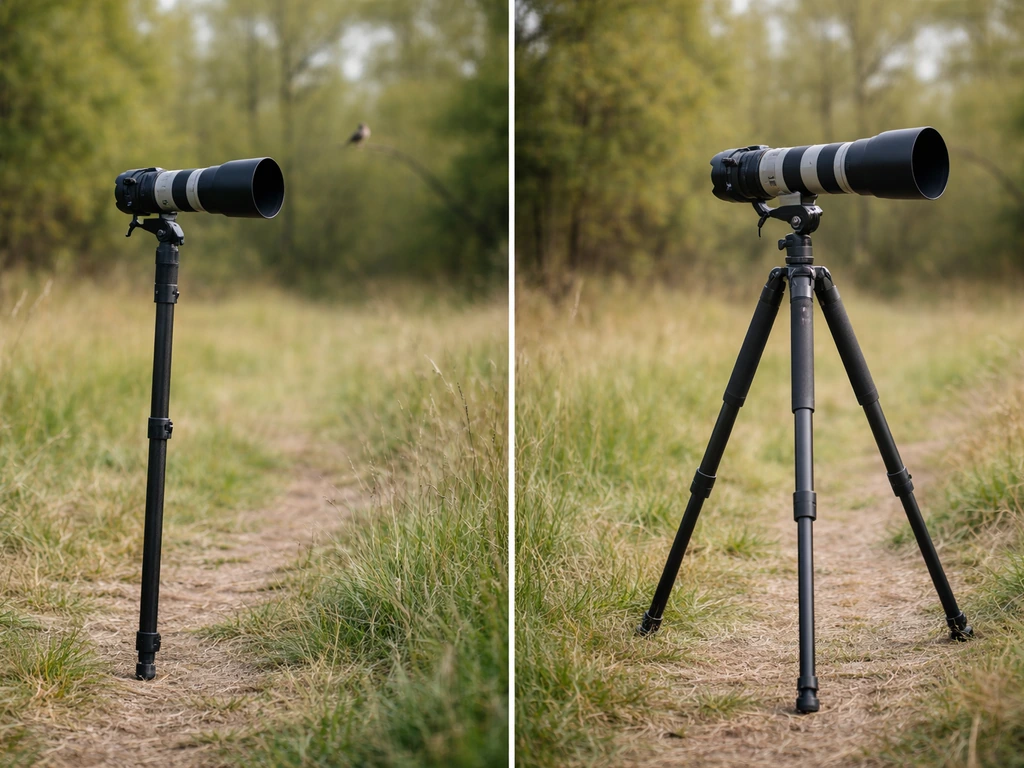
A monopod is a single pole that braces your camera and lens against your body. It reduces fatigue and helps you shoot at slightly slower shutter speeds than you could handheld, but it does not eliminate camera movement, you're still the third leg of the equation. A tripod uses three legs and a head to create a true fixed platform. When properly set up, the camera stays exactly where you put it without any input from you.
For bird photography specifically, that distinction matters more than in almost any other genre. You're often working with 400mm, 500mm, or 600mm lenses where the slightest vibration shows up as soft feather detail. You're also dealing with unpredictable subjects that can flush, fly, land, and reposition in seconds. Those two demands, maximum stability and fast response, pull in opposite directions, which is exactly why the monopod vs tripod debate is genuinely worth thinking through rather than just defaulting to whatever your gear bag can carry.
When a monopod wins

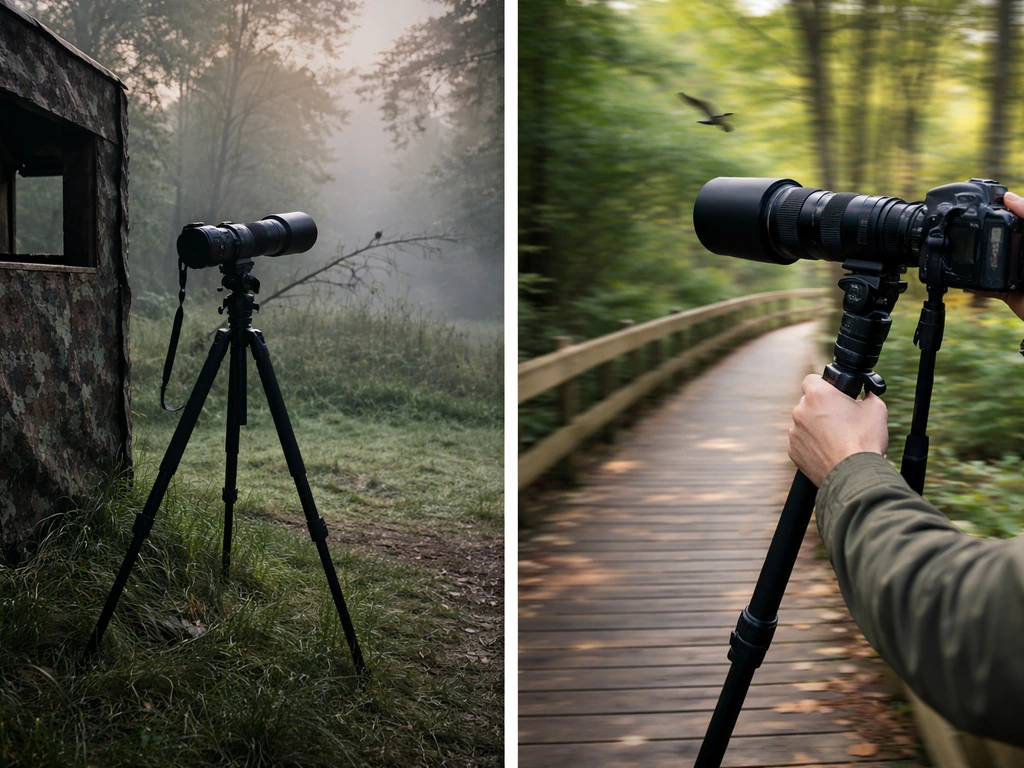
The monopod's real advantage is speed and mobility. If you're walking a trail, moving between hides, or working in a tight woodland where setting up a tripod would take 30 seconds and scare every bird in range, a monopod keeps you ready. You can swing it onto a bird mid-flight, pivot quickly, and keep moving without breaking stride. For birds in flight, raptors hunting low over a field, shorebirds working the tide line, warblers flitting through canopy, a monopod paired with a panning head or a fluid video head gives you enough support to track and shoot at the fast shutter speeds (1/1600s and above) you need to freeze wing motion.
Monopods also shine in crowded or restricted locations. Narrow hides, nature boardwalks, and festival bird counts often don't have room for a spread tripod. The monopod fits in, stays out of other people's way, and still saves your arms during a long morning session. If you're using a 500mm f/5.6 prime or a 100-500mm zoom, the weight relief alone is significant over several hours.
One honest caveat: experienced bird photographers often find that a monopod occupies an awkward middle ground. It's more stable than handheld, but not by as much as you'd hope for super-telephoto work. For a 600mm f/4 on a mirrorless body, a monopod provides insufficient stability to fully exploit the lens's resolving power when you're trying for feather-level sharpness on a still bird. It's a genuine compromise, useful, but not a substitute for a real tripod when conditions allow.
When a tripod wins
A tripod is the right tool any time your subject is predictable and your priority is maximum image quality. That covers a lot of bird photography: birds on a regular perch, nest photography, waders feeding in a marsh, raptors on a fence post at dawn. In these situations you know roughly where the bird will be, you have time to set up, and sharpness matters more than reaction time. A properly set up tripod gives you a stable platform that a monopod simply cannot match.
Low light is where the tripod gap really opens up. At dawn or dusk, you're often shooting at 1/200s or slower with high ISO to compensate. On a monopod, that shutter speed range produces soft images because your body movement transmits directly into the lens. On a tripod with electronic first curtain shutter (EFCS) enabled, you can shoot at those speeds and get sharp results because the camera is genuinely isolated from movement.
BirdPhotography. com explains that for slow-shutter tripod work in the 1/15s to 1/125s range, using an electronic shutter can reduce vibration and shutter shock for sharper results shoot at those speeds and get sharp results. Mirrorless cameras with electronic shutter modes are particularly effective here, they eliminate the mechanical vibration that can soften tripod shots in the 1/15s to 1/125s range.
Long waits also favor the tripod decisively. If you're stationed at a waterhole for two hours waiting for a kingfisher to return, holding a monopod the entire time is exhausting and pointless. A tripod lets you step back, let the camera do the waiting, and actually be present. For top water bird fishing lure fishing trips, stability matters at the water’s edge so you can keep your framing steady while the action starts. Nest photography and hide work operate the same way, you're in a fixed position for extended periods, your subject's behavior is somewhat predictable, and stability wins every time.
Choosing based on your birding scenarios
Rather than picking one support system and sticking with it, think about your most common shooting scenarios and match the tool to the job. Here's how that breaks down in practice.
| Scenario | Best support | Why |
|---|---|---|
| Perched bird, predictable location, good light | Tripod | Maximum sharpness, no hurry, stable platform |
| Perched bird, moving frequently between spots | Monopod | Quick repositioning, less setup time |
| Birds in flight, fast action | Monopod or handheld | Need to track and pan freely |
| Low-light dawn/dusk session | Tripod | Slow shutter speeds need true stability |
| Hide or nest photography (long wait) | Tripod | Fatigue-free, repeatable compositions |
| Walking trails or woodland birding | Monopod | Mobility, fits narrow paths |
| Heavy super-telephoto (500mm f/4 and above) | Tripod with gimbal head | Lens weight and vibration control |
| Soft/wet/muddy ground | Tripod with spike feet | Legs dig in for stability |
| Crowded or restricted locations | Monopod | Compact footprint, easier to manage |
Distance matters too. The longer your focal length, the more amplified any camera movement becomes. At 400mm on a moving monopod you can get away with a lot at 1/1000s. At 600mm on a static subject at 1/250s, the monopod's residual movement will be visible in your images at full resolution. That's when the tripod earns its bulk.
Specs that matter: weight, height, head choice, and lens compatibility
Weight and material
Carbon fiber is worth the price premium for bird photography because you're carrying this gear across fields, through mud, and into cold wet hides. Carbon is lighter than aluminum, transmits less vibration, doesn't rust, and handles temperature extremes better. If budget forces the choice, carbon fiber legs with an aluminum head is a reasonable compromise. A good starting point for load capacity on a tripod is at least 17.6 lbs (8 kg) to cover a large mirrorless body, a big telephoto, and any accessories, and leave headroom.
Height and center column use
Set up your tripod to reach comfortable eye level using the legs alone, without touching the center column. Every inch you raise the center column creates a lever arm that amplifies tiny vibrations significantly, the center column is the single biggest stability killer on an otherwise solid tripod. blank" rel="noopener noreferrer">Extend the legs fully first, and only raise the center column as a last resort when you genuinely need that extra few inches. For low-angle bird photography (shooting at water level, for example), look for tripods with legs that splay wide or invert.
Head choice: gimbal vs ball head
This is where a lot of people make an expensive mistake by defaulting to a ball head. Ball heads are versatile and compact, but for a 500mm or 600mm lens they're genuinely difficult to use for tracking moving birds, you release the tension, the lens tips, you correct, and the bird is gone. A gimbal head mounts the lens at its center of gravity so it stays perfectly balanced in any position. You can swing it freely to track a flying bird and it won't drift when you let go. If you're shooting with anything 400mm f/5.6 or heavier on a tripod, a gimbal head is practically a necessity, not a luxury upgrade.
For monopods, a fluid video head or a specialized monopod tilt head works better than a fixed ball head, because you want smooth horizontal panning without having to unlock and re-lock. Check that your monopod uses a standard 3/8-inch thread so you have flexibility in head choice, many monopods require you to buy the head separately.
Ground conditions and feet
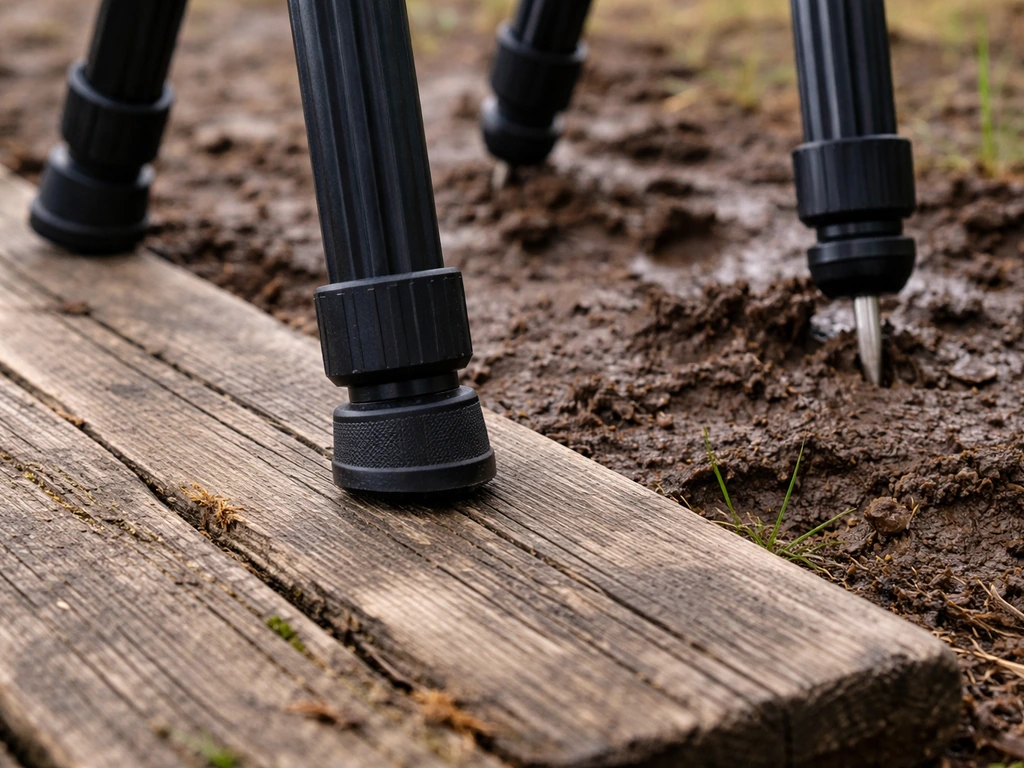
Rubber feet work on hard surfaces like hides, boardwalks, and dry rock. On soft, wet, or muddy ground, which is where a lot of great bird photography happens, metal spike feet dig in and give you a locked, stable base that rubber feet simply slide around on. Many tripods let you swap feet, and it's worth carrying the spikes when you're heading to a wetland or estuary.
How to use them well
Tripod technique
The biggest mistake with tripods in bird photography is assuming that mounting the camera means you're done. Vibration still finds a way in. Use a remote shutter release or self-timer to avoid pressing the shutter button directly. Enable electronic first curtain shutter on mirrorless cameras, it eliminates the mechanical jolt of the shutter opening and makes a noticeable difference at shutter speeds below 1/200s. Avoid extending the center column unless you have no choice. On windy days, hang your bag from the center column hook to lower the rig's center of gravity.
Monopod technique
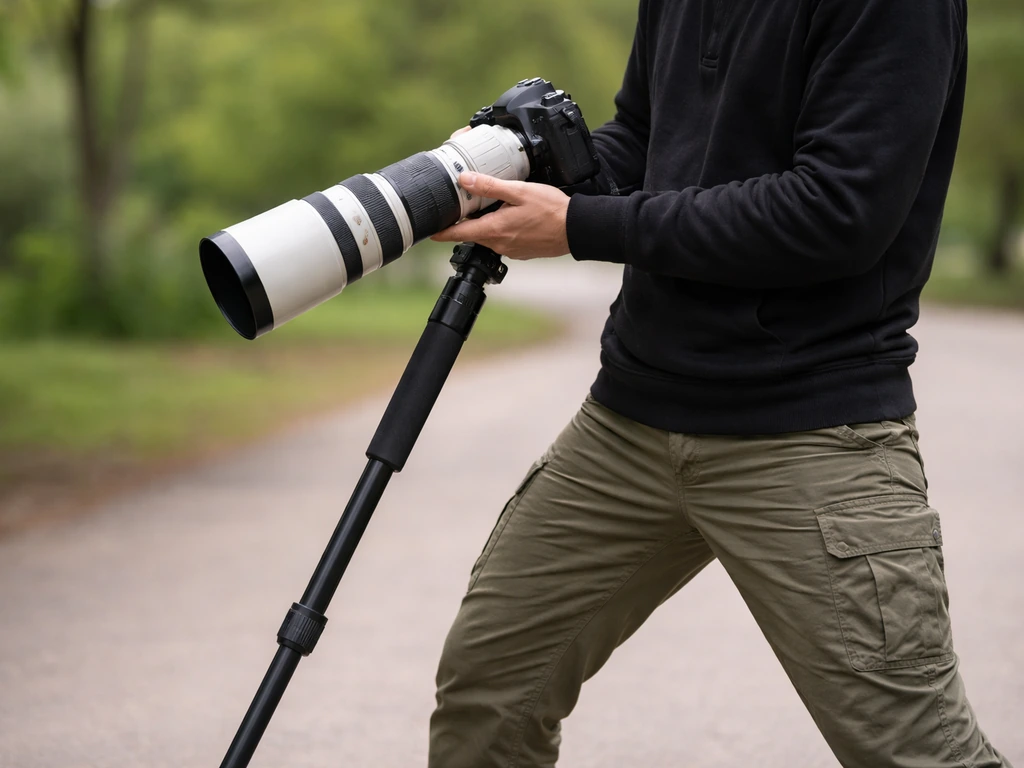
Your body is the other two legs. Stand with your feet roughly shoulder-width apart and angle the monopod slightly away from you, not straight up, so you're creating a natural triangle between the pole and your two feet. Keep your elbows tucked in close to your body rather than flared out. This dramatically reduces the swaying that makes monopod shots soft. On smooth surfaces like concrete or wet rock, the monopod tip can slide; lean into it slightly or use a rubber foot with better grip. Panning for birds in flight works well on a monopod, let the head float horizontally while your feet pivot, rather than trying to steer with your arms.
When you can't bring both: workarounds
If you're traveling light and can only carry one support, a monopod covers more scenarios. You can supplement it for static shots by bracing against a tree, fence post, or the door frame of a vehicle, anything solid that reduces movement. Beanbags are an underrated alternative for car-based bird photography: draped over a car window frame or a fence post, a beanbag cradles the lens and delivers near-tripod stability for a fraction of the weight and pack size. For foot travel where even a monopod is too much, a wrist strap with good lens image stabilization and fast shutter speeds is your fallback.
Your simple decision guide
Here's the honest summary. To help you choose with confidence, check out our guide to the best bird pole setups for different shooting styles. If you're starting out and shooting birds in a mix of conditions with a lens up to around 500mm, buy a quality carbon fiber monopod with a fluid tilt head first.
If you are shopping for bird hunting specifically, use a shorter, reliable range of shot sizes as your starting point, then adjust based on distance and how the birds behave what size shot for bird hunting. It'll handle 70 percent of situations, save your arms, and teach you what stability you're missing for the other 30 percent.
When you're ready for a tripod, get a carbon fiber set rated to at least 17–18 lbs, skip the center column extension habit, and add a gimbal head if you're working with 400mm or longer glass. That combination will outperform anything a monopod can do for static and low-light bird work.
- Active birder, walking trails, mixed bird behavior: start with a monopod and fluid head
- Hide/wetland photographer, long waits, static subjects: prioritize a carbon fiber tripod with a gimbal head
- Flight and action specialist: monopod or handheld with fast shutter speeds and good image stabilization
- Low light at dawn/dusk is your main challenge: tripod with EFCS enabled on a mirrorless camera
- Tight budgets or travel setups: monopod plus a quality beanbag covers most scenarios without the bulk
- Super-telephoto lenses (500mm f/4 and above): a gimbal tripod head stops being optional at this point
Getting the right support system is closely tied to your overall camera setup. The head you choose, the lens you're mounting, and the birds you're targeting all feed into the same decision. If you're still working out your full camera rig, that's worth thinking through alongside the support question, the right setup for photographing fast-moving songbirds differs quite a bit from what you'd use for large wading birds at a wetland.
For a deeper walkthrough on dialing in your settings, see the best camera setup for bird photography camera rig. Once your support system is sorted, your images will improve noticeably, not because of gear magic, but because camera shake is quietly ruining more bird shots than most beginners realize.
FAQ
If I buy only one, should I choose a monopod or tripod for bird photography in the beginning?
Start with a monopod if most of your outings are walk-and-chase (woodland, scrub, moving flocks) because setup speed and reduced arm fatigue matter more early on. Choose a tripod as your single support only if you know you will spend long periods in hides or at predictable perches, where you can afford a slower setup and you benefit from maximum sharpness.
Can a monopod replace a tripod for low-light bird shots?
Only partially. A monopod helps compared to handheld, but at very slow shutter speeds the remaining sway from your breathing and stance can still show up. If you routinely shoot dawn or dusk at shutter speeds near 1/125s or slower, a tripod with electronic first curtain shutter (or a mirrorless electronic shutter mode) is the safer path for feather-level detail.
What shutter speeds should I target with a monopod at 400mm to 600mm?
There is no universal number, but a practical approach is to bias faster than you would handheld. If you are seeing soft feather detail, step up shutter speed first, then check your stance and panning technique. At 600mm, even small body movement becomes more obvious, so treat 400mm “rules” as too optimistic.
Does a gimbal head on a tripod also help for birds on a perch?
Yes, even if the bird is fairly still. A gimbal makes it easier to hold framing smoothly without drift, and it tends to work better when the bird shifts position slightly. However, if your tripod work is mostly static and slow repositioning, a well-tuned fluid head can also be effective, the key is reducing overshoot when you correct framing.
Are ball heads ever a good idea for long-lens bird photography?
They can work for shorter lenses or quick, mostly static compositions, but they are a common failure point for tracking. With 400mm to 600mm, unlocking and re-locking often causes the lens to tip, which makes tracking moving birds difficult. If you use a ball head, practice releasing tension gradually and plan for small corrections.
How do I stop a tripod from becoming unstable on soft or muddy ground?
Use the right feet for the surface. Swap to spike feet in mud or wet edges, and avoid putting the center column down in a way that forces you to lift the rig higher than needed. Also spread the legs wide and keep the center column retracted, because stability usually drops fastest when the center column is extended.
Does extending the center column matter for sharp bird photos?
Yes. Extending the center column increases leverage, so tiny vibrations and ground movement magnify. Even if the camera looks level, for long lenses it can cost sharpness. A better workflow is fully extend the legs to reach working height and only raise the center column when absolutely necessary.
What’s the best monopod head choice for birds in flight?
Use a fluid video head or a monopod tilt head designed for smooth horizontal panning. The goal is predictable motion without frequent locking and re-locking. If you feel jerky starts or overshoot when tracking, it usually comes from the head type or from releasing tension too abruptly.
Should I mount the monopod straight under me or angle it?
Angle it slightly away from your body to create a more stable triangle between your stance and the pole. Keep elbows closer to your torso to reduce rocking. This doesn’t eliminate micro-movement, but it noticeably reduces sway that shows up at full resolution on long lenses.
How can I improve sharpness without buying more gear after choosing monopod or tripod?
Use a remote release or self-timer so your finger is not the last input before exposure. On mirrorless cameras, enable electronic first curtain shutter when available. Also confirm your lens stabilization mode makes sense for the support you’re using, some setups behave better with stabilization adjusted rather than left fully on.
Is a carbon fiber tripod or monopod always worth it?
For birding, it is often worth it because you carry it over long distances and in cold or wet conditions. Carbon fiber legs are lighter and generally help reduce vibration transmission compared with aluminum. If budget is tight, a carbon leg plus aluminum head can still deliver most of the benefit, just don’t skimp on load rating for your telephoto and accessories.
What tripod weight rating should I look for if I use a 400mm to 600mm lens?
Choose a set that supports your full setup with margin, not just the lens weight. Include the camera, lens, head, and any accessories you commonly mount (like a plate, heavy bracket, or control cables). Overloading makes stability worse, and it can worsen vibration under wind or during re-framing.
What should I do if my monopod tip slips on wet rock or boardwalks?
Use a monopod with better grip feet or a surface-appropriate foot option. If slipping continues, adjust your stance so you are leaning slightly into the contact point rather than trying to hold it perfectly upright. Also check that the tip is fully seated and not worn down.
Will using a beanbag or car support replace a monopod or tripod?
In car-based bird photography, a beanbag often gets you surprisingly close to tripod stability with much less bulk. It works best when the car window frame or fence post provides a consistent contact surface. If birds are frequently changing distances quickly, monopods regain an edge because you can reposition while staying ready.
Next Articles
Best Camera Setup for Bird Photography: Field Guide
Step-by-step camera and settings guide for bird photography, from lens choice and AF to field presets for sharp keepers.
Garden Bird Checklist: Wild Species, IDs, and Tracking Tips
Ready-to-use wild garden bird checklist with IDs, field marks, tracking tips, and a bird station setup for beginners.
Printable Backyard Bird Guide for Beginners and First IDs
Printable backyard bird guide for beginners: simple ID key, look-alikes, and a ready-to-fill checklist for backyard sigh