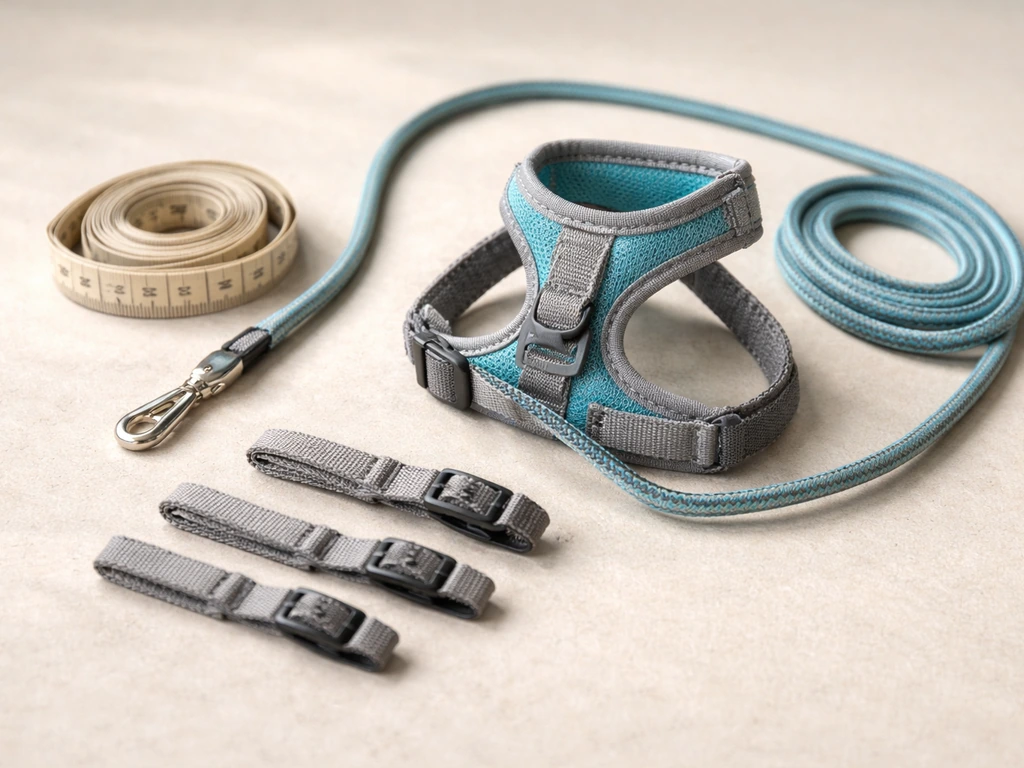
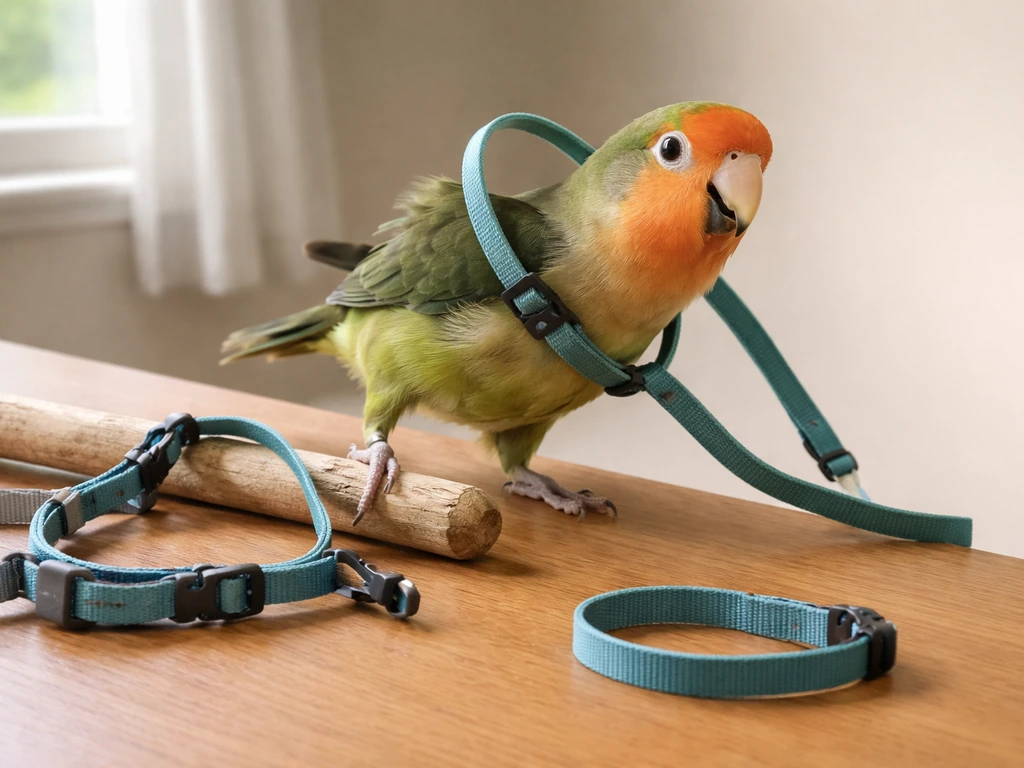
The best bird leash for most beginners is a harness-and-leash system like the Aviator Harness, which comes with an attached elastic leash roughly six feet long and is available in sizes from extra-small (finches, parrotlets) up to extra-large (macaws). If you want a starting point, the best small bird harnesses are the ones that fit snugly without restricting wings, neck, or feet. If you're comparing options, the best bird harness is the one that fits snugly, uses bird-safe materials, and lets your bird move comfortably. It fits snugly without restricting wings, neck, or feet, uses bird-safe materials, and is designed so the bird can be trained to put its own head through the collar loop rather than being forced into it. That last part matters more than any other spec on the package.
Best Bird Leash: How to Choose, Fit, and Train Safely

What "bird leash" actually means (and why the harness is the whole game)
When people search for a bird leash, they're usually picturing something like a dog leash: a cord you clip to your bird and walk around with. That's not how it works with birds, and trying to rig it that way is how birds get injured. A bird leash is always part of a harness system. The harness wraps around the bird's body (typically in a figure-eight or vest configuration) and the leash attaches to a back ring. Nothing clips around the neck. Nothing attaches to a leg band. The whole point is to distribute any tension across the body safely, not concentrate it on a fragile structure.
The use cases are pretty specific: supervised outdoor time in a yard or park, taking your bird along on a trip without confining it to a carrier the whole time, or letting a flight-capable bird stretch without risking a one-way flight into the sky. It's not for constant restraint, it's not a substitute for a carrier during transport, and it doesn't replace training. Think of it as a safety net for controlled outdoor experiences, not a walking routine like you'd have with a dog.
Safety criteria you can't skip
Fit is everything. A harness that's even slightly too loose will be off your bird in under a minute, and a harness that's too tight restricts breathing and blood flow. Some birds may initially have their toe or foot get caught in the belt or collar as they learn, so monitor fit and adjust early during training Blog 3. Beyond sizing, here's what to actually evaluate before you buy or use any system:
- Wings, neck, and feet must move freely. A properly fitted harness leaves all three completely unobstructed. If your bird can't flap, the fit is wrong.
- No breakaway clasp. Unlike dog collars, bird harnesses should NOT have a breakaway feature. Birds weigh almost nothing, so any tension that would trigger a breakaway is exactly the tension you need to prevent a flight escape. You want the harness to hold.
- Bird-safe materials. Look for soft nylon or similar non-toxic webbing. Avoid anything with zinc hardware (zinc is toxic to birds) and any elastic or rubber components that a beak could shred and ingest.
- Inspect hardware before every outing. Check for fraying, cracked buckles, or any deformation in metal components. Damaged hardware can fail under surprisingly low load.
- Leash attachment point on the back. The D-ring or attachment point should sit between the shoulder blades, not at the chest or belly, which would pull the bird awkwardly.
- Elastic leash preferred over rigid cord. A small amount of stretch in the leash absorbs sudden lunges or flaps without jerking the bird hard. The Aviator's built-in elastic leash is a good reference point for what this feels like.
Choosing the right harness style for your specific bird
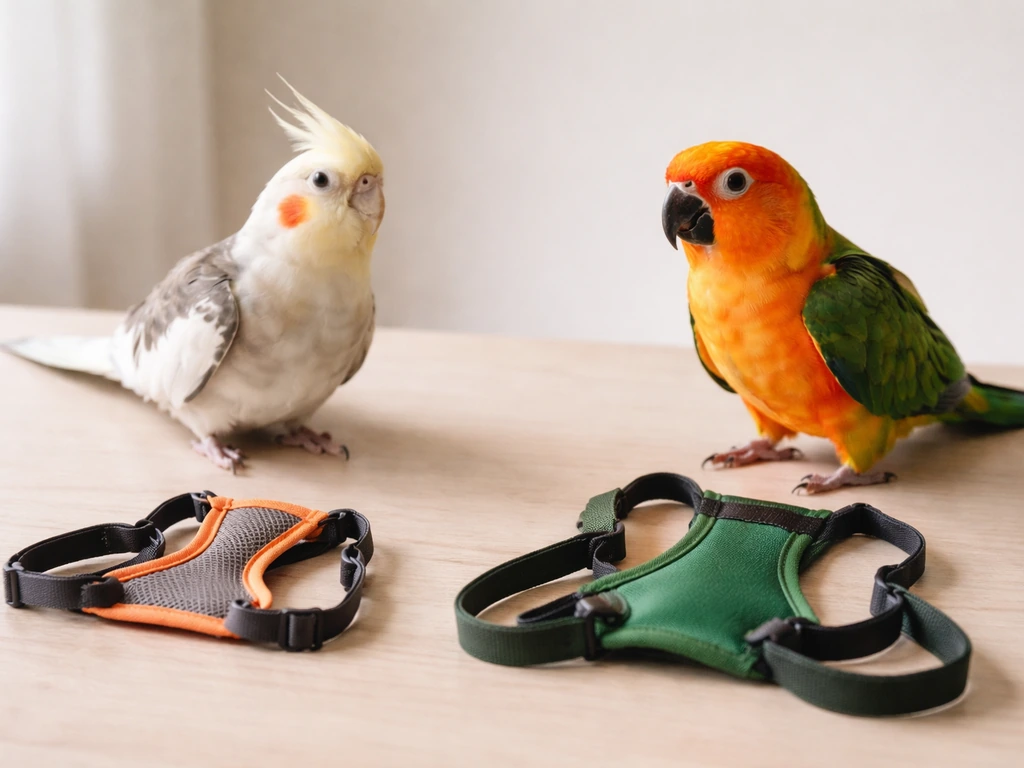
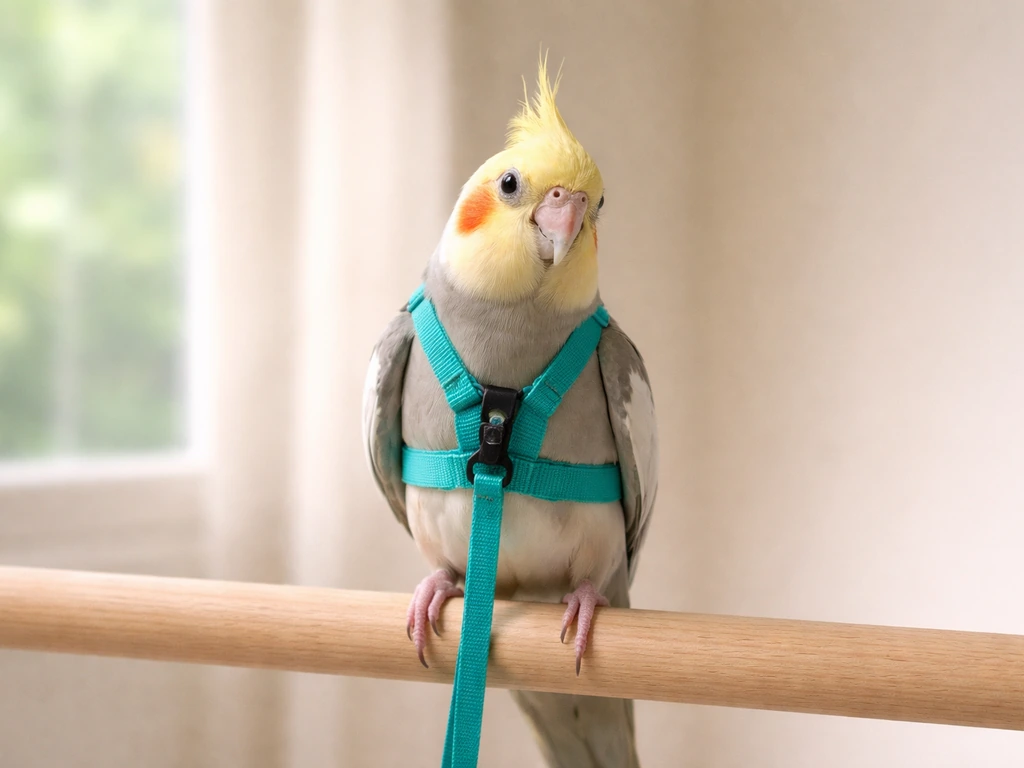
Not every harness style works for every bird, and body shape differences between species are real. A cockatiel and a conure might be similar in weight but have very different chest depth and neck circumference, which affects which products fit well. If you're shopping for the best bird harness for conure, focus on fit, comfort, and the harness style that matches your conure's chest depth and neck size. As you shop, look for the best bird harness for cockatiel fit and stability so the neck loop stays secure without restricting breathing. Here's how to think through your choice:
| Bird Type | Body Shape Consideration | Best Harness Style | Notes |
|---|---|---|---|
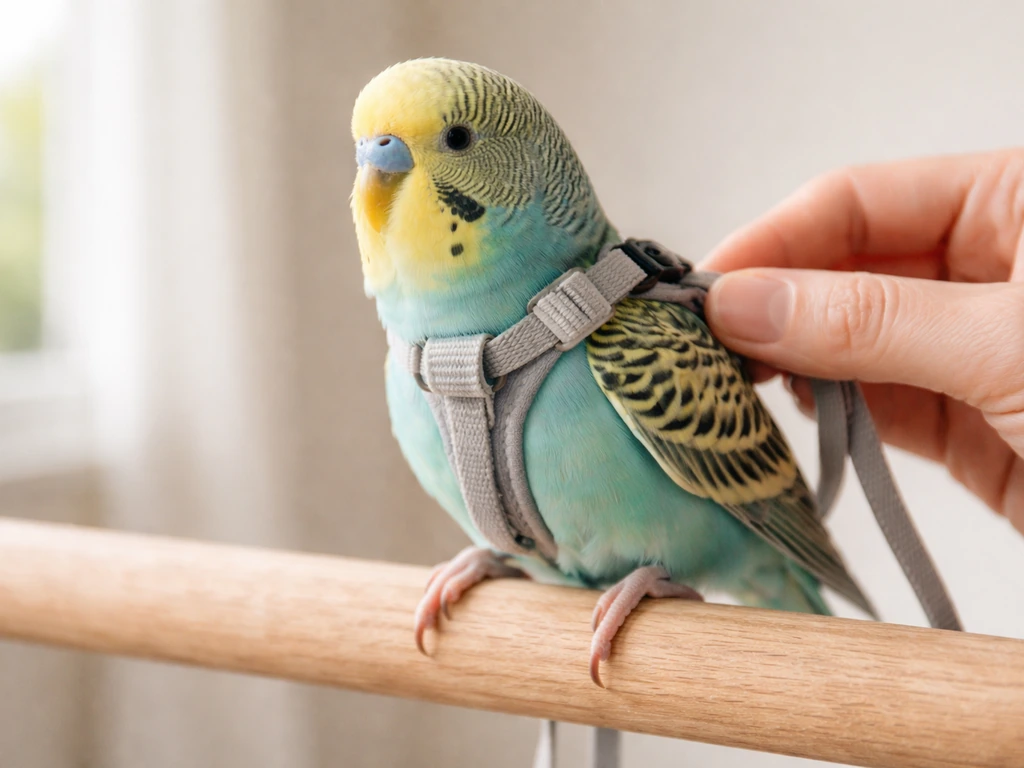
| Small birds (budgies, parrotlets, small conures) | Narrow chest, delicate neck | Figure-eight soft harness or small Aviator | Extra care on neck loop sizing; very easy to over-tighten |
| Medium birds (cockatiels, GCCs, caiques) | Medium depth chest, moderate build | Aviator (small/medium) or figure-eight | Most harnesses are designed around this size range |
| Large parrots (African greys, Amazons, eclectus) | Deep chest, strong neck | Aviator (large) or vest-style | Vest style distributes load better for heavy birds |
| Extra-large birds (cockatoos, macaws) | Very deep chest, wide wingspan | Aviator XL or purpose-built vest | Standard harnesses often too narrow in the chest panel |
| Stocky builds (caiques, pionus) | Wide body relative to weight | May need wide-panel vest style | Figure-eight can ride up or shift on stocky birds |
Temperament also plays a role. A high-energy bird that thrashes during handling will need a more secure, stable fit than a calm bird that steps up reliably. If your bird has never tolerated handling well, don't start with the harness. Work on basic step-up and handling trust first, then introduce the harness as the next phase of training. You're building a stack of trust, not jumping to the top.
If you're specifically working with a cockatiel or a conure, there are harness options and training nuances specific to those species worth looking into separately. The fitting process I describe below applies broadly, but sizing a harness for a cockatiel is its own topic worth giving full attention.
How to fit and size a bird leash/harness
This is where most beginners go wrong, and honestly where I went wrong the first time. Either they wrestle the harness onto a bird that isn't ready, or they get it on but don't check the fit properly. Here's the actual process:
- Measure before you buy. For most figure-eight and Aviator-style harnesses, you need neck circumference and chest/body girth. Measure loosely with a soft tape measure, then check against the manufacturer's size chart. When in doubt between two sizes, go with the one the manufacturer recommends for your bird's species.
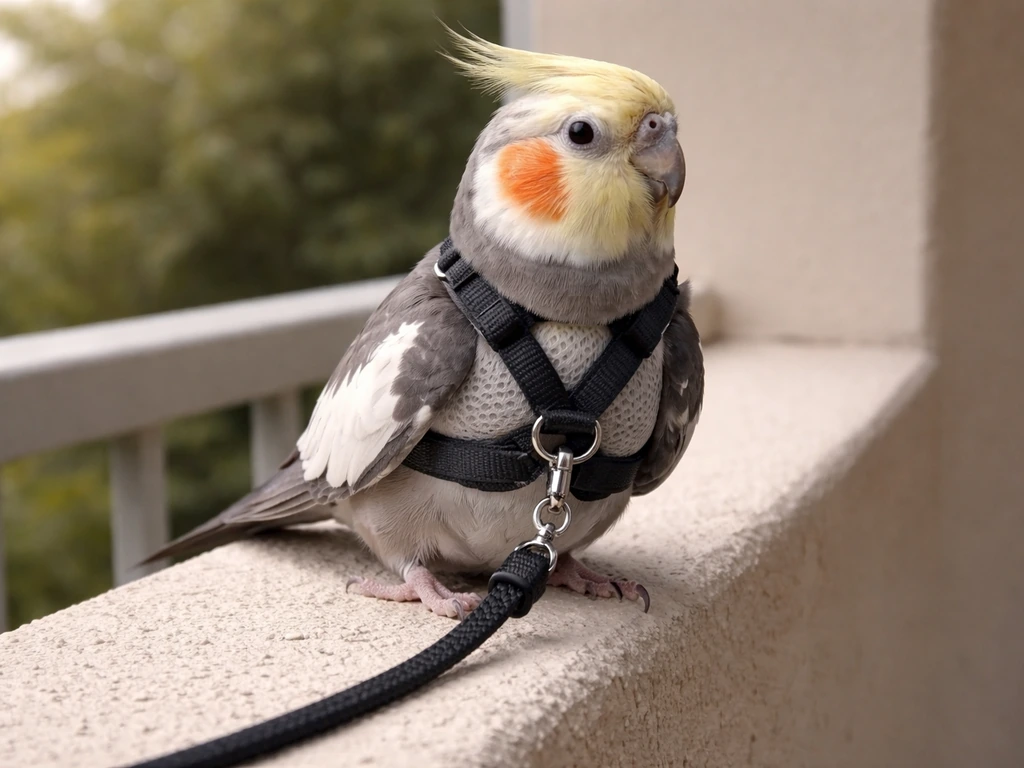
- Check the neck loop first. With the harness on, you should be able to slide one finger (just one) under the neck loop comfortably. If you can fit two fingers easily, it's too loose. If you can barely get one in, it may be slightly too tight.
- Check the body loop. The loop around the body (below the wings) should sit snug but not compress feathers. The bird should be able to fully extend and flap both wings without the harness pulling or shifting.
- Watch for foot entanglement. Especially during early fittings, birds sometimes catch a toe or foot in the belt or collar loop when shifting around. Keep a close eye on this during the first few sessions and be ready to gently free a caught foot without pulling.
- Attach the leash and do a short tug test. With the bird calm and on your hand, give the leash a gentle, brief tug to simulate resistance. Watch how the harness responds: it should stay in position without rotating or riding up.
- Never leave a harnessed bird unsupervised. Even a well-fitted harness can become a hazard if the bird gets tangled in the leash around a branch or perch. The harness is for active, supervised outings only.
Training your bird to accept and walk on a leash
Here's the mindset shift that makes all the difference: you're not putting the harness on the bird, you're training the bird to put itself into the harness. That's not just a cute framing. It's the actual method that works, and it's what Lafeber and the Aviator's own training guidance both point toward. The bird's goal is to voluntarily put its head through the collar loop. Everything in the training process builds toward that moment.
Phase 1: Harness is just a weird object (days 1-5)
Leave the harness near the bird's cage without doing anything with it. Let your bird look at it, sniff it, maybe chew on it a little (watch they don't swallow anything). The goal is zero negative association. Once your bird is clearly unbothered by the harness sitting nearby, you can pick it up during handling sessions and just hold it without attempting to put it on.
Phase 2: Head through the loop (days 5-14+)
Open the harness collar loop into a large, unthreatening circle. Hold a treat on the other side of the loop and let the bird reach through to get it. Don't close the loop. Just repeat this until the bird is voluntarily poking its head through the loop for treats without hesitation. This step takes as long as it takes. Some birds get there in a few days; some take three weeks. Keep sessions short because bird attention spans are genuinely short, five minutes is often better than twenty, and end every session on a success. Once the bird is reliably putting its head through, gradually reduce the loop size over multiple sessions until the collar sits at a normal fitted position.
Phase 3: Full harness on, stationary (days 14-21+)
Once the bird tolerates the collar loop, work on the full harness. Use a bridge cue (a clicker, a whistle, or a consistent word like "yes") to mark the exact moment the bird does something right, then immediately follow with a treat. The bridge tells the bird precisely which behavior earned the reward, which speeds up learning significantly. Get the full harness on, give the bridge and a treat, then take it off. That's the whole session. Gradually extend the time the harness stays on before the treat arrives.
Phase 4: Leash on, indoor movement (days 21-30+)
Attach the leash and let the bird walk around on your hand or a perch indoors with the leash hanging loose. Let the bird feel the weight of the leash and get used to it without any tension. Then add very gentle resistance, basically just enough to feel the leash is attached. Reward calm behavior throughout.
Phase 5: Outdoor exposure
Don't jump straight to a busy park. Start in your backyard or a quiet outdoor area, ideally at a calm time of day without heavy foot traffic, loud machinery, or unfamiliar animals nearby. Outdoor environments are dramatically more stimulating than indoor ones, and a bird that's perfectly calm in your living room may become reactive and flighty the moment it hears a dog bark or sees a hawk overhead. Short outdoor sessions with lots of reassurance build the outdoor confidence gradually.
Setting up your first outdoor outing
A harness doesn't replace a carrier for transport. If you're driving somewhere, your bird travels in a secure carrier, harnessed or not. A good carrier matters even more if your bird might need frequent or longer trips between home and your outing spot. The harness goes on either before you leave or at the destination, not while you're managing a car ride. Frightened birds can and do bolt the moment a carrier opens, so practice the carrier-to-hand transfer indoors first until it's calm and reliable. The transition point from carrier to open air is the highest escape-risk moment of any outing.
For location, think about these factors before picking a spot:
- No raptors or large birds of prey in the immediate area. Even a distant hawk silhouette can trigger a panic response.
- Shade available. Birds overheat faster than most people expect, especially darker-feathered species. Plan outings in the morning or late afternoon and always have a shaded option.
- Low foot and vehicle traffic. Loud sudden noises (car horns, skateboard wheels, dogs barking) are common panic triggers for birds new to outdoor environments.
- No other pets off-leash. Even a friendly dog approaching at speed can cause a serious stress response.
- Know your exit. Have a plan for getting the bird back into a carrier quickly if something goes wrong. Practice it before you need it.
If you're planning regular outings, a good carrier is essential for the transit portion. The harness and carrier work as a team, not alternatives to each other.
Common mistakes and how to fix them
The bird escapes the harness
Nine times out of ten, this is a fit issue. If the neck loop is even slightly large for your bird's head, a determined bird will work it over their skull and be free in minutes. Go back to sizing, remeasure, and if you're between sizes, size down rather than up for the neck. Some birds are also escape artists who learn to contort their bodies in ways that shift the harness. For these birds, a vest-style harness with more coverage area is harder to manipulate than a minimal figure-eight design.
The bird panics in the harness
This almost always means you moved too fast through the training phases. Panicking in a harness is dangerous because a thrashing bird can injure itself against the restraint. Stop the session immediately, remove the harness calmly without making it a big event, and go back to an earlier training phase where the bird was comfortable. Some birds genuinely need six to eight weeks before they're harness-ready outdoors. That's not failure, that's just the timeline.
The bird chews the harness
Most birds will chew on the harness at some point during training, especially parrots. A little exploratory beak contact is fine and normal. Sustained chewing during an outing is a problem because it weakens the material. Redirect with a treat or a toy during sessions, and inspect the harness thoroughly after every outing for bite damage. If you see fraying or any weakening of the webbing, replace the harness before the next outdoor use. Don't patch it.
The harness shifts or rotates during use
A harness that rotates so the leash attachment point ends up on the bird's side or belly is usually either too loose in the body loop or not the right shape for your bird's body proportions. Stocky, wide-bodied birds (like caiques) often have this problem with standard figure-eight designs. A wider-panel vest harness will distribute better and stay in place more reliably. If you're looking for the best bird vest options, focus on proper fit, secure coverage, and bird-safe materials so your setup stays comfortable and secure outdoors.
The bird shows signs of overheating
Panting with an open beak, drooping wings, and holding wings away from the body are all signs a bird is too hot. Get into shade immediately, offer water, and head home. Don't wait to see if they "just need a minute." Overheating in birds escalates quickly. Dark feathers absorb more heat, and small birds overheat faster than large ones. Keep outings under 30 minutes in warm weather and always have water available.
Keeping your harness in good shape (and knowing when to retire it)
After every outing, wipe down the harness with a damp cloth and let it air dry completely before storage. Don't use soap, bleach, or any chemical cleaners directly on the material since residues can irritate skin and be toxic if the bird preens the harness. For a deeper clean, hand-wash in plain warm water and air dry fully. Never put a harness in a dryer.
Before every outing, do a quick inspection: run the webbing through your fingers looking for fraying, stiffness, or any weak points; check every buckle and metal component for cracks or deformation; and test the leash attachment point by giving it a firm tug. If anything feels compromised, don't use it. The replacement cost of a harness is trivial compared to the cost of losing your bird.
As for replacement timing, there's no hard rule by calendar. Replace when you see material degradation, when hardware starts to stick or deform, or when the bird has outgrown the fit (especially relevant for young birds still growing). A well-made harness used carefully and inspected regularly can last a couple of years. One that's been through heavy chewing or a lot of outdoor UV exposure may need replacing in under a year. Let the inspection tell you, not the date.
Quick-reference checklist before your first outing
- Harness inspected: no fraying, buckles intact, leash attachment secure
- Fit confirmed: one finger under neck loop, wings move freely, body loop not compressing feathers
- Bird completed all training phases calmly indoors
- Carrier ready for transport to and from the location
- Location scouted: shade available, low traffic, no visible raptors or off-leash dogs
- Outing planned for cooler part of the day (morning or late afternoon)
- Water available
- Sessions kept short (15-30 minutes maximum for a first outdoor outing)
- Exit plan in place if the bird panics
FAQ
Can I use a normal dog leash with a bird harness?
No. A bird leash needs to attach only to the harness back ring, with leash length and elasticity appropriate for a bird, so tension is distributed across the body. Using a rigid cord or a leash with clips that can swing and catch can create side loading and increase injury risk.
How long should the best bird leash be for my bird?
A common beginner starting point is about six feet with elasticity, but the best length depends on your bird and your walking space. Too long can let the bird spin into the leash, while too short can pull tension into the harness when your bird shifts, so choose a length that lets the bird move and step without the line going taut.
What if my bird keeps trying to get the collar loop off during the first few sessions?
That usually means the bird is ready to escalate training and you need to slow down, not that you should loosen the harness. Revisit voluntary head-through training with the loop alone, then refit so the neck loop sits properly at normal fitted position. If you are between sizes, sizing down for the neck is safer than sizing up.
Is it ever okay to attach the leash to the front of the harness instead of the back ring?
Usually no. Leash attachment is designed to work with the harness geometry, so attaching in the wrong place can rotate the harness onto the bird’s side or belly and put tension on areas you want to avoid. Stick to the manufacturer’s attachment point.
How do I know if the harness is too tight or too loose beyond general fit?
Check behavior and movement, not just measurements. If the bird holds its wings away, seems reluctant to breathe deeply, or struggles to step comfortably, the harness may be too tight or positioned wrong. If the bird can slide out quickly or the harness rotates, it is likely too loose in the body loop or not the right style for your bird’s proportions.
What should I do if my bird panics or thrashes after the leash is attached?
Stop immediately, remove the harness calmly, and return to an earlier phase indoors where the bird was comfortable (loop-only training or harness-on with leash hanging loose). Panicking outdoors increases the risk of self-injury and escape, and repeating earlier success helps rebuild trust.
Can I train a harness on a bird that won’t step up reliably yet?
Not as the first step. If the bird cannot step up calmly or handle handling sessions without escalating, the harness training will likely turn into a struggle. Build a foundation with step-up and trust first, then introduce the harness as the next phase.
Are there temperature or weather limits for using the best bird leash outdoors?
Yes. Watch for overheated bird signs like open-beak panting, drooping wings, and holding wings away from the body. In warm weather, keep outings short (often under 30 minutes), provide water, and prioritize shade immediately if temperatures rise.
How often should I clean the harness?
At minimum, wipe down after every outing and air dry fully before storage. If you need deeper cleaning, hand-wash in plain warm water, avoid soap or chemical cleaners that can leave residues, and never use a dryer since heat and tumbling can degrade materials.
Should I replace the harness based on time in use rather than inspection?
Use inspection rather than a calendar. Replace when you see fraying, stiffness, weakened webbing, hardware that sticks, deformation, or when the bird outgrows the fit. UV exposure and chewing can shorten lifespan, so frequent checking is the safest approach.
What’s the safest way to transition from carrier to open air during outings?
Practice the transfer indoors first until the bird stays calm during carrier opening and hand-off. When you’re ready outdoors, do not put the harness on while managing a car ride, and make the highest-risk moment (carrier opening) as brief and controlled as possible.
My bird chews the harness during training. Does that mean the harness is unsafe?
Not automatically, mild exploratory chewing can be normal. The issue is sustained chewing that damages materials. Redirect during training with treats or toys, and inspect after every outing for bite damage, fraying, or weakened webbing, then replace if you see any degradation.
Choose the best bird harness for cockatiel with fit, size, style comparisons, training steps, and escape-safe checks.
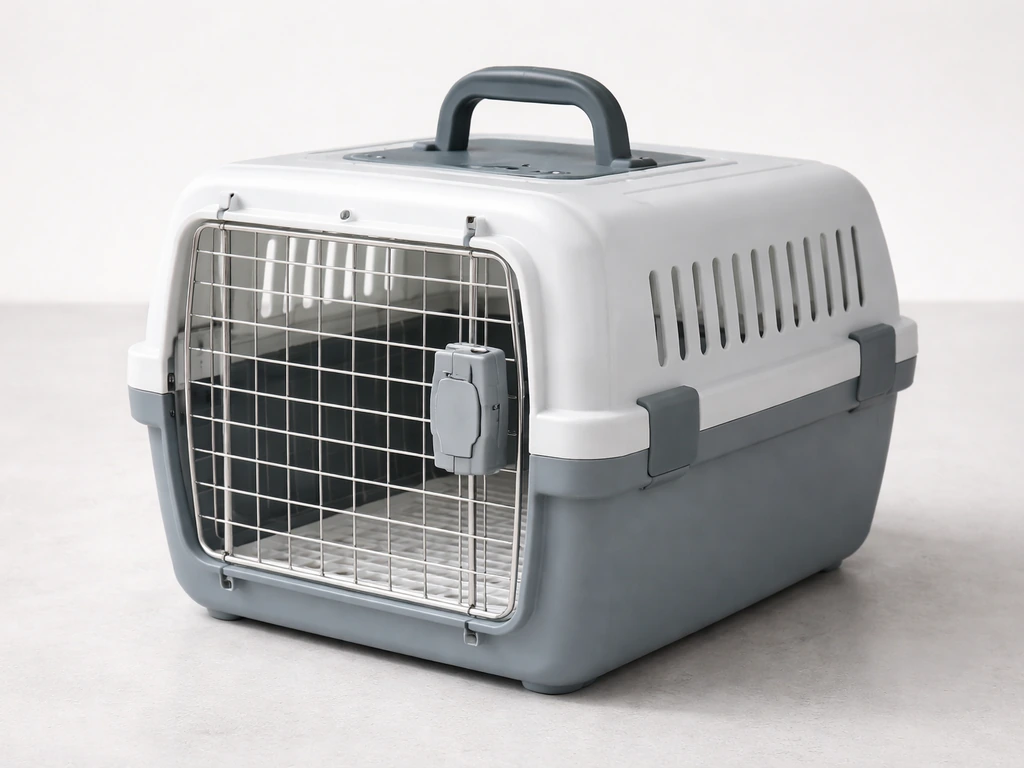
Choose the best bird carriers for vet visits and travel: sizing, safety features, ventilation, cleaning, and avoiding co
Choose the best bird harness: types, sizing, secure fit, training plan, outdoor safety, and troubleshooting for beginner