For most beginners, the best bird decoy is a life-size, full-body foam or plastic decoy matched to the species you actually want to attract, paired with a motion element (spinning wing, jerk cord, or even a simple wind-activated stake) to break up the static look. If you are using it for photography or observation rather than hunting training, a highly realistic painted decoy placed at eye level in the bird's preferred habitat will outperform a cheap silhouette every time. That said, 'best' shifts dramatically depending on which bird you are targeting, what you are trying to accomplish, and where you are set up, so let's work through all of it. If you are also searching for the best bird bait, start by matching the bait to the species and the local food sources they already rely on.
Best Bird Decoy Guide for Beginners: Choose, Set Up, Succeed

What 'best bird decoy' actually means (and for which situation)
The phrase 'bird decoy' gets used in several different contexts, and it is worth being upfront about what this guide covers. We are talking about outdoor decoys used to attract wild birds into view, whether for wildlife photography, bird watching, or hunting training scenarios. This is not about pet bird accessories or enrichment toys for captive birds, though if you keep birds and care about wild bird welfare, the ethical section at the end will still be relevant to you.
Once you are clear on the outdoor context, 'best' boils down to three things: target species, your specific goal (observe vs. train a dog vs. call birds into range), and the environment you are working in. A spinning-wing mallard decoy is excellent for duck photography in a marsh but useless for attracting mourning doves in a field. A crow decoy spread on a fence line is a different rig entirely from a goose decoy spread in a cut corn field. The single biggest mistake beginners make is buying a generic 'bird decoy' without anchoring it to a specific species and setting.
Choosing the right decoy type for your target bird
Static vs. motion decoys
Static decoys (rigid full-body, shell, or silhouette styles) are the baseline. They are cheap, durable, and easy to transport. They work well when birds are already committed to an area and just need visual confirmation that it is safe to land. Motion decoys add a spinning wing, a rocking body, or a ripple effect on water, and they are almost always more effective in low-pressure situations because moving decoys look alive from a distance. The catch: in areas where birds have been pressured, motion decoys can actually spook them because they have learned to associate spinning wings with danger. Start with motion if you are new to an area and dial it back if you notice birds flaring.
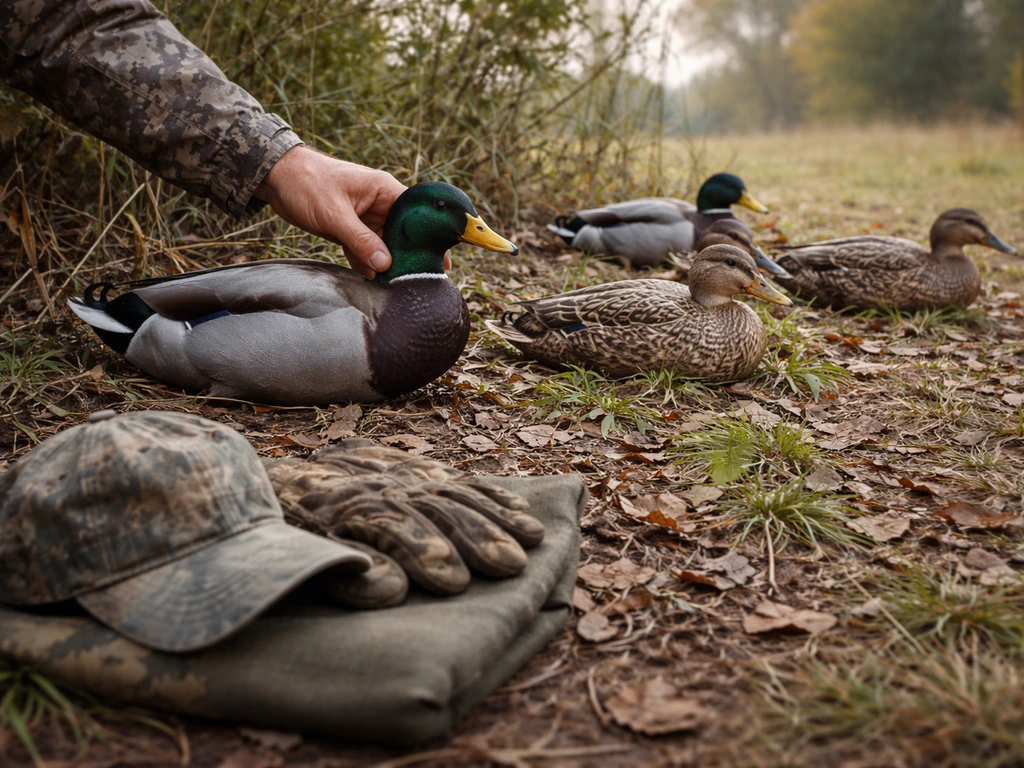
Full-body vs. silhouette vs. shell
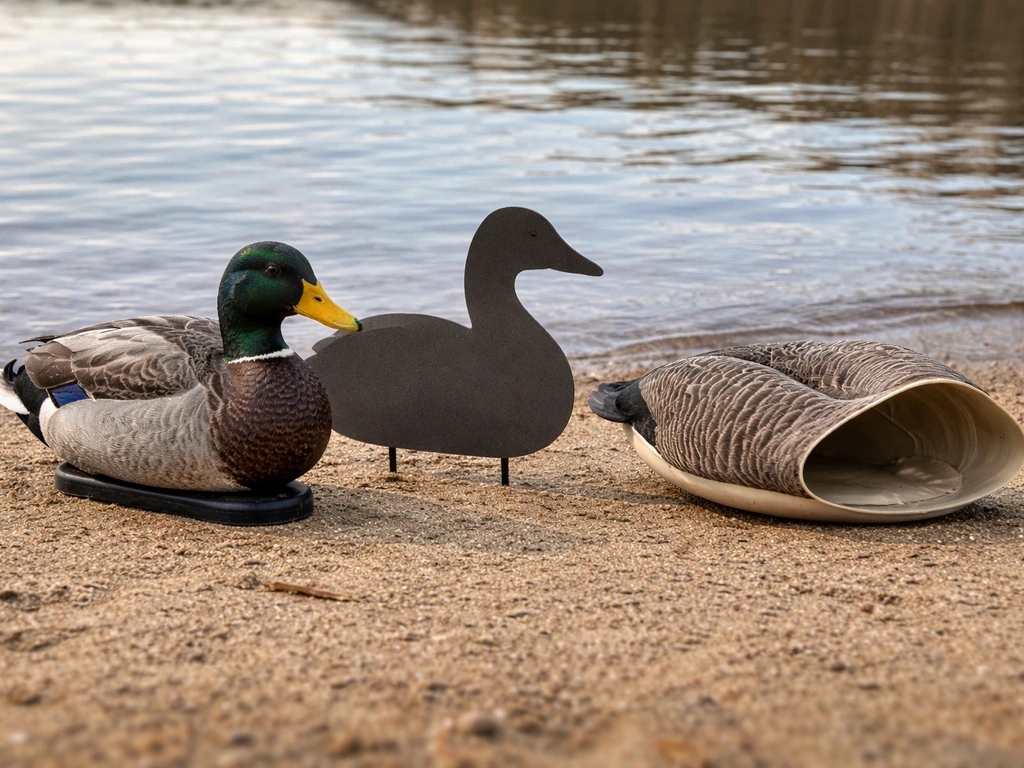
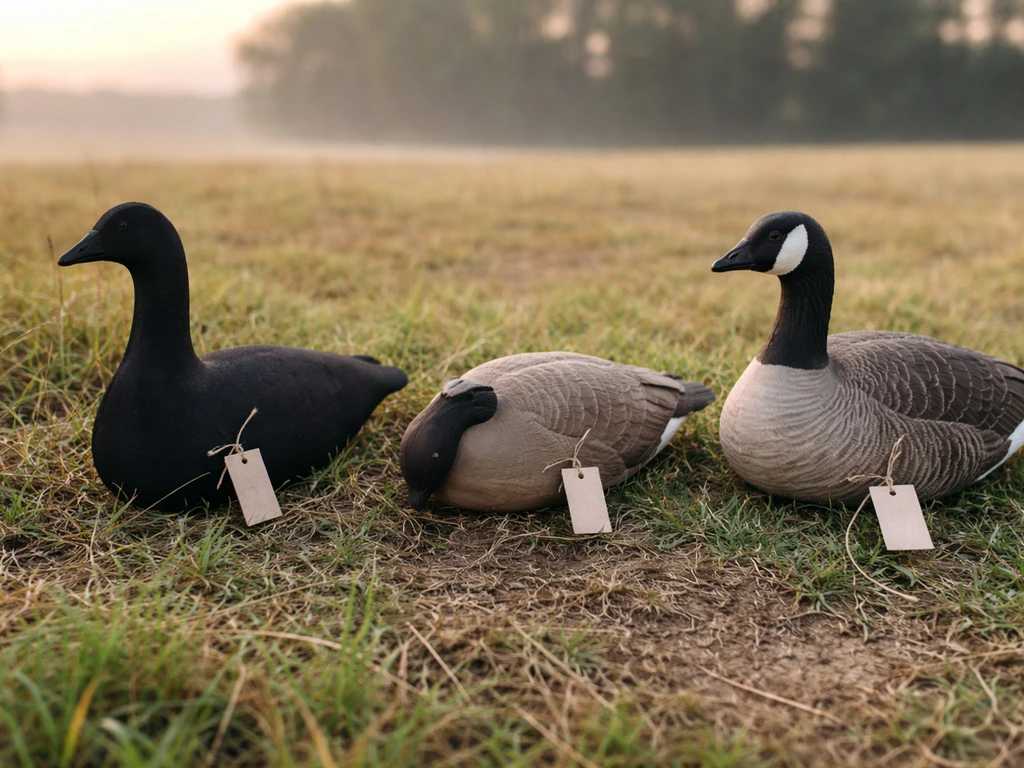
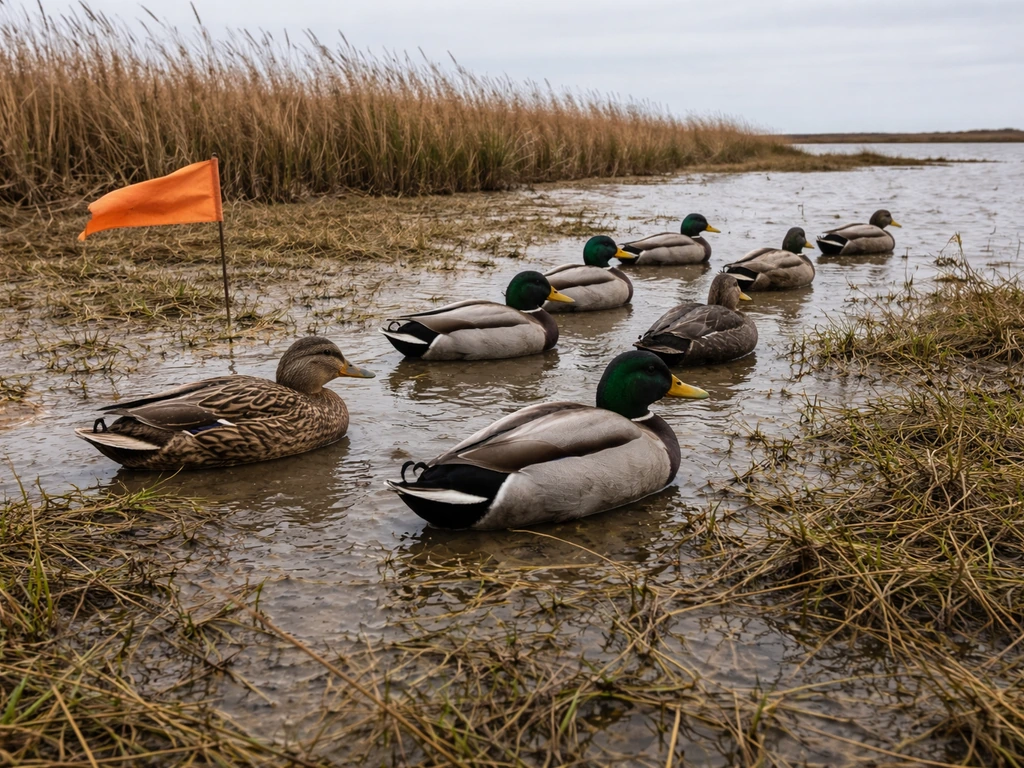
Full-body decoys are the most realistic at all angles and are worth the extra cost for geese and larger waterfowl. Shell decoys are hollow, stack flat, and are a practical middle ground for ducks. Silhouettes are 2D cutouts that work surprisingly well for geese in fields when the light hits them right, and they are extremely easy to carry in large numbers. For photography and observation, invest in full-body decoys with accurate paint. For a field spread where you need volume, mixing silhouettes with a handful of full-bodies at the landing zone gives you scale without breaking your back hauling gear.
Audio elements: caller vs. silent
Audio decoys or electronic callers paired with a visual decoy are a powerful combination, especially for species like Canada geese, mallards, and crows. Sound reaches birds before they can see your spread, giving you more time to work them. That said, in many jurisdictions electronic callers are restricted or outright prohibited, particularly for migratory birds during hunting season. If you are using decoys purely for photography or observation, a quality mouth call or a battery-powered caller (where legal) paired with a realistic decoy can double your encounters. Check local regulations before using any electronic caller.
Matching decoy to target species
| Target Bird | Recommended Decoy Type | Key Feature to Prioritize |
|---|---|---|
| Mallard/dabbling duck | Full-body or shell + spinning-wing motion decoy | Realistic paint, motion element |
| Canada goose (field) | Full-body mix with silhouettes for volume | Scale of spread, landing zone gap |
| Canada goose (water) | Full-body floaters | Natural resting postures |
| Snow/white geese | High-volume white silhouettes or rags | Spread size and contrast |
| Mourning dove | Clip-on or stake-mounted dove decoys | Perching posture on fence/wire |
| Crow | Crow decoys + owl or hawk decoy nearby | Social distress cues |
| Wild turkey | Full-body hen or strutter decoys | Posture and realistic coloring |
Making decoys work in real conditions
Location and habitat first
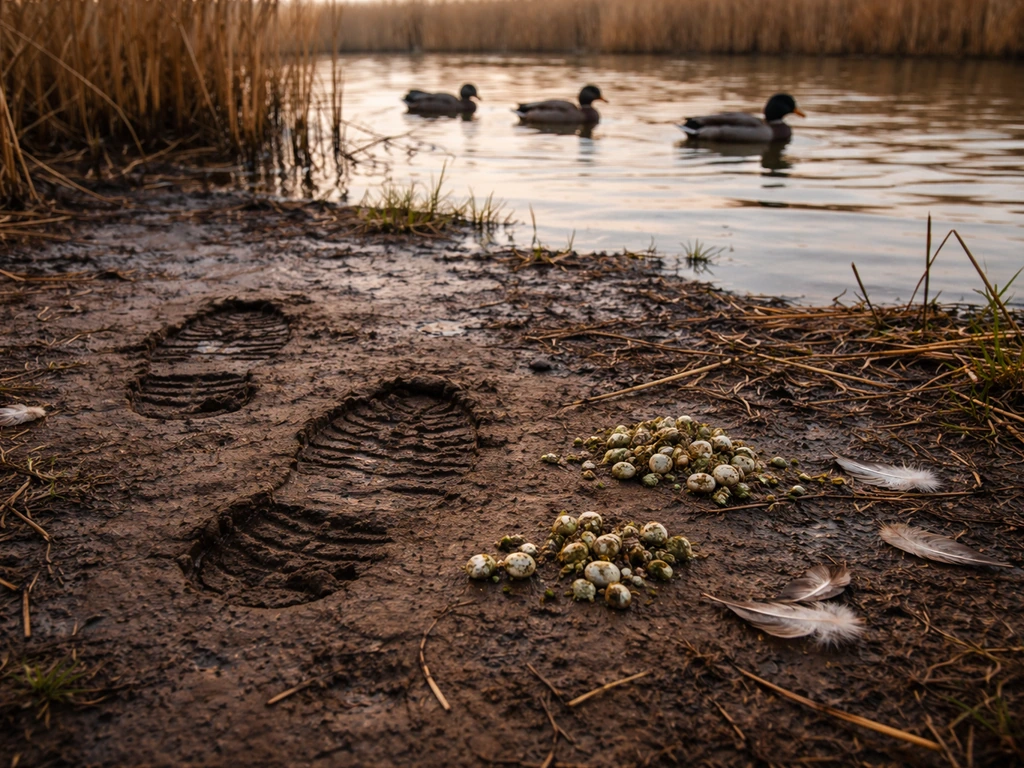
No decoy overcomes a bad location. Birds go where food, water, and shelter already exist. Scout the area before you set up: look for tracks, droppings, feathers, feeding sign, and roost trees. If birds are not using that field or pond on their own, a decoy spread will rarely change that. Place your decoys where you have already seen the target species, not where you wish they would be.
Wind and light orientation
This is the detail most beginners skip and then wonder why birds flare at the last second. Almost all birds land into the wind, so your decoys should face into the wind and your landing zone should open up downwind of your position. Texas Parks and Wildlife's hunter education guidance specifically highlights how waterfowl land into the wind, and setting up your spread to take advantage of this gives you a predictable approach angle.
Ducks Unlimited notes that there are many decoy-placement strategies, and that learning how birds respond behaviorally can improve results. On the light side, keep the sun at your back when possible.
Birds flying toward your spread will be looking into the light, which helps hide your position and makes your decoys appear more vivid rather than backlit and flat.
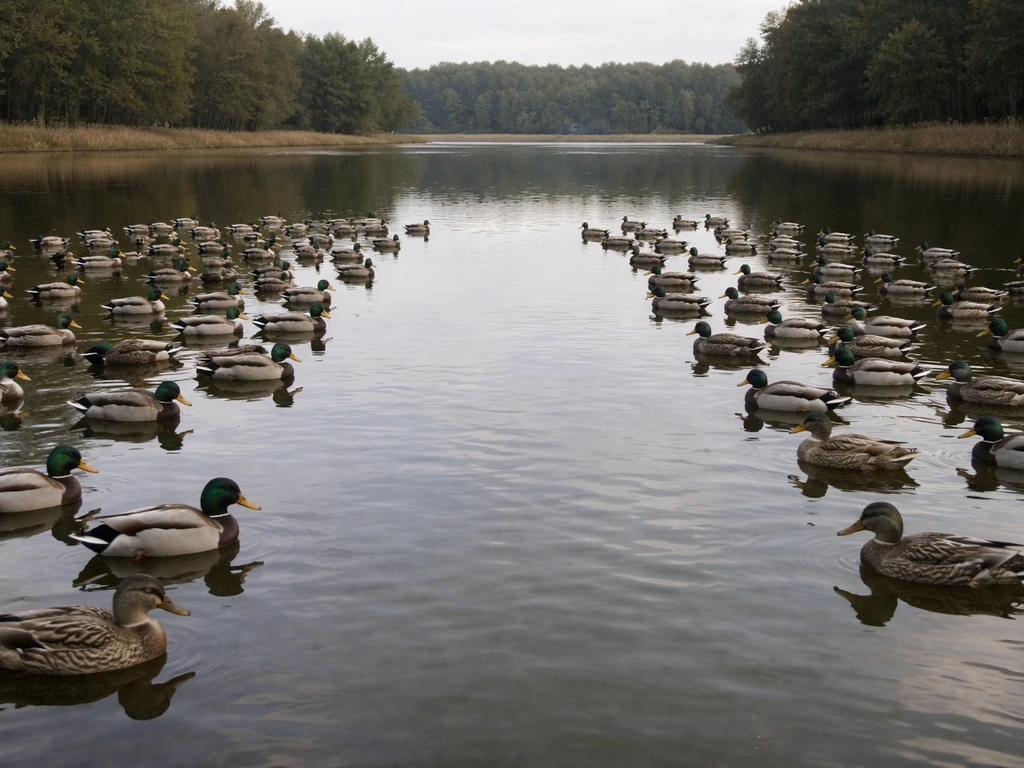
Distance and spread size
A useful approach from waterfowl guides is to use two groups: a larger spread visible from altitude to pull birds into the area, and a smaller, tighter cluster with a clear landing gap to bring them in close. For photography, this means placing a group of five to eight decoys with a clear open patch in front where birds will actually land, with you positioned just back from that gap. A stable camera support matters too, which is why choosing the best monopod for bird photography can help you keep steady framing at long distances For photography, this means placing a group of five to eight decoys. For geese specifically, scale matters more than realism at long range, which is why the old snow goose trick of using white rags or newspaper to create sheer volume still works.
Timing your setup
Get your decoys out before first light for waterfowl and early morning for most songbirds and upland species. Birds move at dawn and again near dusk. Midday decoy use for ducks and geese is generally unproductive unless weather is pushing birds. Crows are more active throughout the day. Turkeys are most responsive to decoys in the first two hours after sunrise during spring breeding season. Knowing your species' daily rhythm is just as important as the decoy itself.
Placement rules: attracting vs. spooking
The single most important structural rule: leave a landing zone. Decoys packed too tightly with no open space in front of them look unnatural to incoming birds, because real birds always leave room to land without colliding with each other. Cabela's waterfowl field guides emphasize this clearly, recommending a gap in front of and to the sides of your position so birds can slide in rather than being forced to commit to a wall of decoys. For a basic duck spread, put the gap directly in front of where you are watching or photographing from.
Decoy posture matters more than most beginners realize. A spread of all alert, heads-up decoys looks like a group of nervous birds. Mix in some feeding postures (heads down), resting postures, and preening poses to signal that the area is calm and safe. For geese, a sentry decoy or two on the perimeter with the rest in relaxed poses reads as a natural flock.
Height and anchor points also affect whether birds commit. Dove decoys should be clipped to wires, fence lines, or dead branches at perching height, because doves sitting on the ground look wrong to incoming birds. Duck floaters should sit naturally in the water without tipping or spinning erratically in light wind. If your decoys spin freely on a stake or anchor line and look chaotic, they will spook more birds than they attract. Secure them appropriately for conditions.
Gear checklist and accessories
Beyond the decoys themselves, a few accessories make the difference between a setup that works and one that wastes your morning.
- Stakes and ground anchors: heavy-duty wire or screw-in stakes keep decoys oriented correctly in wind instead of spinning randomly
- Decoy line and clips: corrosion-resistant clips for floaters, braided decoy cord rated for the conditions
- Motion stake or jerk cord: a simple jerk cord rigged to one or two decoys adds lifelike movement without a battery
- Decoy bag or backpack: mesh bags allow decoys to dry and are far easier to carry than trash bags for 12 to 18 decoys
- Camouflage blind or layout blind: staying hidden is as important as decoy quality; birds do not commit if they spot you
- Gloves and face mask or face paint: skin and hand movement are visible to birds at distances you would not expect
- Pruning shears: for quick blind-building with natural brush for concealment
- Caller or mouth call: matched to your target species; a call that does not match your decoy species is counterproductive
- Waders or waterproof boots: for setting out floaters in cold or muddy conditions
If you are just starting out with bird photography or observation and do not want to invest heavily upfront, a six-pack of quality shell or full-body decoys for your target species plus a simple stake kit will get you into the field productively. You do not need a 48-decoy spread on day one.
Why your decoy setup is not working (and how to fix it)
Birds are flaring at the last second
This usually means they spotted you, not that the decoys are wrong. Check your concealment first. Are you moving? Is sunlight hitting your face or binoculars? If you are positioned upwind of your spread, birds flying in will have time to look you over before committing. Cabela's field advice is blunt about this: being incorrectly positioned relative to birds and wind is one of the top reasons spreads fail even when the decoys look great. Reposition downwind of the landing zone.
Birds are landing far from your spread
Your spread is too small or your landing zone gap is not positioned correctly. Add volume if the species calls for it (geese in particular respond to spread size), and make sure the open landing space is in front of, not to the side of, your decoys. Also check that your decoys face into the current wind direction. A spread that looks like birds are all trying to fly in the same wrong direction will not read as natural.
Birds are ignoring the spread entirely
Wrong location is the most likely cause. Return to scouting basics. If no birds have used that spot recently, even perfect decoys will not manufacture traffic. Second possibility: wrong species decoys. A group of Canada goose decoys will not pull mallards in the same way mallard decoys will. Match your decoys to the species you are actually seeing in the area.
Motion decoys are spooking birds
In high-pressure areas, birds wise up to spinning wings fast. Remove the motion element entirely and go static for a session or two. If that produces better results, you are dealing with pressured birds. Save the motion decoy for early season or low-traffic locations.
Decoys look great but results are inconsistent
Timing and weather. Cold fronts push birds and increase movement dramatically. Overcast days tend to produce better decoy results than bright bluebird days for waterfowl. Wind helps motion decoys look more realistic. If you are setting up on calm, sunny, warm mornings and getting nothing, the conditions are fighting you. Be patient and track which weather patterns produce your best encounters.
Legal and ethical boundaries you need to know
This is the part that does not get enough attention in gear-focused guides, and it matters a lot. Decoy use is regulated differently depending on your location, the species involved, and what you intend to do after attracting birds. Here are the key areas to check before you set up.
- Migratory bird protection: In the United States, most waterfowl and songbirds are protected under the Migratory Bird Treaty Act. Using decoys to harass, trap, or injure protected species without the appropriate permit is a federal offense.
- Electronic callers: Many states prohibit electronic callers for migratory game birds during hunting seasons. Check your state's regulations annually, as these rules change.
- Protected and non-game species: Decoys used near nests, roosting sites, or territories of threatened or endangered species can cause harmful disturbance. Know which species in your area carry protected status.
- Private land: Always have written permission before setting up on any property you do not own. Trespassing with hunting or photography gear carries real legal consequences.
- Hunting license requirements: If there is any chance your activity could be interpreted as hunting, hold the appropriate license for your state and season. This applies even to photography setups that use calls or decoys.
- Trapping: Using decoys to funnel birds into a trap is almost universally regulated. Even banding or scientific trapping requires federal and state permits.
- Stress to wild birds: From a welfare standpoint, if you are an observer or photographer, be mindful that prolonged decoy use can stress birds, especially during nesting season. Limit your sessions and avoid disrupting feeding or brooding behavior.
If you are coming to this topic as a bird enthusiast who keeps pet birds or is considering getting one, the ethical thread connects directly: understanding how wild birds behave, what stresses them, and what protects them makes you a better bird keeper overall. The same curiosity that drives you to watch wild birds with a decoy is the foundation of responsible bird ownership.
Where to go from here
Start simple. Pick one target species you have already seen regularly in a specific location. Buy three to six quality full-body or shell decoys that match that species, add a basic stake kit, and get out there before sunrise. If you are specifically shopping for the best choke for bird hunting, pair your decoy choice with the right shot pattern for your target species and range. Get your concealment right before you worry about spread optimization. Once you have had a few sessions and watched how birds react, you will know exactly which adjustments to make. Most beginners over-complicate their first setup and under-invest in their hide. Flip those priorities and your results will improve immediately.
If decoys are part of a broader interest in wild bird behavior, pairing this with quality optics and a good field guide will deepen what you get out of every session. And if you are interested in attracting birds to a permanent setup at home, topics like bird feeders, poles, and station placement connect naturally to what you have learned here about location, species matching, and creating an environment birds actually want to use. If you want a stable setup for the Bird Buddy, choosing the best pole for Bird Buddy (with the right height and sturdy mounting) makes it much easier to keep the camera at the right angle bird feeders, poles, and station placement.
FAQ
How do I know if my motion decoy is spooking birds instead of attracting them?
In calm conditions, motion elements can look unnatural if they move too fast or on the wrong axis. Start with a slower motion setup (gentle wind or a light jerk cord), and if birds flare repeatedly, switch to fully static decoys for that location so you can isolate whether the movement is the problem.
Can I use the same decoy spread for multiple bird species?
Yes, but it depends on species behavior. Birds like geese and ducks typically respond to realistic field scale and an appropriate approach angle, while upland birds often require perching, visibility, and cover features rather than a big “waterfowl style” spread. If you change species, rebuild the setup around that species’ landing and perching habits instead of only swapping decoy models.
What should I do if birds are nearby but never land in my landing gap?
Avoid “set and forget” timing. If you arrive after birds have already shifted their routines for the day, decoys rarely create new traffic. Use short checkpoints, like 15 to 30 minutes of observation, and adjust only when you can see birds in the area committing toward your wind-facing landing zone.
Could my concealment be causing last-second flares, even if my decoys look realistic?
Don’t rely on the decoys alone for visibility. Check your camera or binocular position, your face concealment, and whether your gear silhouette shows above grass or reeds. Even with perfect decoys, movement at the wrong time (standing up, grabbing a camera, shining light) can be the trigger that causes the last-second flare you are trying to prevent.
How many different decoys and accessories should I buy before I start experimenting?
It’s generally better to reduce complexity at the start. Choose one target species, use the recommended number of decoys with a clear landing gap, and then add variables one at a time, like posture mix, height/anchor, or the audio component (if legal). Changing too many factors at once makes it hard to tell what improved or hurt your results.
What’s the best way to handle pressured birds in an area that used to work?
For pressured waterfowl, many beginners overuse motion. A practical approach is to run two sessions at the same spot and wind direction, one fully static and one with motion. If static outperforms motion, keep it static in that area and save motion decoys for early season or lower-traffic sites.
What are the most common landing-zone mistakes beginners make?
Common “right idea, wrong execution” errors include placing the open landing space off to the side, facing decoys away from the wind, or having the entire spread behind your viewing position so birds approach toward you rather than into the gap. Re-check wind direction, then stand where birds would land, and confirm the gap is in front of them.
How can incorrect decoy height or anchoring reduce my success?
Yes, height mismatches can matter even if the decoys are the right species. If dove decoys sit too low or duck floaters tilt or spin in light wind, incoming birds may interpret it as unsafe or wrong. Adjust mounting points to perching height, and anchor floaters so they drift naturally and remain stable.
How do I troubleshoot whether the problem is my decoys versus the location?
If you’re unsure whether you’re dealing with a “no birds” problem or a “bad setup” problem, run a control check. Scout for recent sign, confirm the wind and approach look natural, and then place decoys only where you’ve already seen the species. If there is no feeding or roosting use, assume location is the limiting factor before buying upgrades.
What setup changes help most for bird photography compared with hunting training?
For photography, prioritize the front landing gap and camera stability over adding more decoys. If your camera placement forces you to block your own view or makes you drift during shooting, you can lose the best angle at the moment birds commit. Use a steady support and keep your shooting position just back from the gap you want birds to use.
If audio is legal, how should I use it so it doesn’t backfire?
Audio can be powerful, but if it triggers a negative response, stop immediately. If allowed where you are, use sound as an added layer to a realistic visual, not a substitute for wind, concealment, and correct landing space. Also consider that birds may respond differently at various times, so keep notes on time of day and weather.