Bird taxidermy for beginners is absolutely possible, but there's a hard truth most guides skip: in the United States, you almost certainly cannot legally keep, preserve, or mount most wild birds you find without running into federal law. The Migratory Bird Treaty Act (MBTA) covers nearly every native North American songbird, raptor, and waterbird, and possessing even a single feather without proper authorization is a federal violation. That said, there are legal paths forward, there are safe ways to start, and there are smart alternatives if the legal hurdles are too high for your situation. Here's how to navigate all of it honestly.
Bird Taxidermy for Beginners: A Legal, Safe Starter Guide

Marcus Chen
29 May 2026
What bird taxidermy is (and isn't) for beginners
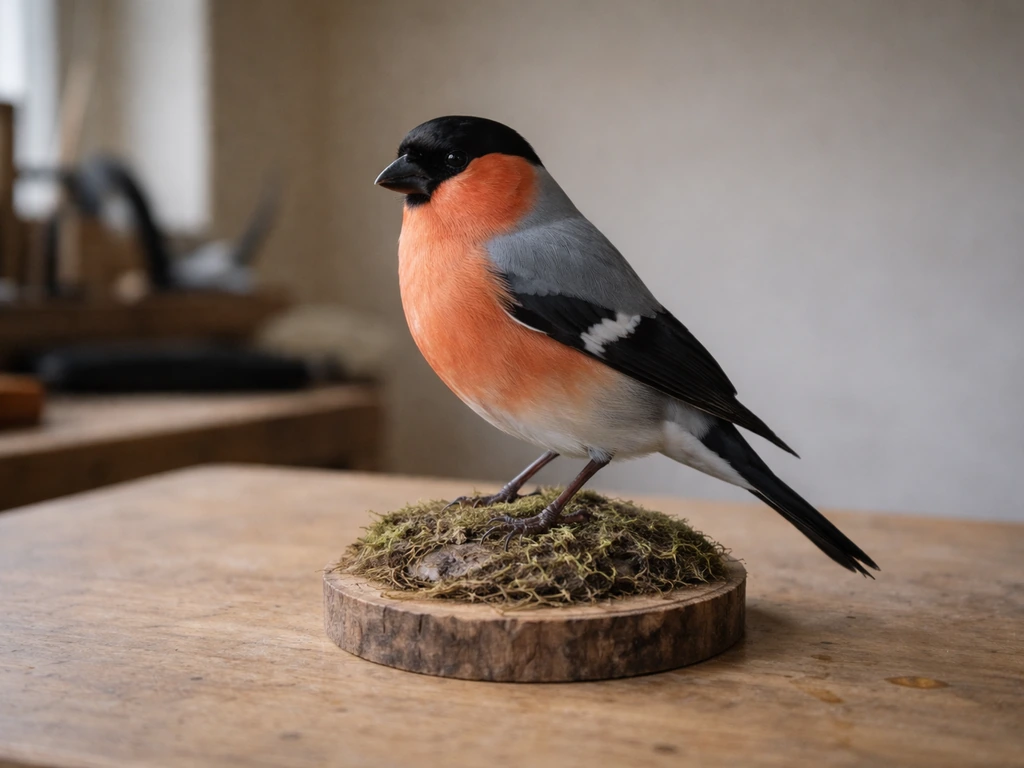
Taxidermy is the process of preserving a bird's skin and feathers over an artificial form so it looks lifelike in display. For birds, this typically means skinning the specimen, cleaning and preserving the skin with a borax-based compound or other agent, fitting it over a commercial foam form, and positioning it for drying and final display. It is not a quick craft project. A small bird like a sparrow or finch takes hours of careful work, and feathers are brutally unforgiving of mistakes. One slip with a scalpel or one rough handling moment and you can ruin a specimen you cannot legally replace.
What taxidermy is NOT: it is not a way to memorialize a pet bird at home without preparation and legal consideration (more on that below), it is not embalming, and it is not the same as freeze-drying, which is a separate preservation method. A lot of beginners also assume that any dead bird they find in the yard is fair game to pick up and work with. It is not. The species question matters enormously before you touch anything.
It's also worth being clear about the audience here: if you're a first-time bird owner wondering how this connects to caring for a living pet bird, the answer is that it doesn't, really. Taxidermy is a separate discipline involving deceased specimens, specific chemicals, and legal frameworks that have nothing to do with keeping a healthy parrot or canary. Good bird care is about enrichment, diet, air quality, and companionship.
If your goal is truly to learn bird care, start by focusing on day-to-day enrichment, diet, and air quality rather than preservation planning Good bird care. If you’re looking for love bird care tips, focus on the basics of enrichment, diet, and air quality rather than preservation. Taxidermy is a completely different skill set, and you shouldn't let curiosity about one bleed into how you handle your living birds.
Legality and ethics: permits, protected species, and humane handling
This is where most beginner guides bury the lead. Federal law under the MBTA prohibits possessing, transporting, or selling migratory birds, their feathers, nests, or eggs without a federal permit. This covers the vast majority of wild birds in North America. It doesn't matter if the bird was already dead when you found it. Picking it up and taking it home to mount it is illegal without the right authorization.
As of late 2024, USFWS updated its rules: a regulatory authorization under 50 CFR § 21.16 now covers opportunistic salvage of dead migratory bird specimens, but there's a critical catch. The specimen must be immediately turned over to an authorized institution, like a natural history museum, wildlife rehabilitation center, or university with the appropriate permits. You, as a private individual, are generally not authorized to keep it. If you want to perform taxidermy services on migratory birds for others, USFWS requires a Federal Taxidermy permit (permit 3-200-8). And once a migratory bird is mounted, legal possession is generally restricted to qualified public institutions holding Special Purpose Possession-Dead permits.
So what CAN a beginner legally work with? The short list includes non-native, non-migratory species not protected under the MBTA, such as European Starlings, House Sparrows, and feral Rock Pigeons in the U.S. These three species are specifically excluded from MBTA protections. Domestically raised poultry (chickens, ducks raised for food) is another legal option and is actually a common starting point for beginners because the specimens are legal, available, and larger birds are easier to work with. If you want to work with a protected species for educational display, you need to apply for a Special Purpose Possession Education permit (3-200-10c) and operate under its strict requirements.
On the ethics side: humane handling means never sourcing a bird by killing a protected wild species. If you find a bird that appears sick or injured, USFWS and NPS guidance is consistent: contact your local USFWS office, a wildlife rehabilitator, or your state wildlife agency before doing anything else. Don't improvise. And always document everything: where you found the specimen, the date, the species (to the best of your ability), and how it was obtained. The USFWS Feather Atlas forensics resource is a useful reference for species identification, though even that resource notes that definitive ID requires expert confirmation.
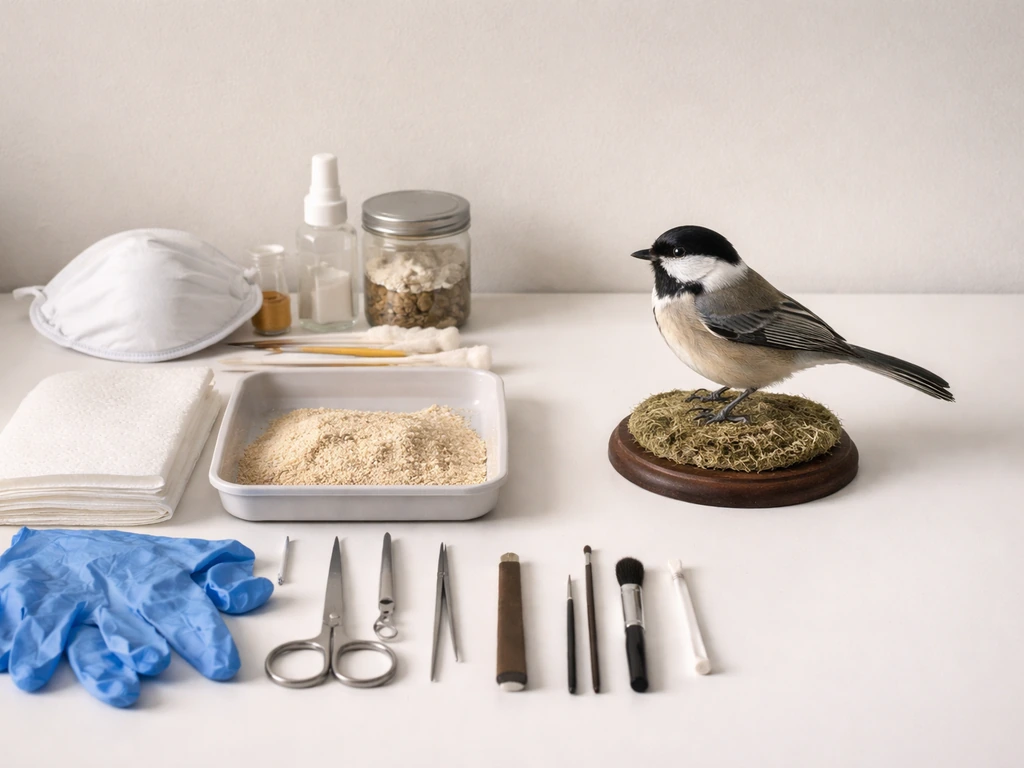
Safety and materials checklist for a first attempt
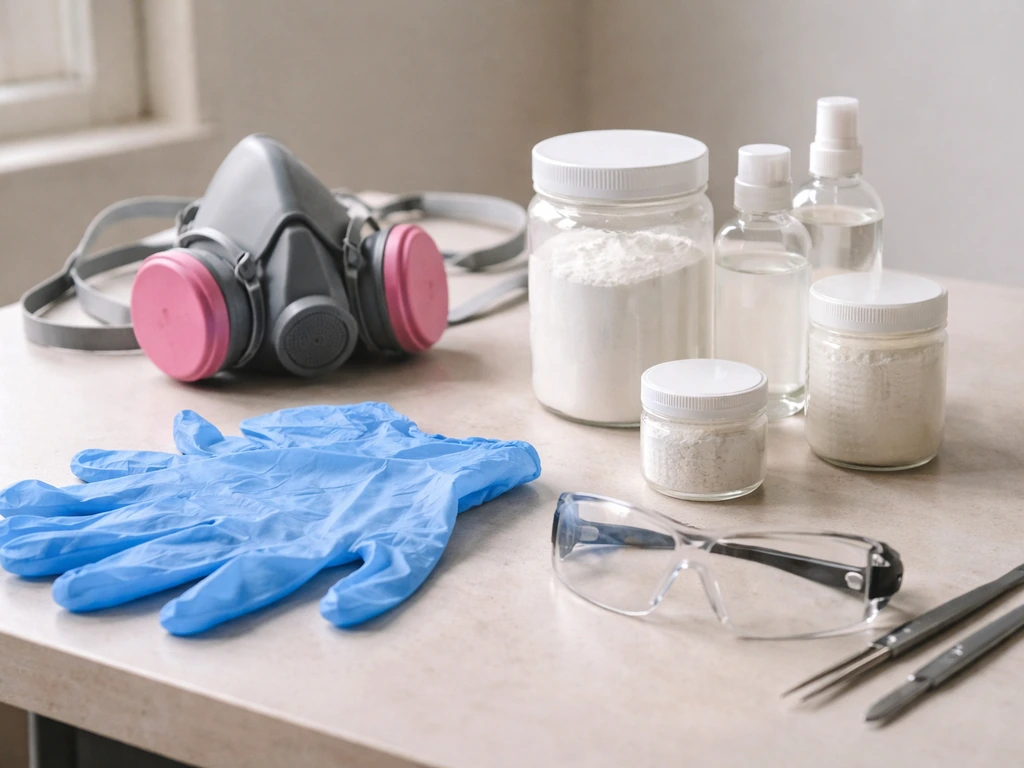
Before you touch a specimen, get your safety setup right. Dead birds can carry salmonella, avian influenza, and other pathogens. NPS guidance for handling found birds is clear: use gloves, avoid touching your face, and double-bag the carcass for transport or storage. Don't let children handle specimens. Work in a well-ventilated area, especially if you're using any chemical preservatives.
On chemicals: many beginner guides recommend borax as a preservative and degreaser, and it's the safest option available. Avoid formaldehyde or formalin unless you have specific training. OSHA and the CDC both classify formaldehyde as a regulated chemical hazard with real occupational exposure risks, and it has no place in a first-timer's home workspace. Borax is effective for most small bird projects and dramatically safer.
- Nitrile gloves (two pairs minimum, in case one tears)
- Safety glasses for any skinning or chemical work
- Disposable apron or old clothes you don't mind staining
- Sharp scalpel or X-Acto knife with spare blades (dull blades tear feather follicles)
- Forceps and scissors (curved and straight)
- Borax (plain, not scented) as your primary preservative
- Wire (stainless steel, 18-20 gauge for small birds) for internal support and leg positioning
- Commercial foam bird form sized to your specimen
- Straight pins (at least 50-100 for positioning feathers during drying)
- Thread and a curved needle for closing the skin
- A rigid foam board or flat surface for working and drying
- Zip-lock bags and a small cooler if you need to store the specimen before working
- Permanent marker and paper tags for labeling the specimen with species, date, and location
One materials note that trips up beginners: do not use regular steel wire. It rusts over time and can stain and structurally damage your mount from the inside. Stainless steel wire is the correct choice. NPS museum guidance flags this exact issue, and it's the kind of detail that seems minor until your display mount starts showing rust stains through the feathers two years later.
Beginner workflow: from specimen handling to preservation and final display
This is a high-level overview. Bird taxidermy is a hands-on skill that benefits enormously from watching experienced practitioners work before you attempt it yourself. If you're troubleshooting your first display setup, you may also run into bird table problems like unstable mounting surfaces or poor placement that accelerates damage. These steps give you the logical sequence so nothing surprises you.
- Obtain a legal specimen and document it immediately: write down species (or best guess), date, location, and how it was acquired. Label it before anything else.
- Assess and photograph the bird: take clear photos of the bird from multiple angles before any handling. Note injuries, feather condition, and coloration. This documentation is useful both legally and as a reference for final positioning.
- Store or refrigerate until ready to work: if you cannot begin immediately, wrap the bird loosely in a paper towel, place it in a sealed plastic bag, and refrigerate (not freeze, which can damage feather follicles) for up to 48 hours. For longer storage, freezing is acceptable but thaw slowly in the refrigerator before working.
- Prepare your workspace: cover your work surface, set out all tools, put on gloves and safety glasses, and ensure you have good ventilation.
- Skin the bird: make a clean incision along the ventral (belly) midline from just below the sternum toward the vent. Carefully separate the skin from the body, working gently around the wings, legs, head, and tail. The skull is usually kept inside the skin for birds, with the eyes removed and replaced with glass eyes later.
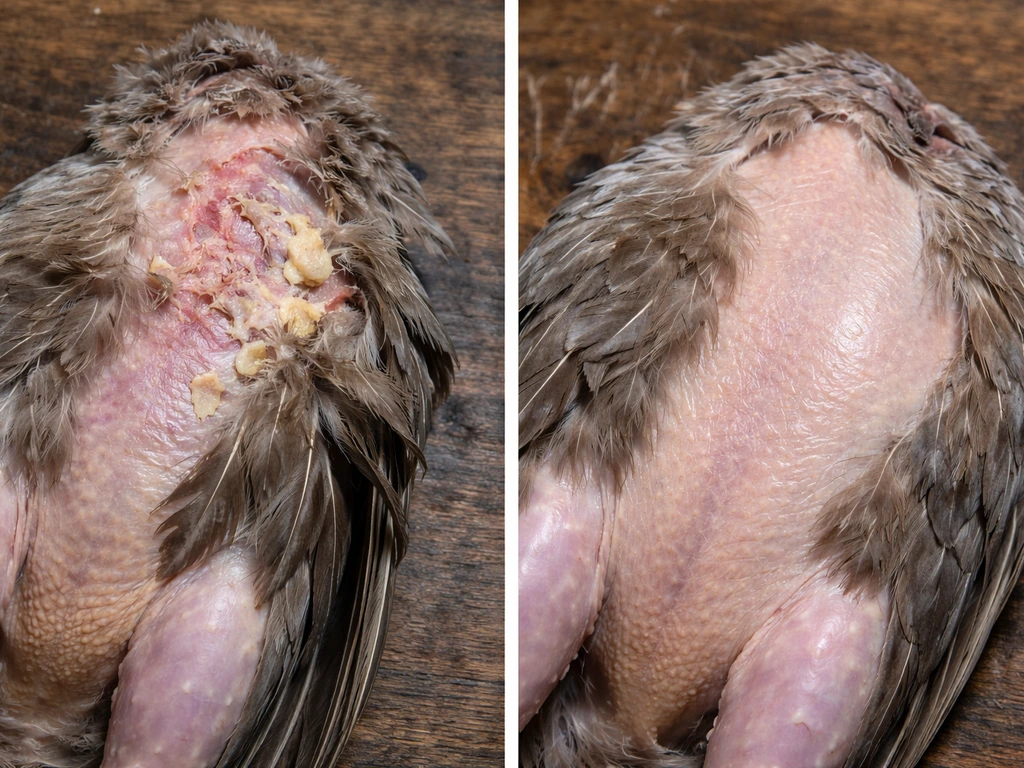
- Clean the skin: remove all fat and meat from the skin using scissors and a dull scraping tool. Thoroughness here is critical. Any remaining tissue will rot and cause odor, staining, and pest attraction.
- Apply borax: coat the entire inner surface of the skin generously with borax. It dehydrates and preserves the tissue and also helps with feather cleanliness.
- Select and prepare your form: choose a commercial foam form that matches your bird's body measurements as closely as possible. Most suppliers sell forms by species and approximate weight. Modify the form with a carving tool or sandpaper if needed.
- Mount the skin over the form: carefully work the skin back over the form, positioning the wings, legs, and head. Insert glass eyes (properly sized for the species) into the eye sockets.
- Wire and position: if the pose requires leg support, thread stainless steel wire through the legs and into the form. Use straight pins to hold feather groups in correct alignment while the specimen dries.
- Dry the mount: drying takes 2-6 weeks depending on bird size and ambient humidity. Keep the mount in a stable, dry environment away from direct sunlight, pests, and drafts during this period.
- Remove pins and do final grooming: once fully dry, remove all pins carefully. Use a soft brush to gently realign any feathers that dried slightly out of position. Do not use water or steam on a dry mount.
Common mistakes and how to avoid ruining feathers or skins
The most damaging mistake I see beginners make is rushing the skinning step. A dull blade or impatient technique tears feather follicles from the skin and creates bald patches that cannot be fixed. Slow, deliberate cuts with a sharp blade make all the difference. Change your scalpel blade frequently; they dull faster than you expect.
The second most common disaster is incomplete fat removal. Any fat or meat left on the skin will decompose, which causes odor, staining through the feathers, and attracts dermestid beetles. These beetles are a natural history collection's worst nightmare: their larvae feed specifically on dried skins, feathers, and hair. A specimen that isn't thoroughly cleaned and properly stored can be reduced to fragments within weeks of a beetle infestation.
- Using a dull blade: always start with a new, sharp blade and replace it as soon as cutting resistance increases
- Grabbing the bird by delicate parts: support the full body from below, never grab by the bill, tail, or legs, as this stresses and breaks fragile anatomy and dislodges feathers
- Skipping documentation: failing to label the specimen with species, date, and origin creates legal risk and makes it impossible to verify compliance if questioned later
- Choosing the wrong form size: a form that's too large will stretch and distort the skin; too small and it will wrinkle. Measure the bird before ordering.
- Inadequate borax application: thin or patchy application leads to unpreserved areas that rot and smell
- Pinning feathers incorrectly during drying: pins placed through feather vanes (the flat part) can permanently crease or split the feather; pin at the base or along the shaft instead
- Allowing the drying mount to be exposed to pests: a drying mount in a garage or basement is an open invitation for dermestid beetles and moths; use a clean, sealed space
- Using tap water to clean feathers: water can mat and damage feathers during the skinning process; use dry cornmeal or clean paper towels instead
When to skip DIY: working with a licensed taxidermist or alternatives
Honestly, if the bird you want to preserve is a protected migratory species, skip the DIY route entirely. Contact a federally permitted taxidermist (they hold permit 3-200-8 from USFWS) if you want a mounted specimen for educational purposes through a qualified institution. These professionals have both the legal authorization and the skill set to handle the work correctly. Paying a licensed taxidermist is not an admission of failure. It is the legally correct and often practically smarter choice for most first-timers working with wild birds.
Another excellent option is contacting your local natural history museum, wildlife rehabilitation center, or ornithology department at a nearby university. Many of these institutions accept legally salvaged specimens and can connect you with their collections teams. This gets the specimen into a place where it will be properly cared for and used for genuine education or research, which is a better outcome than a first-timer's mount that may not last.
For people whose primary motivation is memorializing a pet bird specifically, there are alternatives to full taxidermy that don't require the same legal and chemical complexity. Freeze-drying is one option, performed by specialized taxidermy studios that handle the entire process, and it produces exceptionally lifelike results with no DIY chemical exposure. Memorial enclosures (preserving a few feathers in a sealed shadow box or resin) are another meaningful option that doesn't require a full mount. A portrait commission from a wildlife artist is another route that some people find more personally meaningful than a physical mount.
Care after the mount: storage, cleaning, display, and long-term preservation
A finished bird mount is not maintenance-free. Feathers are keratin structures that degrade with UV exposure, humidity swings, and pest damage. Display your mount away from direct sunlight and away from heating/cooling vents that cause humidity fluctuations. A stable environment in the range of 65-70°F and 45-55% relative humidity is ideal, which aligns with what museum collections science recommends for natural history specimens.
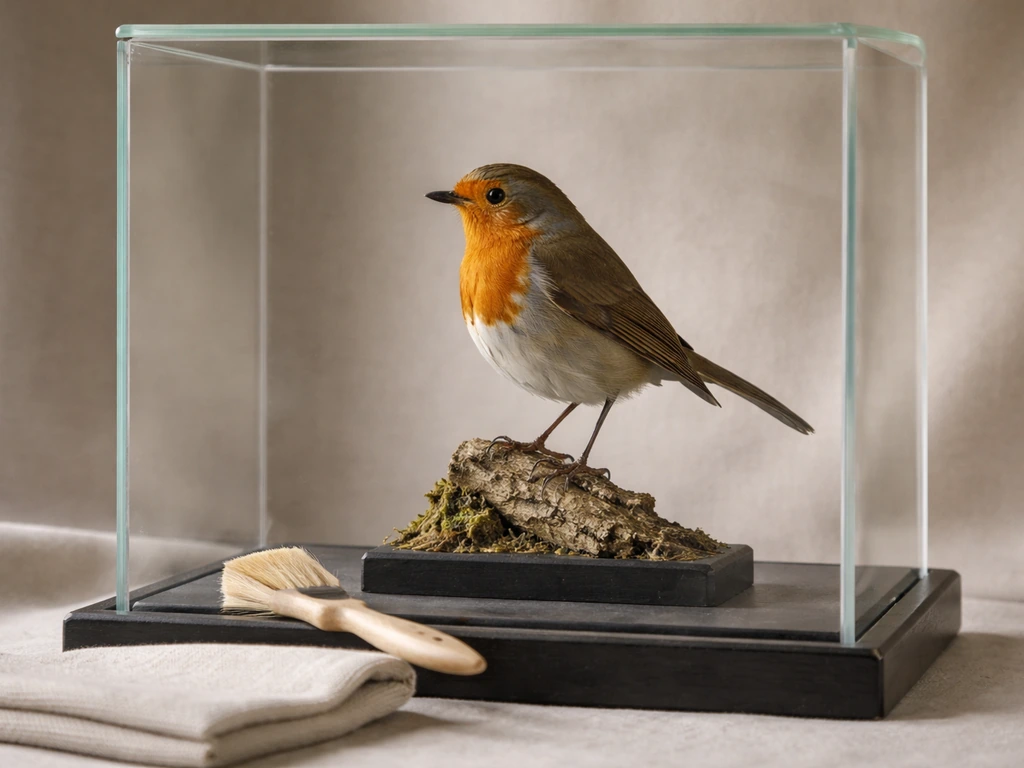
For cleaning, use a soft, dry natural-bristle brush (like a clean watercolor or cosmetic brush) to gently sweep dust from feathers, always working in the direction of feather growth. Never use water, cleaning sprays, or compressed air directly on a mounted bird. Compressed air can drive dust into feather barbules and dislodge fragile structures.
Pest prevention is the ongoing priority. Dermestid beetles and clothes moths are the primary threats to any feathered mount. Store mounts in sealed display cases when possible. Inspect your mount regularly for any signs of shed beetle casings (small, dry, capsule-like husks) or frass (fine powder under the specimen). If you see signs of infestation, seal the mount in a plastic bag and freeze it at 0°F (-18°C) for at least two weeks to kill any insects and larvae. This is a standard museum protocol.
Keep records for any specimen you legally possess. As required under federal recordkeeping rules, documentation should show where the bird was obtained, the date received, species, and details of origin. Even if you're not required to submit these records, maintaining them protects you if your possession is ever questioned. Store a copy of any relevant permits alongside the specimen record.
| Approach | Legal complexity | Skill required | Cost | Best for |
|---|---|---|---|---|
| DIY taxidermy (legal species only) | Low, if species is unprotected | High | Low to moderate (tools + materials) | Beginners practicing on poultry or legal species |
| Licensed taxidermist (federally permitted) | Handled by taxidermist | None required from you | Moderate to high | Protected or migratory species, quality display mounts |
| Freeze-drying service | Handled by studio | None required from you | High | Pet bird memorialization, lifelike results |
| Natural history institution donation | Specimen turned over legally | None required from you | Free | Wild migratory birds found dead; educational use |
| Memorial enclosure (feathers/resin) | Very low if feathers are from legal sources | Low | Low | Simple memorialization without full mount |
One final thought: if you're a bird owner who came to this topic thinking about your living pet, the best investment of your time is in their care, not preservation planning. Understanding common bird owner mistakes, getting habitat and diet right, and making sure your bird's environment is safe are far more meaningful topics to dig into while your bird is alive. Taxidermy is a valid craft, but it belongs in a completely separate mental category from caring for a healthy, thriving bird.
FAQ
If I find a dead bird in my yard, can I take a few feathers home for a project or keepsake?
Usually no for protected migratory birds. Under the MBTA, possessing or removing feathers from most native North American wild birds can be a federal violation even if the bird was already dead, so the “just a few feathers” idea is still legally risky without the right authorization.
What should I do first if I find a bird that seems injured or sick instead of definitely dead?
Treat it as a live-wildlife problem. Contact your state wildlife agency or a permitted wildlife rehabilitator before touching it, because attempting preservation or handling can interfere with care and can also create legal issues if the species is protected.
Are all non-native birds like pigeons and starlings always safe to preserve for beginners?
In general, some species such as European Starlings and House Sparrows are excluded from MBTA protections, and feral Rock Pigeons are typically treated similarly in the article’s context. However, local rules can add restrictions, so confirm the species and check your state before starting any preservation or possession.
Can I legally buy a bird or feathers online so I can do taxidermy at home?
Buying does not automatically make possession legal. If the item is from migratory bird species, it can still require permits and proper authorization, and sellers sometimes cannot provide compliant documentation. The practical decision aid is to only proceed when you have permit-ready paperwork that matches the species.
What permit situation applies if I want to do taxidermy services as a beginner for other people’s specimens?
The article notes that for migratory birds, USFWS requires a Federal Taxidermy permit (permit 3-200-8). If you do work that results in mounted possession, the “who is allowed to possess” rules become part of your setup, so you should not assume you can do the work privately and keep the finished mount.
Does “opportunistic salvage” mean I can keep the specimen after giving it to the right institution?
The authorization described in 50 CFR § 21.16 requires immediate turnover to an authorized institution for migratory bird carcasses. The beginner mistake is assuming a handoff gives you ongoing possession rights, it does not.
If I preserve a bird that is legal for DIY, how do I store it to avoid pest damage and odors from the start?
Follow museum-style sealing and temperature controls early. The article explains a freezer method for infestations, but you should also plan from day one for sealed storage (and regular inspections) because dermestids and clothes moths can start problems quickly if the specimen or workspace is not managed well.
Is borax always the best choice for beginners, and what’s the main risk to avoid besides formaldehyde?
Borax is described as the safer preservative option for first-timers, while formaldehyde is strongly discouraged. Still, any chemical handling requires ventilation and basic exposure control, and you should avoid improvising with unknown degreasers or solvents that could introduce additional hazards or affect feather integrity.
Can I use regular household tools like wire and tweezers for mounting?
You can use many common tools, but the article flags one critical non-obvious issue: avoid regular steel wire because it can rust and stain your mount over time. Use stainless steel wire for internal support, and keep an eye on anything that could corrode or bleed over months and years.
How do I document a legally possessed specimen in a way that actually helps if my possession is questioned?
Create a simple record packet with date, exact location found, best-guess species, how it was obtained, and a copy of any permits. The detail that helps most in real scenarios is matching each specimen’s origin info to the physical specimen record so you can explain your chain of custody quickly.
I just want a memorial. Is freeze-drying or a small feather display box safer and simpler than full taxidermy legally and practically?
Often yes, especially compared with DIY chemical taxidermy. Freeze-drying is typically handled by specialized studios rather than a home workflow, and shadow boxes or resin memorials avoid full mounts and a lot of the chemical and procedural complexity, but you still need to make sure any feathers you use are obtained legally.
If my first attempt goes wrong, can I rework the specimen later or sell the finished mount?
Reworking can be a common trap because the legality of the specimen and possession does not change once it is already in your hands. Selling or transferring a mount may also trigger additional rules, especially for protected species, so the safer path is to avoid turning a legal gray area into a bigger one and instead move to permitted routes or institutional turnover.
What environmental conditions should I plan for if I display a finished mount at home?
The article recommends avoiding direct sunlight and humidity swings, with an approximate target range of 65–70°F and 45–55% relative humidity. If you live in a region with seasonal spikes or use aggressive HVAC, consider a sealed display case with stable conditions so the mount does not dry out or absorb moisture.