The best perches for bird nails are natural wood branches with varying diameters and textures. A mix of three or four different perch types, including natural wood, rope, and maybe one concrete or ceramic perch used sparingly, gives your bird the varied grip surfaces it needs to wear nails naturally, stay comfortable, and avoid the foot problems that come from a boring, one-diameter cage setup. That said, getting it right is less about buying one magic perch and more about understanding fit, placement, and rotation.
Best Perches for Bird Nails: Safe Sizes, Materials, Setup

Marcus Chen
3 Jun 2026
Why bird nails get overgrown in the first place
In the wild, birds spend their days landing on branches of constantly changing widths, textures, and surfaces. That natural variety files nails down gradually without any human intervention. In a cage, most beginner setups default to two or three smooth wooden dowels of the same diameter, and that's where the trouble starts. Without varied surfaces, nails have nothing to wear against. Without varied diameters, the foot grips the same way every single time, loading the same pressure points on the same spots of the foot day after day.
This isn't just a nail problem. It becomes a foot problem too. When birds grip an identical perch in an identical way constantly, pressure sores develop on the underside of the foot. Left unchecked, those sores can progress into bumblefoot (pododermatitis), a painful and sometimes serious infection. Nail overgrowth is just the most visible symptom of a perch setup that isn't doing its job. The real issue is lack of variety: in diameter, in texture, in shape, and in how the bird uses each perch.
There are also bird-specific factors at play. Some species naturally have faster-growing nails than others. Sedentary birds that don't move much through the cage wear their nails down less than active fliers. And some foot conformations, including post-injury feet or birds with leg problems, may struggle to get adequate wear from even a well-set-up cage. Perch setup is the biggest lever you have, but it's not always the whole answer.
What actually makes a perch good for nail health
When people search for the best perches for bird nails, they often expect to find one specific product. If you're shopping for the best bird stands, focus on the same nail-health factors first: surface texture, diameter fit, shape variety, and how your bird's foot loads the perch. But 'best for nails' is really about four things working together: surface texture, diameter fit, shape variety, and how the bird's foot loads the perch. Learn how to define bird perches clearly so you can choose shapes and materials that support healthy, comfortable foot loading. Getting any one of these wrong can cancel out the others.
Diameter fit: the three-quarters rule
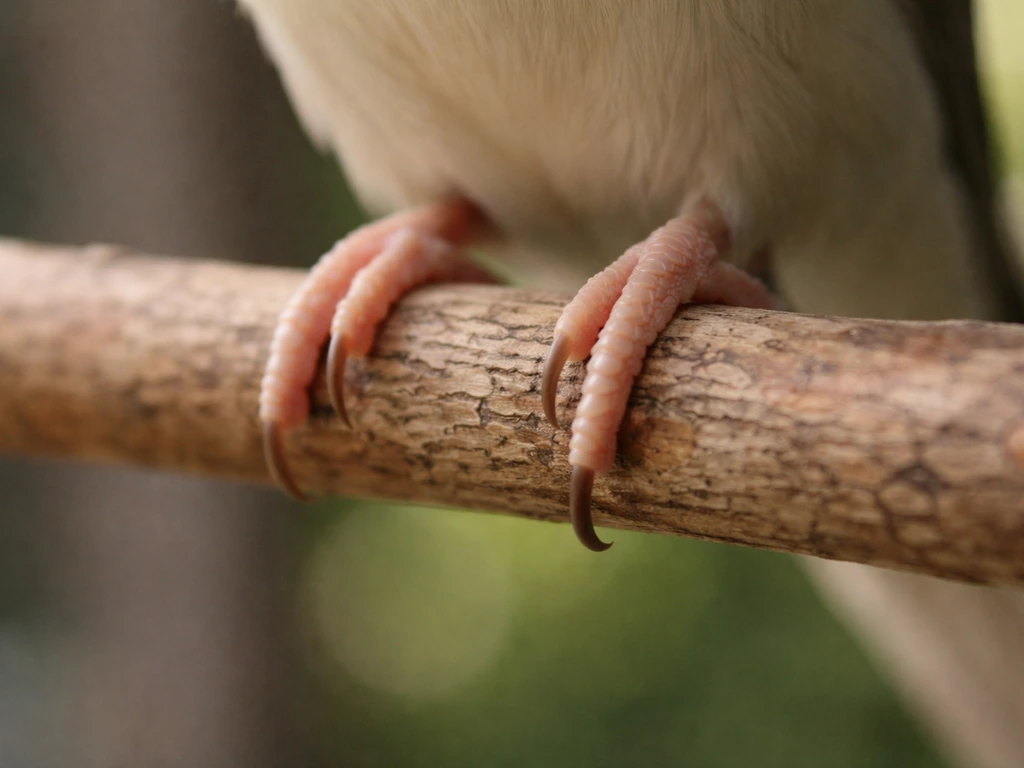
The most important dimension is diameter relative to your bird's foot. The target is that the bird's toes wrap about three-quarters of the way around the perch when gripping. If the toes overlap completely, the perch is too small. If the foot sits flat and the toes can't reach down the sides, the perch is too large.
Both mismatches cause problems: too small means unstable grip and potential tendon strain, too large means the bird can't grasp properly and may slip or fall, which leads to its own injuries. For small birds like budgies, finches, and lovebirds, that means perches around half an inch (about 12-13 mm) in diameter as a starting point. Larger parrots need proportionally thicker perches, with multiple diameters offered so the foot never locks into one position for hours on end.
Surface texture: grip without damage
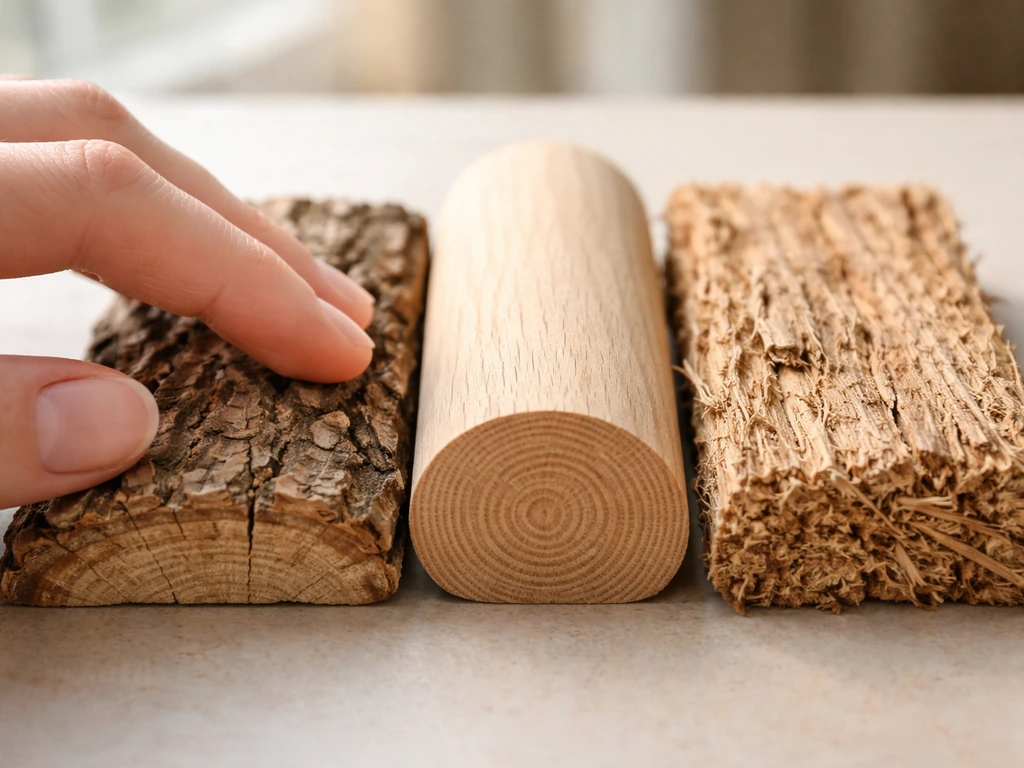
Texture matters for traction and for gentle nail wear. Natural wood bark provides a mild abrasive surface that files nails slowly over time, which is exactly what you want. Too smooth (like polished dowels) and there's no wear at all. Too rough (like sandpaper perch covers) and you're not filing nails, you're grinding the soft sole tissue of the foot. This distinction is crucial and worth repeating: rough surfaces don't preferentially wear nails, they wear whatever contacts them, and that includes the delicate skin on the bottom of the foot.
Shape and contour: irregular is better
A perfectly cylindrical perch means the foot loads the exact same points every time. An irregularly shaped natural branch shifts grip slightly each landing, distributing pressure across different parts of the toe pads and the base of the foot. This is why a real branch from a safe tree is genuinely superior to a turned wooden dowel, even if both are made of wood. Irregular = more exercise for the foot muscles, better pressure distribution, and naturally varied nail contact.
Matching perch size to your bird
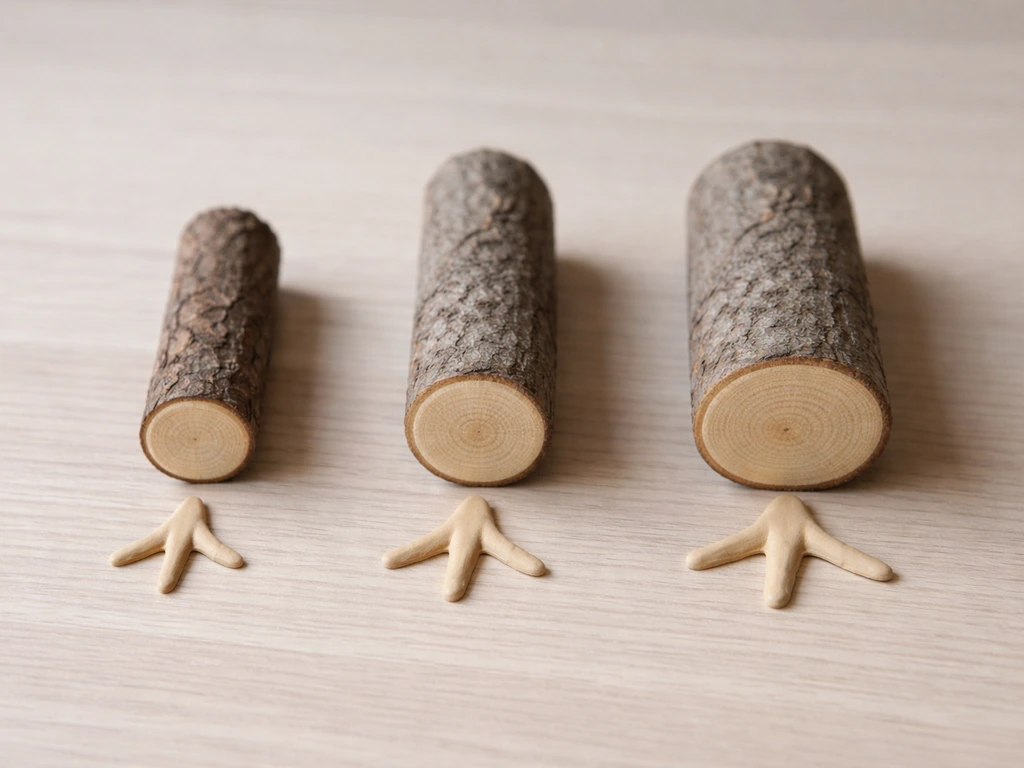
There's no single 'correct' perch diameter because bird feet come in very different sizes. The three-quarters wrap rule gives you the test, but here's a rough starting framework by bird size. Remember, you want multiple diameters in every cage, not just one 'correct' size.
| Bird Size / Type | Example Species | Suggested Diameter Range | Notes |
|---|---|---|---|
| Extra small | Finches, canaries | ~1/2 inch (12-13 mm) | Offer 2-3 diameters within this range |
| Small | Budgies, lovebirds, parrotlets | ~1/2 to 3/4 inch (12-19 mm) | Natural twigs/branches work well |
| Medium | Cockatiels, conures, caiques | ~3/4 to 1 inch (19-25 mm) | Vary textures as much as diameters |
| Large | African greys, Amazons, Eclectus | ~1 to 1.5 inches (25-38 mm) | Rope perches add good diameter variation |
| Extra large | Macaws, large cockatoos | ~1.5 to 2+ inches (38-50+ mm) | Multiple natural branches essential |
Placement matters just as much as size. Perches at different heights encourage the bird to move around the cage, which means more landings, more grip variety, and more natural nail wear throughout the day. Avoid placing perches directly above food and water bowls, and make sure the bird has enough clearance to stretch its wings without hitting the cage walls when perched. Angling perches slightly (rather than all perfectly horizontal) also changes how the foot loads on landing, adding more variety to the daily routine.
Aim for at least three to four perch positions at varying heights, and try to create a natural 'flight path' through the cage so the bird actually moves between them. A bird that sits on one perch all day gets almost no nail wear and develops pressure points. Encouraging movement is part of perch strategy.
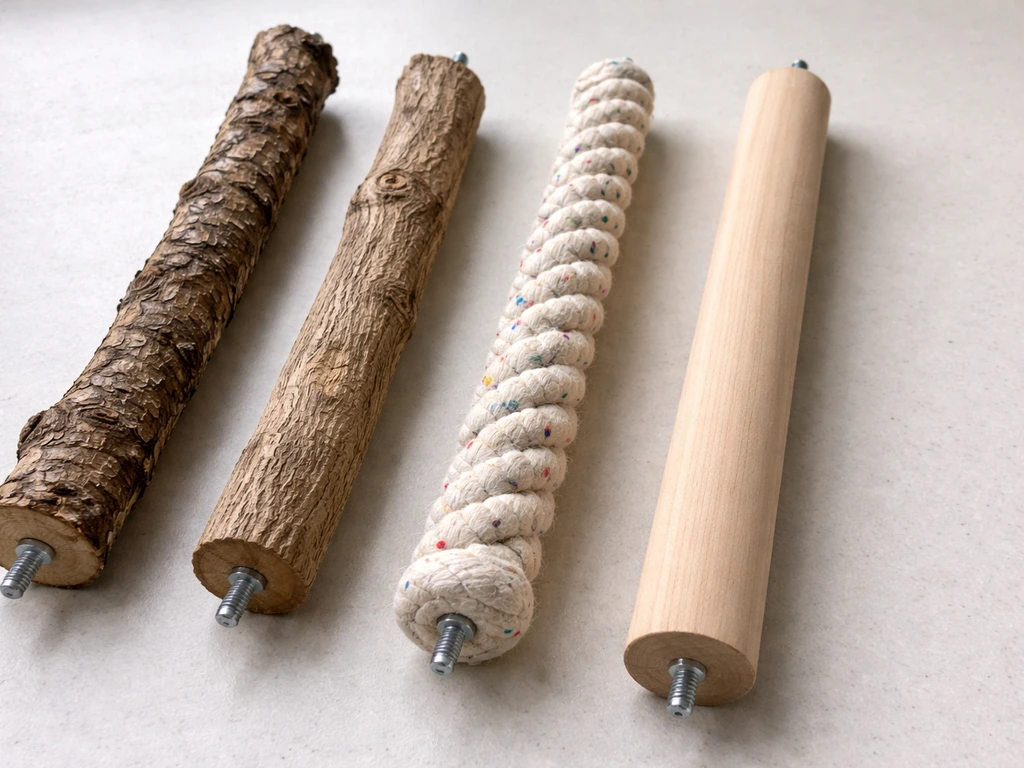
Perch materials: what helps, what hurts, and what to skip entirely
Not all perch materials are equal, and some are actively harmful despite being sold widely in pet stores. Here's a frank breakdown of what's worth your money and what isn't.
Natural wood branches (best overall)
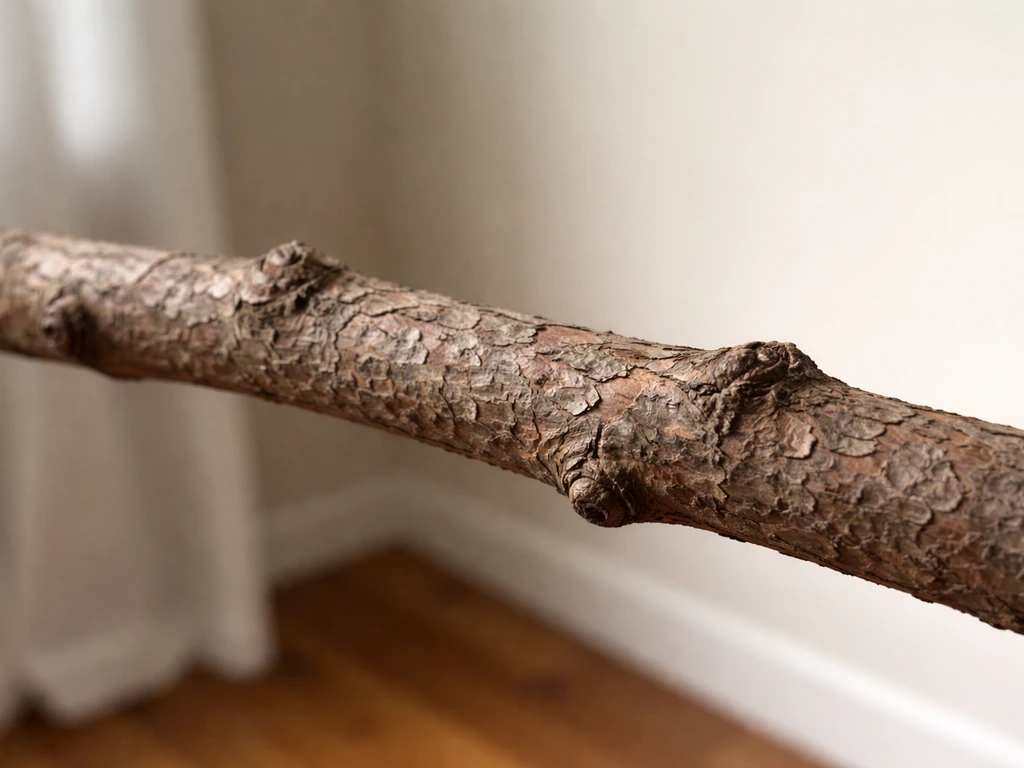
These are the gold standard for both nail health and foot health. Real branches have naturally irregular surfaces, varied diameters along their length, and rough-enough bark to provide gentle nail wear without damaging foot tissue. Safe wood species include manzanita, dragonwood, grape, apple, willow, and eucalyptus. Avoid toxic species like cherry, plum, oleander, avocado, and anything treated with pesticides or chemicals. If you're sourcing branches yourself from outside, wash them thoroughly and bake in the oven at around 250-300°F for an hour to kill any pathogens or parasites. Replace any branch that becomes heavily chewed and splintered, because rough splinters can puncture foot tissue and create the exact infection pathway you're trying to prevent.
Rope perches (great for grip variety)
Cotton rope perches are excellent for adding grip variety and are especially popular for medium to large parrots. The braided texture gives the foot a very different surface to work against compared to wood, and the slight give in the rope is gentler on arthritic or older birds. The main risk with rope perches is fraying: loose threads can wrap around toes and cut off circulation. Check rope perches every week and retire them as soon as they start looking ragged.
Smooth wooden dowels (use sparingly)
The classic round dowel rod is fine as one perch among several, but it shouldn't dominate the cage. Smooth, uniform dowels offer almost no nail wear and the perfectly round, consistent surface loads the same pressure points on the foot every single time. A cage with nothing but dowels is one of the most common beginner mistakes, and it's linked to both nail overgrowth and bumblefoot risk over time.
Optimal Avian also notes that 24/7 dowel use and limited variety in diameter and texture can contribute to pressure sores, arthritis, and bumblefoot A cage with nothing but dowels is one of the most common beginner mistakes, and it's linked to both nail overgrowth and bumblefoot risk over time. . If you have a dowel perch already, keep it in the mix but add two or three more varied options around it.
Concrete and ceramic perches (use with caution)
Concrete and ceramic perches are marketed specifically for nail filing, and they do provide mild abrasion. Used correctly, meaning as one perch in a varied setup rather than the primary or only perch, they can help with nail wear. The problem comes when these are used too frequently or as the main perch in the cage. That level of abrasion can develop pressure sores on the bottom of the foot, not just file the nails. If you use a concrete or ceramic perch, place it at a secondary spot in the cage, like near the food bowl where the bird will land briefly and move on, rather than as the main sleeping perch.
Sandpaper perch covers: skip them entirely
This is probably the most important thing to get right: sandpaper perch covers do not keep nails short. Multiple veterinary sources, including guidance from Purdue University's veterinary hospital and VCA Animal Hospitals, are explicit on this point. Sandpaper covers irritate and abrade the soft sole tissue of the foot, causing sores and infections. The surface is too rough for the skin but doesn't have enough consistent contact with nail tips to actually file them down. If you bought a starter cage that came with sandpaper sleeve covers, pull them off immediately.
| Perch Type | Nail Wear Benefit | Foot Safety | Best Use | Verdict |
|---|---|---|---|---|
| Natural wood branches | Good (bark texture, varied diameter) | Excellent (irregular surface distributes pressure) | Main perches, sleeping perch | Best overall choice |
| Rope perches | Mild | Very good (soft, gives slightly) | Variety, movement encouragement | Excellent addition |
| Smooth wooden dowels | Minimal | Fair (uniform pressure if only type used) | One perch among several | Acceptable in moderation |
| Concrete/ceramic perches | Moderate | Fair (can cause sores if overused) | Secondary spot only (near food bowl) | Use carefully, limit exposure |
| Sandpaper perch covers | None (does not file nails) | Poor (damages foot skin) | N/A | Do not use |
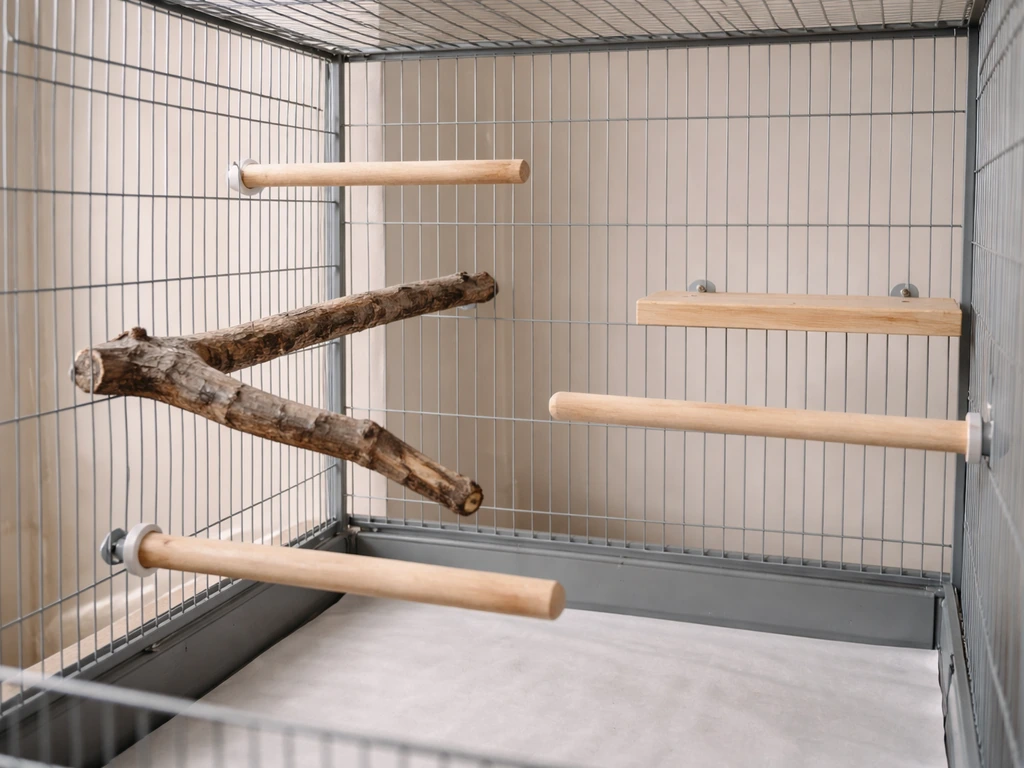
How to set up a perch lineup that actually works
A good perch lineup isn't just about picking the right products. It's about how they're arranged, how many you use, and whether the bird actually moves between them. Here's a practical approach that draws on recommendations from avian rehab organizations and veterinary sources.
The target is at least four different perch positions with at least two different diameters and two different materials. If you can add what some avian organizations call 'action perches,' things like swings, bungee perches, or rope boings, even better. These encourage movement simply by being fun to use, and more movement means more variety in how the feet load throughout the day.
- Main sleeping perch: a medium-to-large natural wood branch at the highest comfortable position in the cage. This is where your bird will spend the most time, so it needs to fit perfectly (three-quarters wrap rule) and be the right diameter for your species.
- Active perch: a rope perch or natural branch at a middle height, angled slightly to change the grip dynamic. This should be close enough to the sleeping perch that the bird moves to it regularly during the day.
- Foraging or activity perch: place near the food bowl or a foraging toy. A concrete or ceramic perch works well here since the bird lands and leaves rather than sitting for hours. This gives a dose of abrasion without overdoing it.
- Lower or swing perch: a swing, bungee perch, or a natural wood branch at the bottom third of the cage. This encourages the bird to explore lower levels and creates yet another grip surface and diameter experience.
Avoid lining up all perches at the same height on opposite walls. Birds naturally want to move up and down as well as side to side, and a single-height setup limits that. Also avoid placing a perch directly beneath another, both for cleanliness reasons and because the lower bird will always feel exposed and stressed, making it less likely to use that perch at all.
The goal is that your bird naturally rotates through at least three of these four positions daily without you doing anything special to encourage it. If your bird is sticking to just one perch all day, it's worth asking whether the other perches are positioned in a way that's actually inviting, whether they're at the right diameter for comfort, and whether there's something (like a food station or toy) creating a reason to land there.
DIY perches vs store-bought: what's actually worth it
Honestly, DIY natural wood perches are often better than what you'll find in most pet stores, and they're free if you have access to safe trees. The commercial perch market is full of smooth uniform dowels and novelty perches that look fun but don't serve foot health particularly well. That said, store-bought rope perches, quality manzanita branches, and well-made concrete perches from reputable bird suppliers are genuinely good products.
Making your own safe wood perches
The process is simple. Identify a safe, non-toxic tree (apple, willow, grape, manzanita, eucalyptus, and hazel are commonly recommended). Cut branches to a length that fits your cage with the bark intact. Scrub with a stiff brush and plain water, then bake at 250-300°F for 45-60 minutes to sterilize. Let cool completely before installing. You can use stainless steel bolts or the cage's own perch holders to mount them. The irregular shape, the bark texture, and the varying diameters along one branch give you everything a bird needs from a perch in one piece of wood.
What to look for when buying store-bought perches
- Look for natural wood perches with bark still on, or branchy/irregular shapes rather than perfectly round profiles.
- Check that the listed diameter range matches the three-quarters-wrap rule for your bird's foot size.
- For rope perches, choose tightly braided cotton with no loose threads right out of the package.
- For concrete or ceramic perches, make sure the texture is smooth-rough (like fine grit), not coarse and jagged. It should feel like a slightly rough stone, not sandpaper.
- Avoid any perch sold with sandpaper covers, or remove the covers immediately if the perch itself is otherwise good.
- Check that mounting hardware is stainless steel or zinc-free to avoid heavy metal toxicity.
- Skip brightly colored perches treated with unknown dyes unless the manufacturer explicitly confirms bird-safe materials.
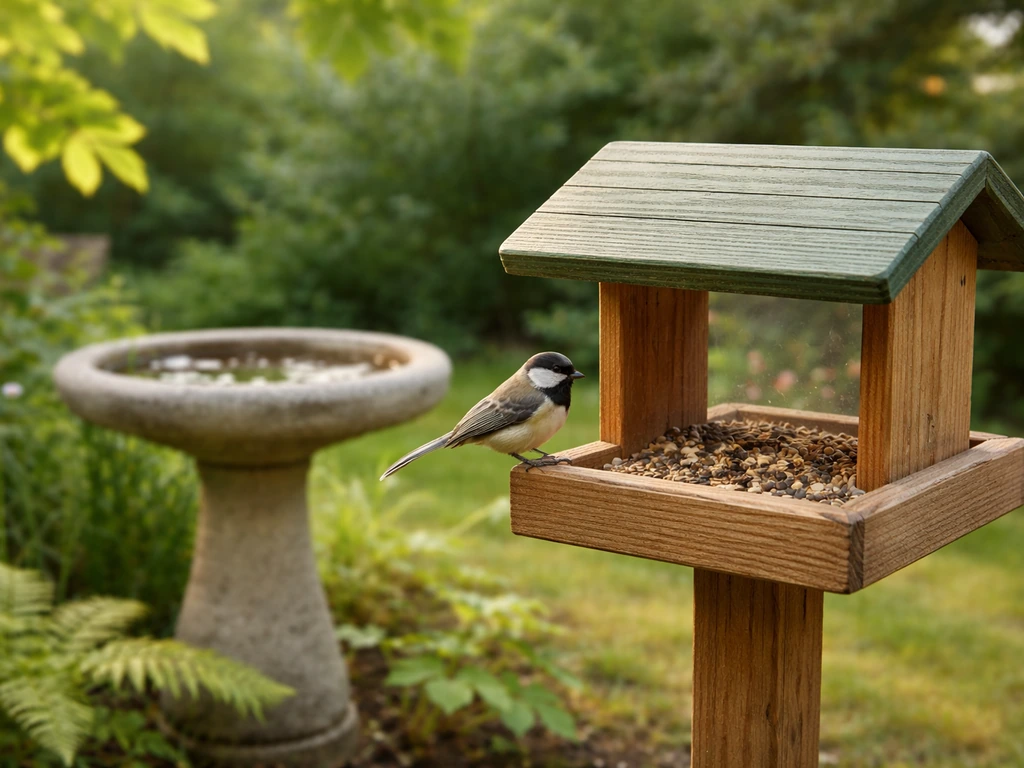
When you're building out a cage setup, the perch lineup works well alongside a broader cage plan. Things like a bird table or play gym outside the cage can supplement in-cage perch time, giving additional surfaces and diameters for foot variety during out-of-cage hours. A table top bird play gym can add more safe, varied landing spots for out-of-cage time, which helps improve natural nail wear.
A better bird deck porch patio can also provide safe, varied outdoor surfaces so your bird gets more natural nail wear time between cage sessions bird table or play gym outside the cage. A flat top bird table can be a useful out-of-cage landing and perch surface when you want to add more gripping spots beyond the cage. The more time your bird spends on varied surfaces, the better the overall nail wear.
Your ongoing nail check and care routine
Even a perfect perch setup doesn't eliminate the need to monitor nail length. It reduces how often you need to intervene, but it doesn't replace a regular check. Build nail checks into your weekly routine, right alongside water changes and cage cleaning.
How to assess nail length
Healthy nails should be slightly curved and come to a point, but not hook so long that they catch on things or curl back toward the toe. When your bird perches normally, the nail tips should just clear the perch surface lightly. If nails are visibly curved more than a gentle arc, if they're clicking audibly on hard surfaces, or if your bird is tripping, getting caught on cage bars, or tilting its foot at an unnatural angle to compensate, those are signs the nails are overdue for attention.
When a perch change is enough
If nails are getting long but aren't yet causing any grip or movement problems, the first step is evaluating your perch lineup. Are you using mostly smooth dowels? Add a natural wood branch and a second diameter. Is your bird barely moving between perches? Reposition to create more incentive for movement. Give the new setup four to six weeks and reassess. Many mild nail overgrowth cases resolve on their own once the perch environment gives the bird more wear surfaces to work with.
When to trim nails
If the nails are long enough to interfere with normal movement or grip, or if the bird seems uncomfortable, trimming is the right call regardless of what perches you have. Nail trimming for birds is done a little at a time to avoid cutting into the quick (the blood vessel inside the nail). For first-timers, having an avian vet or experienced bird handler show you the technique in person the first time is genuinely worth it. Having styptic powder on hand before you start is non-negotiable in case of bleeding.
When to call an avian vet
Some situations are beyond what perch changes or at-home trimming can solve. Get to an avian vet promptly if you notice any of the following:
- Nails that are severely overgrown, curling, or growing in unusual directions.
- Nails that have changed color, texture, or appear to be growing abnormally fast.
- Redness, swelling, sores, or any crusting on the bottom of the foot or around the toe joints.
- The bird is favoring one foot, reluctant to perch, or shifting weight constantly.
- Any signs of bumblefoot: puffy, discolored, or tender-looking foot pads, or visible ulcers.
- A nail that bleeds and doesn't stop within a few minutes, or one that gets torn or damaged.
- Repeated nail overgrowth that doesn't respond to perch changes, which may indicate an underlying health or anatomical issue.
Pododermatitis (bumblefoot) can progress from a small pressure sore to a deep abscess quickly, especially in birds, whose small size means infections advance fast. If you see anything that looks like a wound or infection on the foot, don't wait on it. An avian vet, not a general practice vet if you can help it, is the right call because foot and nail problems in birds require species-specific knowledge to treat correctly.
Quick-reference checklist
- Use natural wood branches with bark as your primary perches. They're the best all-around option.
- Provide at least three to four perch positions at varying heights with at least two different diameters and two different materials.
- Follow the three-quarters wrap rule: toes should wrap roughly three-quarters around the perch when gripping.
- Add a rope perch for soft grip variety and movement encouragement.
- Use a concrete or ceramic perch sparingly, placed near food or toys where the bird lands briefly rather than sits for hours.
- Never use sandpaper perch covers. They damage feet and don't file nails.
- Replace any chewed, splintered, or fraying perch immediately.
- Check nail length and foot condition weekly as part of your regular cage routine.
- Improve the perch lineup first if nails are mildly long and not causing problems. Give it four to six weeks.
- Trim nails when overgrowth affects grip or movement, and have an avian vet show you the technique first.
- See an avian vet promptly for any foot sores, swelling, abnormal nail growth, or nail problems that don't respond to perch changes.
FAQ
Will switching to the best perches for bird nails fix nail overgrowth by itself?
If nails are already overgrown, perch variety alone may not shorten them fast enough. Use the new perch setup to prevent recurrence, but schedule an evaluation (and possible trimming by an avian vet or trained handler) if nails are curling, clicking loudly, or catching on bars or toys.
Are sandpaper perch covers a good option for keeping bird nails short?
Do not rely on sandpaper sleeve covers, even if they feel like they are “filing” the nails. They can irritate the soft sole and create sores without providing consistent nail-tip contact, so they should be removed and replaced with textured wood and appropriate diameters.
Can I use a concrete or ceramic perch as the main sleeping perch?
Yes, but only if the bird has multiple alternate landing options and you use them sparingly. Place concrete or ceramic in a secondary spot where the bird lands briefly and then moves on, and keep at least two other textured wood options in the cage to reduce excessive foot loading on one surface.
What signs mean my perch setup is not actually improving nail health?
Safety checks should include both wear and comfort. If you see toe scuffing, callus-like irritation, limping, or nails that still do not contact and clear the perch appropriately, the issue may be diameter mismatch or too-smooth material, not “not enough filing.” Adjust diameters and add irregular branch perches before increasing abrasion.
How often should I check and replace rope perches, and what am I looking for?
Fraying is the go-to failure mode for rope perches. If you notice loose threads, stiff spots, uneven unraveling, or any chance a thread could wrap around toes, retire the perch immediately and replace it with another grip-variety option.
What should I do if my bird’s toes do not wrap about three-quarters around the perch?
Three-quarters toe wrap is the quick test, but the “right” diameter also depends on how the bird grips with its specific foot shape (including post-injury feet). If the bird cannot grasp down the sides, or it slips, use a smaller or differently shaped branch diameter rather than forcing the same size to work for every landing spot.
My bird keeps using the same perch all day, how do I fix that for nail wear?
If nails are not wearing, placement and movement incentives are often the missing piece. Add height variety, avoid putting all perches at one level, and ensure a “flight path” so the bird rotates through at least three of the main perches daily.
Is it safe to use DIY branches from outside my home, and how do I reduce risk?
Bark-on natural branches are best, but avoid transferring problems from new wood. Clean off dirt and debris first, sterilize as appropriate, and inspect after heavy chewing, splintering, or rough damage, since puncture risks increase when the surface breaks down.
My bird is older or less active, will the same perch plan work?
Some birds will need more help than others if they are less active or have conformational issues. If the bird is sedentary or has a history of leg or foot problems, prioritize irregular natural branches, multiple diameters, and gentle grip variety, then monitor nails and feet more frequently with guidance from an avian vet.
At what point should I stop adjusting perches and start trimming nails?
If nails are clicking on hard surfaces, interfering with normal steps, or causing an unnatural foot angle, trimming may be necessary regardless of perch type. A safe interim approach is to start the improved perch rotation immediately, but do not delay professional help when function or comfort is impaired.
Does perch placement matter as much as perch material and diameter?
Yes, and it is better to spread risk. Avoid lining perches directly beneath each other, since the lower bird often feels exposed and may avoid using it, which reduces nail wear. Also keep perches away from food and water spill zones so residue does not build up on the feet.
What should I troubleshoot if my bird’s nails still do not wear down after changing perches?
If nails keep lengthening despite good perches, look for “contact” problems. Make sure the bird can actually grip and use each perch (appropriate diameter and texture), and verify that at least a few perches are at different heights and angles so landings occur often enough to create consistent nail wear.
Next Articles
Garden Bird Checklist: Wild Species, IDs, and Tracking Tips
Ready-to-use wild garden bird checklist with IDs, field marks, tracking tips, and a bird station setup for beginners.
Printable Backyard Bird Guide for Beginners and First IDs
Printable backyard bird guide for beginners: simple ID key, look-alikes, and a ready-to-fill checklist for backyard sigh
The Backyard Bird Lover’s Guide to Nesting and Feeding
Step by step guide to attract nesting birds with the right feeders, foods, water, safe placement, and beginner tips.