A lovebird breeding setup that actually works comes down to four things done right: a roomy, safe cage with correct bar spacing, a properly placed nest box with good nesting material, a nutrient-dense diet started at least four to six weeks before pairing, and a genuinely bonded, health-checked pair. Get those four right and you have a real shot at a successful clutch. Skip any one of them and you will likely end up with fighting birds, infertile eggs, or a hen in serious trouble.
Love Bird Breeding Setup: Step-by-Step for Beginners

Marcus Chen
2 Jun 2026
What a lovebird breeding setup really requires
People often think "breeding setup" just means throwing a nest box on the cage. It is much more than that. What you are actually building is a controlled micro-environment that triggers and supports the full breeding cycle: courtship, nesting, egg laying, incubation, hatching, and chick development. Every element of the setup either supports or disrupts that cycle. That means the cage dimensions, bar spacing, nest box style and placement, substrate inside the box, ambient temperature, lighting schedule, humidity level, diet, and even where you put the cage in your home all interact with each other.
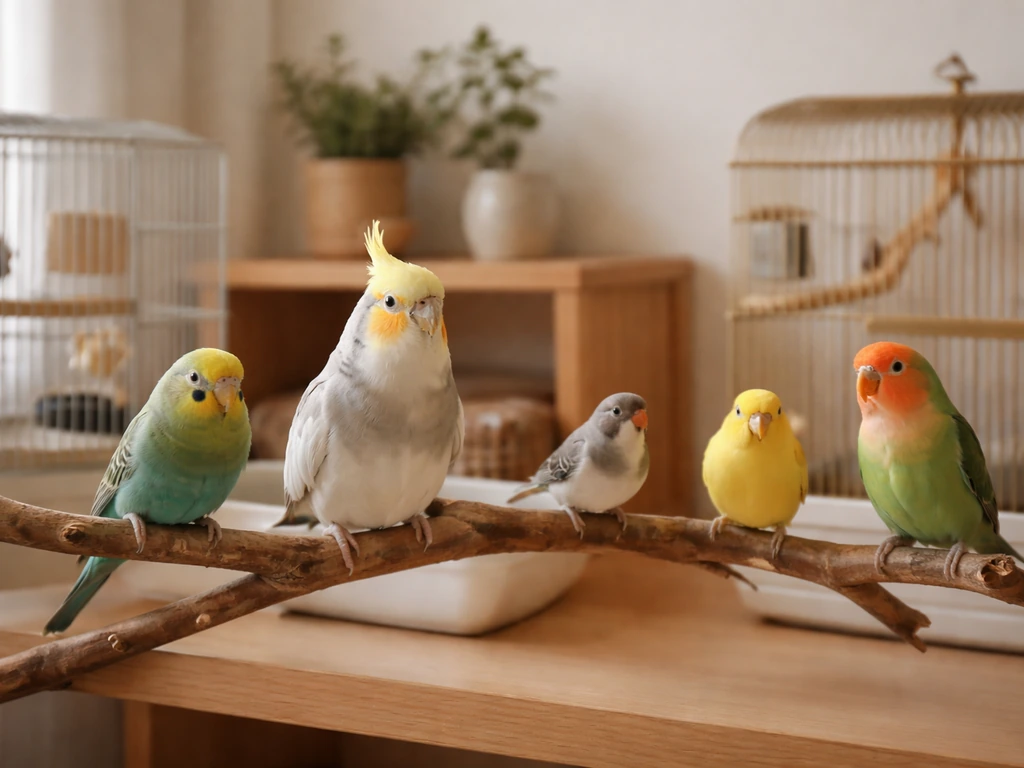
The good news is that lovebirds are not particularly demanding breeders compared to larger parrots. If you are brand new to breeding, learning bird breeds for beginners can help you pick the most manageable species first. They are small, prolific, and motivated. Your job is mostly to remove obstacles rather than force anything. A pair that is healthy, bonded, and housed correctly will usually do the rest on their own.
Choosing healthy birds and confirming they are ready to breed
The single most common beginner mistake is pairing birds that are not ready. Lovebirds should be at least 10 to 12 months old before you attempt breeding, and ideally closer to 12 to 18 months for first-time pairs. Breeding a hen under 10 months dramatically increases the risk of egg binding, which can kill a bird quickly. Age alone is not enough though. You also need to confirm sex, because lovebirds are not visually dimorphic in most species. DNA sexing from a reputable lab (or a blood test done by an avian vet) is the only reliable method. Do not guess based on behavior alone.
Health checks are non-negotiable before pairing. Both birds should have a baseline avian vet exam that includes a fecal test for parasites and ideally a CBC (complete blood count). You want birds that are at a healthy weight, clear-eyed, eating well, and showing no signs of chronic illness or respiratory problems. A sick bird will not breed successfully, and the stress of breeding can push a bird with a subclinical illness into a full health crisis.
Choosing the right species matters too. Peach-faced lovebirds (Agapornis roseicollis) are by far the most beginner-friendly species for breeding. They are widely available, well-studied, and generally hardy. Fischer's and masked lovebirds are also common in captivity. Avoid crossing species or buying birds from unknown or unclear lineage, since hybrid lovebirds can have fertility and health complications.
Signs a pair is ready
- Both birds are at least 10 to 12 months old (12 to 18 months preferred for first clutch)
- Both have passed a vet exam within the last few months
- The pair has been living together for at least four to eight weeks and shows clear bonding behavior: mutual preening, feeding each other, and roosting together
- The hen is at a healthy body weight (not thin, not obese)
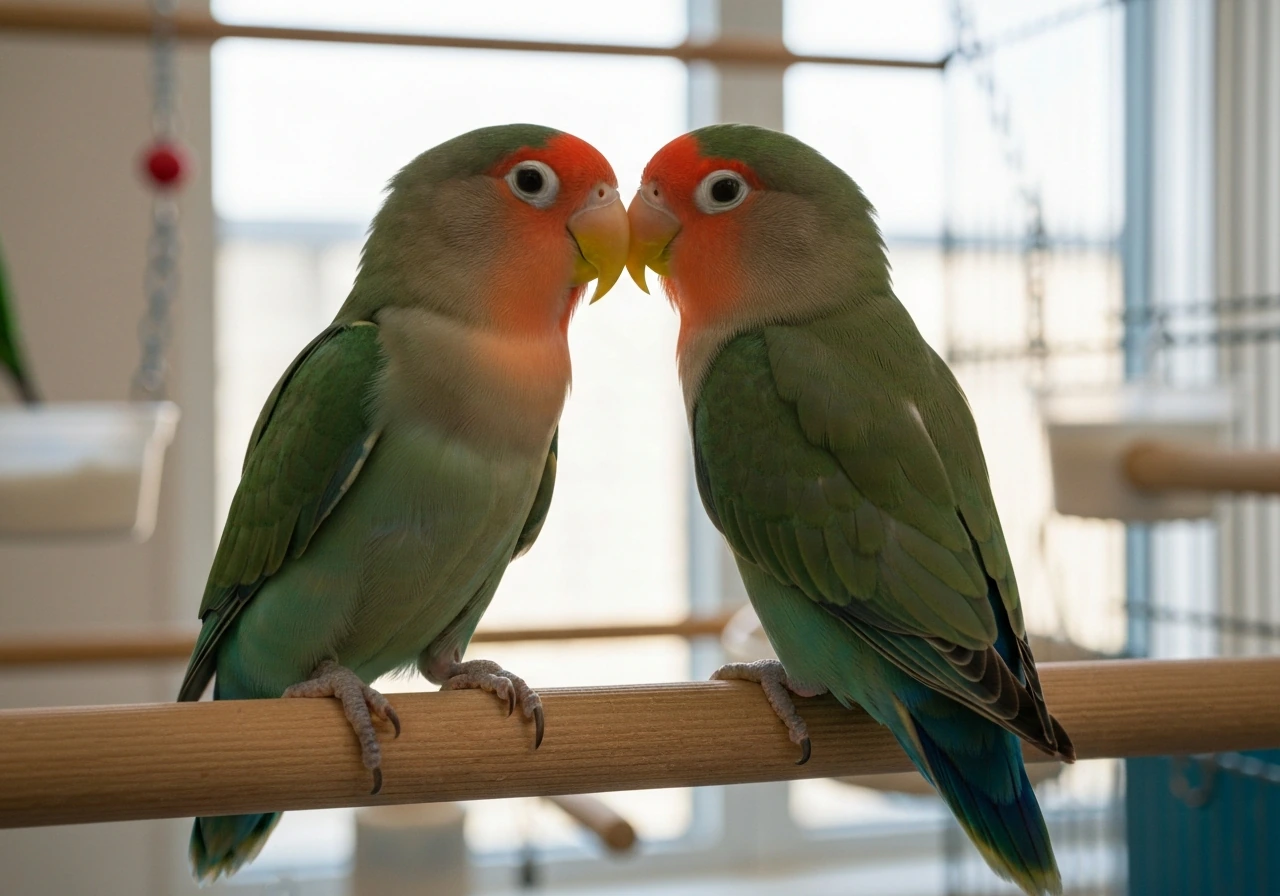
- The male is actively courting: regurgitating food for the hen, singing, and displaying
- Neither bird is molting heavily (avoid pairing during a full molt)
Cage and aviary layout: space, placement, and safety
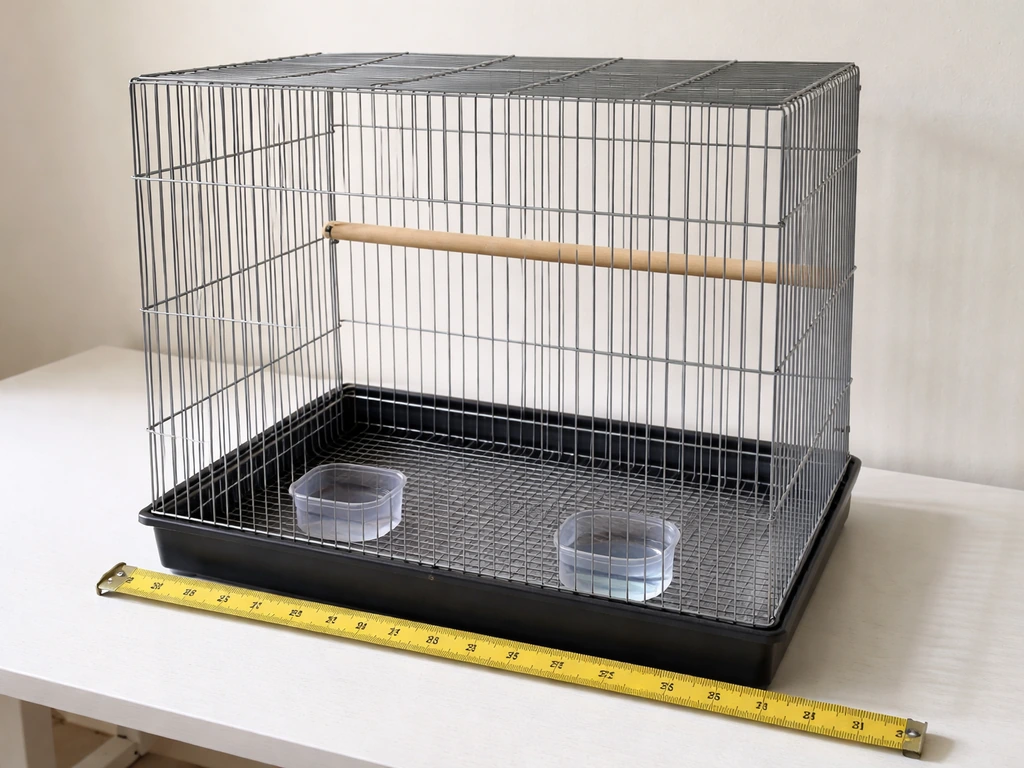
Cage size is where a lot of beginners cut corners, and it almost always backfires. For a single breeding pair, the blank" rel="noopener noreferrer">absolute minimum usable cage size is 24 inches long by 18 inches wide by 18 inches tall. The Merck Veterinary Manual references a minimum of 20 × 20 × 30 inches for small parrots including lovebirds, and blank" rel="noopener noreferrer">PetSmart's care guidance lists at least 18 × 18 × 24 inches as baseline. The honest answer: bigger is better. A cramped cage causes stress, increases aggression between the pair, and limits the hen's movement, all of which hurt breeding outcomes. If you can go 30 × 18 × 18 or larger, do it.
Bar spacing is a safety issue, not just a preference. It must not exceed half an inch (0.5 inches). Wider spacing risks head entrapment, which can injure or kill a bird. The Avian Welfare Coalition and Merck both specifically flag this for small parrots and lovebirds. Horizontal bars are preferable because lovebirds love to climb, and climbing provides exercise and enrichment that reduces stress-related behaviors.
Where to place the cage
Placement affects breeding success more than most guides admit. The cage should be at eye level or slightly above, in a room with stable temperature (between 65 and 80 degrees Fahrenheit), away from drafts, kitchen fumes, and direct HVAC vents. A quiet area with low foot traffic is ideal during active breeding. Lovebirds are light-sensitive breeders, meaning day length affects their hormones. Aim for 12 to 14 hours of light per day using a timer-controlled full-spectrum bird light if your home does not get adequate natural light. Avoid placing the cage near windows with direct afternoon sun, which can overheat the cage.
Cage setup checklist
- Cage: minimum 24" × 18" × 18", horizontal bar construction, 0.5-inch bar spacing, stainless steel or powder-coated non-toxic finish
- Perches: two to three perches of varying diameter (natural wood perches like manzanita, java, or willow work well); avoid placing perches directly over food and water bowls
- Food and water dishes: stainless steel or ceramic, at least two food bowls (one for seed/pellets, one for fresh food), one water dish or sipper bottle
- Cage liner or substrate: unbleached paper (paper towels or butcher paper) on the cage floor for easy cleaning
- Full-spectrum lighting: on a timer set to 12 to 14 hours daily
- Thermometer and hygrometer: place near the cage to monitor temperature (65-80°F) and humidity (40-60% relative humidity)
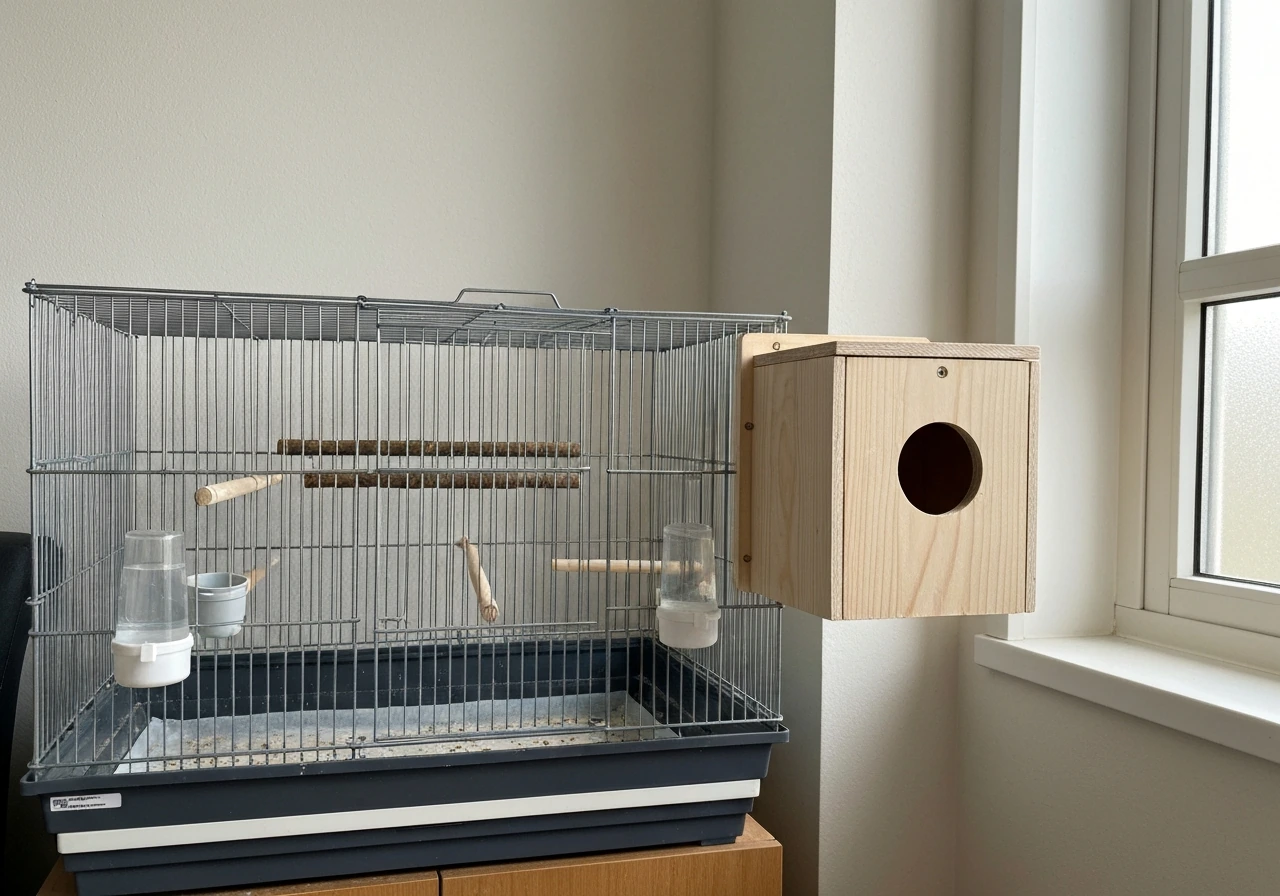
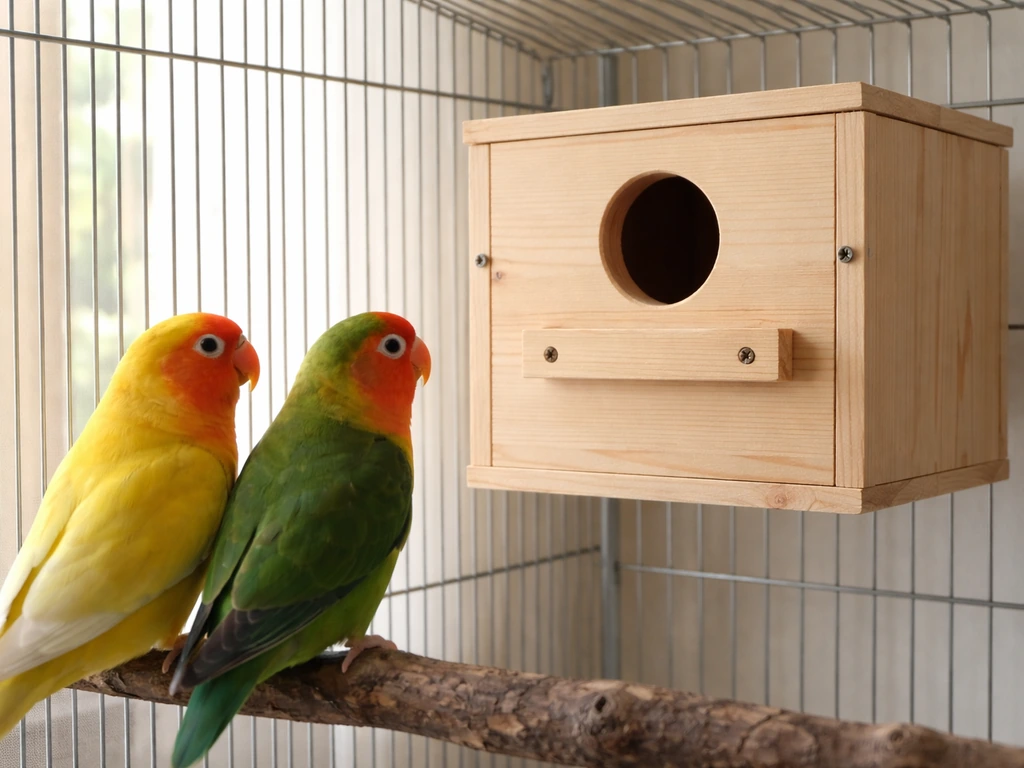
Nest box setup: box type, materials, and placement
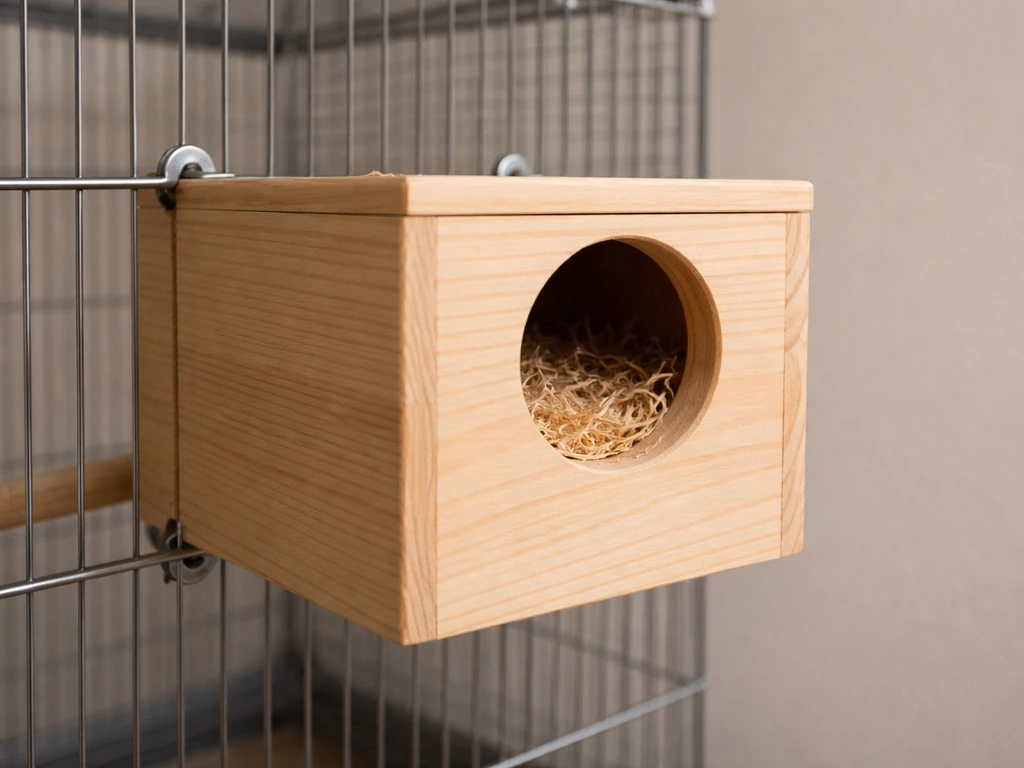
The nest box is the centerpiece of the whole breeding setup. Lovebirds are cavity nesters, meaning they will not lay eggs reliably without a proper enclosed nesting space. In many contexts, bird farming is called bird breeding or aviculture, so you will often see these terms used interchangeably. The standard recommendation for lovebirds is a wooden nest box roughly 6 to 8 inches wide, 6 to 8 inches deep, and 8 to 10 inches tall, with a round entrance hole of about 2 to 2.5 inches in diameter. A slightly concave floor inside the box (called a concave nest base) helps keep eggs together and reduces the risk of them rolling and cracking.
Placement matters a lot. Mount the nest box on the outside of the cage on the upper third of one side wall, with the entrance hole facing inward. This keeps the box accessible to the birds while giving you external inspection access from the back or top without having to reach into the cage. Lovebirds, unlike many other birds, actually carry nesting material tucked into their feathers rather than in their beaks. You need to provide appropriate nesting material: willow twigs, palm fronds, strips of pesticide-free paper, or dried grasses all work well. Avoid synthetic fibers, cotton threads, or anything the hen could get tangled in.
Add a small layer of clean wood shavings (kiln-dried pine only, never cedar or aromatic woods) to the bottom of the nest box before introducing it. The hen will rearrange and add her own material on top. Do not pack the box heavily; leave room for her to customize it. One thing I learned the hard way: introduce the nest box only when you are actually ready to start breeding. If you leave it in permanently outside of breeding season, you risk chronic egg laying from the hen, which depletes calcium and causes serious long-term health problems.
Diet, supplements, and health prep before breeding
Diet is probably the most underestimated part of the breeding setup. For most keepers, the best meat bird to raise is a healthy broiler strain that grows fast and converts feed efficiently. Start upgrading nutrition at least four to six weeks before you introduce the nest box. A hen going into a breeding cycle needs reserves of calcium, vitamin A, protein, and essential fatty acids. If she goes into it deficient, you are setting up for egg binding, soft-shelled eggs, poor chick development, or a hen that abandons the nest because she is too depleted to keep going.
A good pre-breeding diet for lovebirds is roughly 60 to 70 percent high-quality pellets (Harrison's Bird Foods or Roudybush are reliable choices), supplemented with fresh vegetables (dark leafy greens like kale and bok choy are excellent for calcium and vitamin A), cooked legumes, and small amounts of seed mix. Seed-only diets are not adequate for breeding birds. During the chick-rearing phase, increase protein intake by offering egg food (cooked egg, soft food mixes, or commercial egg food products) and sprouted seeds daily.
Key supplements before and during breeding
- Calcium: offer a cuttlebone and a mineral block in the cage at all times; these should be available before, during, and after breeding
- Vitamin A: dark leafy greens and orange vegetables (sweet potato, carrot) added three to five times per week
- Protein: cooked egg, sprouted seeds, or a commercial soft food added daily once chicks hatch
- Fresh water: change daily; during chick rearing, change water twice daily to keep it clean
- Avoid over-supplementing with liquid vitamins in water; this encourages bacteria growth and can cause toxicity if overdone
The breeding timeline: from pairing to independent chicks
Once you have the cage set up, the pair bonded, and the diet dialed in, here is roughly what to expect from start to finish. Keep in mind individual pairs vary, and first clutches sometimes take longer to get going.
| Stage | Typical Timeframe | What to Watch For |
|---|---|---|
| Bonding and courtship | 2 to 8 weeks after introduction | Mutual preening, regurgitation feeding, the male following the hen closely |
| Nest box acceptance | 1 to 3 weeks after box introduction | Hen spending time inside the box, carrying nesting material |
| First egg laid | 7 to 10 days after mating is observed | Hen may become quieter and spend more time in the box |
| Full clutch laid | 4 to 6 eggs, one every other day | Clutch is usually complete within 8 to 12 days of first egg |
| Incubation period | 21 to 23 days per egg | Both parents incubate; hen does most of the night sitting |
| Hatching | Staggered over 3 to 5 days | Listen for soft peeping; resist opening the box frequently |
| Chicks in nest (pin feathers) | 2 to 3 weeks post-hatch | Both parents feed chicks; increase soft food availability |
| Chicks fledging | 6 to 7 weeks post-hatch | Chicks leave the box and begin exploring the cage |
| Weaning complete | 8 to 10 weeks post-hatch | Chicks eating independently and no longer begging from parents |
The most important rule during incubation and early chick rearing is to minimize disturbance. Resist the urge to open the nest box every day to check on progress. Quick weekly checks are fine: look for broken or removed eggs, confirm the hen is inside, and make sure no chicks are in obvious distress. Too much intervention causes nest abandonment, especially with first-time pairs.
Common problems and how to fix them
Pair not nesting or ignoring the box
This usually means one of three things: the birds are not fully bonded yet, the lighting schedule is not triggering breeding hormones, or the box is placed in a spot the hen finds uncomfortable. Give them more time together before re-attempting, check your light schedule (12 to 14 hours), and try repositioning the box. Some hens are picky about box orientation.
Excessive fighting or aggression
Lovebirds can be genuinely aggressive with incompatible partners. If one bird is drawing blood, injuring the other, or preventing the other from eating, separate them immediately. This is not a "they will get used to it" situation. Some pairs are simply incompatible. Forcing an incompatible pair will result in injury or death. Allow bonding at a pace that suits the birds, not your timeline.
Broken eggs or eggs on the cage floor
Thin-shelled eggs that break easily almost always point to calcium deficiency in the hen. Make sure the cuttlebone and mineral block have been available for at least four to six weeks before breeding. Eggs found on the cage floor rather than in the nest box often indicate the hen does not feel safe in the box. Check that the box is secure and that the entrance hole is the right size, and reduce disturbance near the cage.
Failed hatching or dead-in-shell
Failed hatching can happen for several reasons: infertile eggs (common in first clutches or if the pair's bond is weak), humidity that is too low during incubation, or nutritional deficiencies. If eggs consistently fail to hatch across multiple clutches, schedule an avian vet visit. Do not attempt to artificially incubate eggs unless you have experience with incubators and are prepared for the demands of hand-rearing chicks.
Chicks not being fed by parents
If you see chicks in the box but they appear cold, thin, or not being attended to, act quickly. Check that the parents are actually in the box and feeding. Chicks that go unfed for more than a few hours can deteriorate rapidly. If the parents have fully abandoned the chicks, you will need to either find a foster pair or begin hand-feeding, which is demanding and requires the right formula and feeding schedule. This is a situation that warrants an immediate call to an avian vet.
Cage sanitation challenges
During chick rearing the cage gets messy fast. Spot-clean the cage floor daily using paper liners that you can swap out in seconds. Do a deeper clean of perches and bowls every two to three days. Do not deep-clean the nest box while chicks are inside; wait until after weaning. Once the breeding cycle ends and the box is removed, soak it in a diluted bird-safe disinfectant (F10 or plain white vinegar solution), rinse thoroughly, and dry completely before storing.
Care, hygiene, and responsible next steps
Breeding lovebirds is genuinely rewarding, but it comes with real responsibilities that beginners sometimes do not think through until after the fact. If you are planning bird breeding for beginners, treat responsible planning and limits as part of the process, not an afterthought. Before you start, have a plan for where the chicks will go. A healthy pair can produce three to four clutches per year if you allow it, which can quickly become 12 to 20 birds annually. That is not sustainable unless you have buyers lined up, space prepared, or a rescue organization willing to accept birds. Limit breeding to one or two clutches per year at most. After each clutch, remove the nest box for at least two to three months to give the hen time to recover. Constant or near-constant egg laying depletes calcium reserves and shortens the hen's life.
On the legal side: in most parts of the United States, breeding lovebirds as a hobbyist does not require a federal permit since they are not native wild birds and are not on restricted species lists. However, if you plan to sell birds commercially, some states and localities require a breeder's license or USDA registration depending on the volume of sales. Check your local regulations before scaling up.
The most important ongoing health step is maintaining a relationship with an avian vet. Have a vet you can call before a crisis happens, not after. Signs that warrant an urgent vet call during breeding include: a hen straining to pass an egg for more than 30 to 60 minutes without success (possible egg binding), any bird that suddenly goes quiet, fluffs up, or stops eating, unexplained bleeding in or around the nest box, or chicks that appear cold and are making no sounds after hatching. These are not "wait and see" situations. Egg binding in particular moves fast and is fatal without prompt treatment.
Sourcing birds responsibly matters too. If you are buying birds to breed from, buy from a reputable breeder who can show you health records, will DNA-sex the birds, and lets you see the parent birds in clean, well-maintained conditions. Avoid birds sold from unknown backgrounds at swap meets or classifieds without health documentation. Starting with healthy, well-sourced stock saves a lot of grief down the road and makes the whole breeding experience far more rewarding.
Quick-reference checklist for your lovebird breeding setup
- Cage: minimum 24" × 18" × 18", 0.5-inch bar spacing, horizontal bars, non-toxic finish
- Nest box: 6-8" wide × 6-8" deep × 8-10" tall, mounted high on cage exterior, lined with kiln-dried pine shavings
- Nesting material: willow twigs, palm fronds, or pesticide-free paper strips (no synthetic fibers)
- Perches: two to three natural wood perches of varying diameter
- Lighting: full-spectrum bulb on timer, 12 to 14 hours per day
- Temperature: 65 to 80°F, humidity 40 to 60%; monitor with a cage thermometer and hygrometer
- Diet: 60 to 70% quality pellets, fresh dark leafy greens three to five times per week, cuttlebone and mineral block always available
- Pre-breeding nutrition upgrade: start at least four to six weeks before introducing the nest box
- Health checks: both birds vet-examined before pairing; fecal test and ideally a CBC
- Bird ages: both birds 10 to 12 months minimum, 12 to 18 months preferred for first clutch
- Clutch limit: maximum one to two clutches per year; remove nest box for at least two to three months between clutches
- Offspring plan: have placement arranged for chicks before you start breeding
- Avian vet contact: on file before you begin, not after a problem arises
FAQ
How long should I keep the nest box in place during breeding to avoid chronic egg laying?
A common approach is to provide the nest box only when you are actively ready to start (after pairing, bonding, and pre-breeding diet are in place). After a clutch is finished and chicks are weaned, remove the box and keep it off for at least two to three months so the hen can recover and break the laying cycle.
What temperature and humidity targets should I aim for during incubation?
The article emphasizes minimizing disturbance, but for incubation success, humidity matters. If your home runs dry, consider using a humidity monitor and aim for stable, moderate humidity rather than wide swings. Avoid placing the cage directly over heat sources, and do not spray water inside the nest box.
Is it okay to supplement with extra calcium once eggs appear?
Yes, but avoid changing calcium dramatically only at the first egg. Calcium and mineral support should be built 4 to 6 weeks before pairing, then maintained with mineral availability during the breeding cycle (cuttlebone and a mineral block). Sudden high-supplement dosing can upset balance, so stick with the consistent setup unless your avian vet advises otherwise.
Can I breed different lovebird species in the same cage or breeding area?
It is risky. The article warns against hybridizing and mixing unclear lineage, and pairing incompatible or mixed-species birds can create fertility and health complications. Keep breeding pairs separate from other lovebirds unless you are intentionally sourcing for controlled, documented breeding.
Do I need to remove the male after the hen starts incubating or when chicks hatch?
Usually no. In most cases, you should avoid unnecessary interference, and both parents typically contribute to feeding and brooding. Only intervene if aggression escalates (for example one bird injures the other) or if a vet advises a specific management change.
What should I do if the hen keeps removing eggs from the nest box?
Eggs on the cage floor and removed eggs often point to stress or an uncomfortable, unsafe-feeling box. First confirm the box is secure, the entrance hole is the right size, and the hen is not repeatedly disturbed. Also confirm the nest base is not packed too tightly and that bedding is clean and appropriately shallow.
How can I tell if eggs are infertile versus just taking longer than expected?
First clutches can run longer, but persistent failure across multiple clutches suggests an issue. Avoid cracking eggs open early for diagnosis. If eggs repeatedly fail to hatch even after bond and setup adjustments, schedule a vet visit and consider testing the eggs for infertility rather than assuming poor incubation alone.
When do chicks start needing extra nutrition, and what mistakes should I avoid?
During chick rearing, protein is typically increased using egg food or approved chick-rearing supplements. A common mistake is relying on seed for protein or drastically changing diet mid-clutch. Increase protein gradually, keep fresh foods small and frequent, and ensure parents have what they need to feed reliably.
Is hand-feeding always the next step if parents abandon the chicks?
Not always, and it is demanding. The article notes fostering or hand-feeding, and the practical decision is first to verify feeding has truly stopped and parents are not still able to care. If abandonment is confirmed and chicks are cold or not vocalizing, contact an avian vet urgently because delays can become fatal.
How do I manage poop and mess without disturbing the nest during early chick stages?
Use a minimal-disturbance routine: spot-clean the cage floor daily with easy-to-swap paper liners, and keep deeper cleaning limited to perches and bowls every two to three days. Do not open or deep-clean the nest box while chicks are inside, wait until after weaning to disinfect and store it.
What signs indicate a breeding pair is not compatible beyond “not ready yet”?
Beyond delayed clutching, incompatible pairs show escalating aggression like drawing blood, preventing one bird from eating, or repeatedly harassing the other at the nest box. In that case, separating immediately is safer than trying to force bonding, and you should reassess the pair rather than continuing the same setup.
Do lovebirds need a specific lighting schedule for breeding, and what mistake ruins it?
Yes, light drives hormones in lovebirds. Use a timer for 12 to 14 hours of light daily, and the most common mistake is accidental light interruptions or inconsistent schedules from early-morning or evening room activity. Avoid placing the cage in spots with bright afternoon sun that can overheat and confound the intended schedule.
If my hen is straining to pass an egg, what is the fastest safe response?
Treat it as an emergency. The article notes that straining for 30 to 60 minutes without success is urgent, because egg binding can be fatal quickly. In parallel, keep the environment calm and warm, but do not delay by trying home remedies. Call an avian vet immediately.
What should I plan for regarding chick placement so I do not end up overproducing?
The article warns about the volume of offspring. Practically, line up buyers, a backup rescue option, or a clear placement plan before the first eggs. Also cap breeding to one or two clutches per year and remove the nest box between cycles so you do not end up with an unmanageable supply.
Next Articles
Bird Breeds for Beginners: Best Starter Pet Birds and Care
Beginner-friendly bird breeds, daily care, noise and social needs, setup, feeding, common mistakes, and adoption tips.

Bird Breeding for Beginners: A Responsible Step by Step Guide
Step by step bird breeding guide for beginners: choosing species, setting up safely, pairing, eggs, chicks, and vet red
Bird Breeding Setup Guide: Room, Care, and Biosecurity Basics
Step-by-step bird breeding setup for beginners: room layout, housing, environment, daily care, feeding, biosecurity, tro